Rather than being its own content type in WCMS, Image galleries are now Block types in WCMS 3 and may not successfully migrate. Image galleries are more likely to migrate if they have been embedded in WCMS 2. Each original Image gallery that did not successfully migrate must be manually recreated on the new WCMS 3 site.
If an Image gallery leads to page not found in WCMS 3
Unembedded Image galleries (and other content on an Image gallery page) often do not migrate. It is not necessary to recreate the non-embedded version of the gallery in WCMS 3 in order for the gallery to appear where it was embedded. If you still want the non-embedded version on your site, refer to how to create a Web page, then proceed to Remediating Image galleries.
Remediating Image galleries
- In WCMS 2, navigate to the Edit tab of the Image gallery.
- In a separate tab, navigate to the WCMS 3 Layout tab of the page you are recreating the Image gallery on.
- Select +Add section if applicable, then select +Add block.
- Under Content, select Image gallery.
- If a title appears above the Image gallery in WCMS 2, enter that into the Title field in WCMS 3 and leave Display title checked. If a title does not appear above the gallery in WCMS 3, enter a title of your choosing and uncheck Display title.
- Under Slideshow Settings, populate the Type of gallery, Number of images to display, and Navigation options fields by replicating what is seen in WCMS 2. The Carousel Image gallery type in WCMS 2 is now Slider in WCMS 3. The Thumbnails Image gallery type in WCMS 2 is now Grid in WCMS 3.

- Select Add media. Add all images to the gallery by searching for them in the Name field via their alternative text and selecting them to add them to the gallery. Note: If you are unable to find the image you are searching for on the site, you will have to download it by right-clicking on the image name in WCMS 2, selecting Save link as... and re-uploading it with identical alternative text as seen in WCMS 2. For more information, refer to How to create an Image gallery.
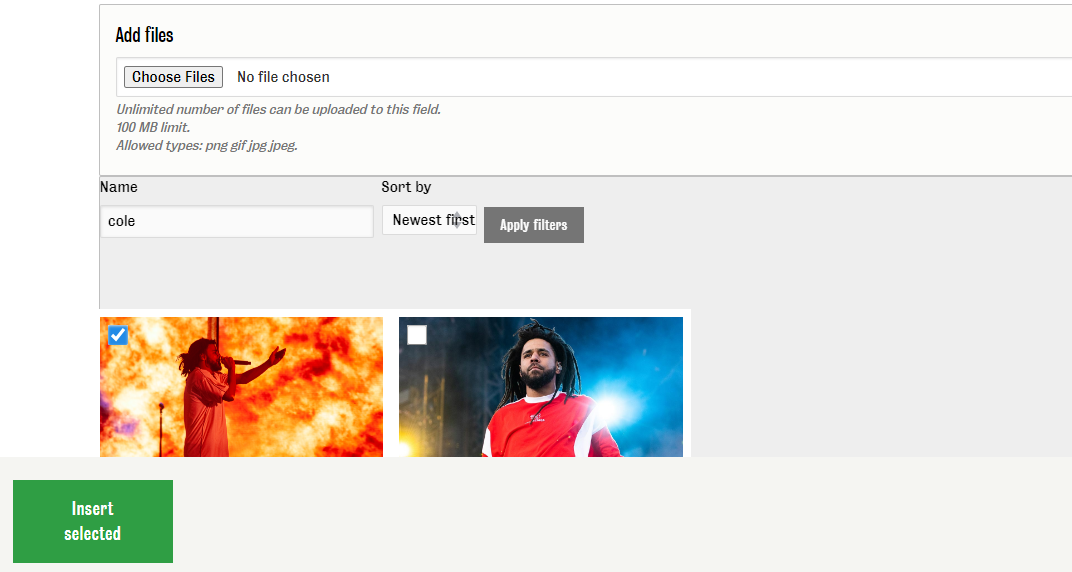
- Select Insert Selected, then select Add block.
- Select Save Layout.
Remediating image captions and titles
Captions and image titles do not migrate and must be manually re-added into the WCMS 3 caption field as there is no image title field in WCMS 3.
-
In WCMS 2, navigate to the Edit tab of the Image gallery.
-
Locate the desired image and copy the text in the Title and/or Caption field.
-
In a separate tab in WCMS 3, select Workbench, then My Dashboard.
-
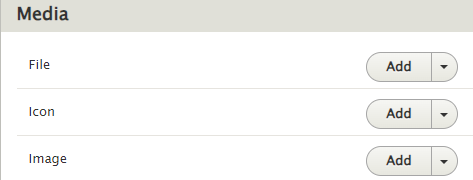
Navigate to Media and select Manage from the drop-down function next to Image.
-
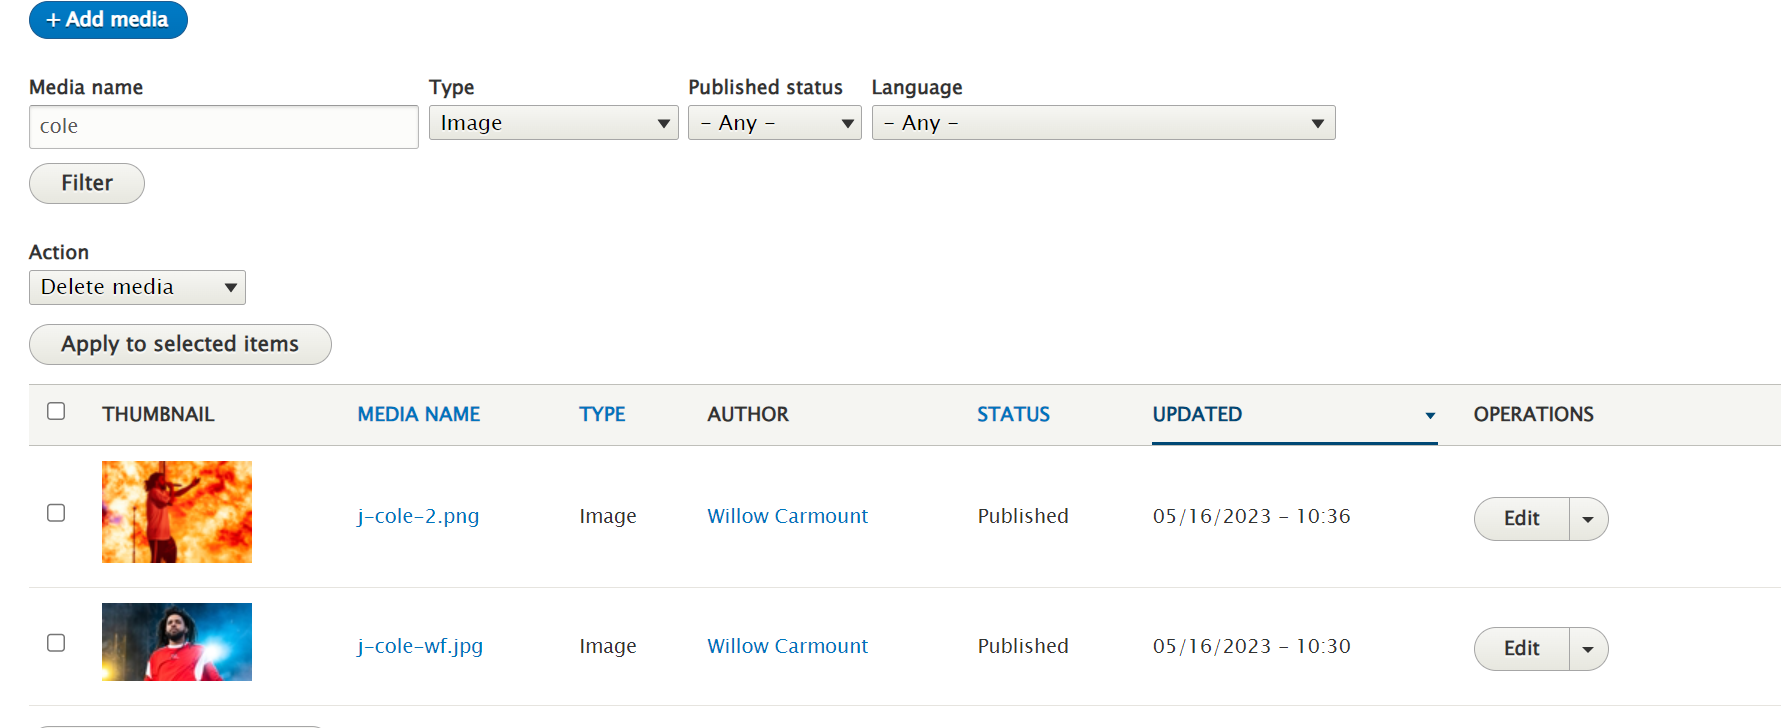
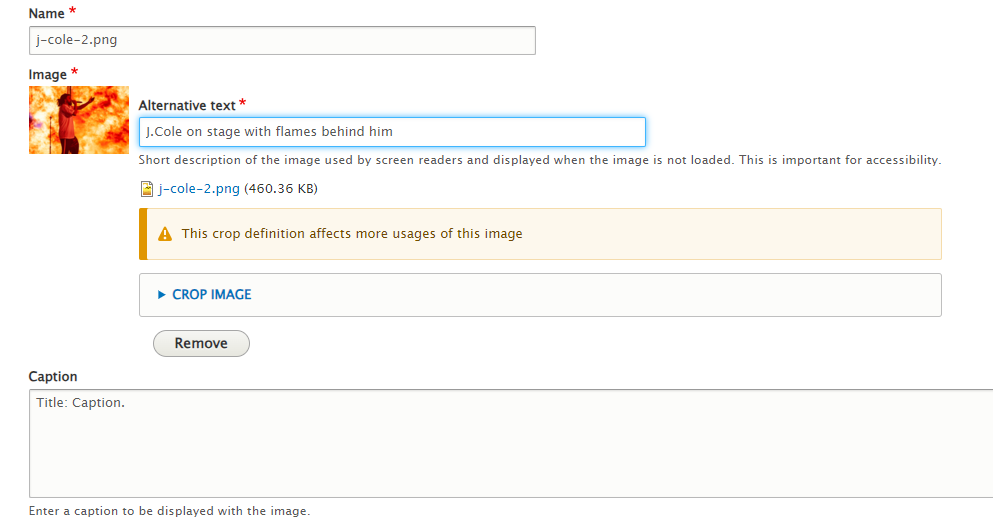
Locate the desired image by searching with the alternative text, then select Edit under Operations.
-
Paste the WCMS 2 title/caption into the Caption field of WCMS 3. If there is both a caption and a title in WCMS 2, copy both into the WCMS 3 Caption field with the format title:caption.
-
Select Save.
Note: If you add image captions and notice they do not appear on the gallery page, open the Edit or Layout tab and resave the page.