Printing
Black and white and colour printing are available from all library computers. Students can use their WatCard to print. You will need to have funds available on your card. You can add money to your WatCard account online or at the Circulation desk.
Faculty, staff and community borrowers (this includes research and visiting scholars) can print using a W Print guest card. You will need to create an account in W Print and purchase a W Print guest card. The W Print guest cards are sold at the Circulation desk in denominations of $2, $5, and $10.
Printer locations
How to print
Students
You can use W Print to print from your laptop or from a library computer. Library computers have a default black and white printer. If you want to print in colour or single-sided, adjust the printing options before sending your document to the printer. To print from a library computer:
- Send your document to the printer: choose "Print" from the "File" menu, or click on the "Print" icon in the "Print" dialogue box.
- In the "Login" dialogue box, enter your WatIAM credentials and click "OK"

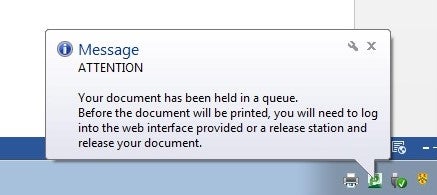
- Please wait until you see the following dialogue box before going to the Release Stations to print your job.
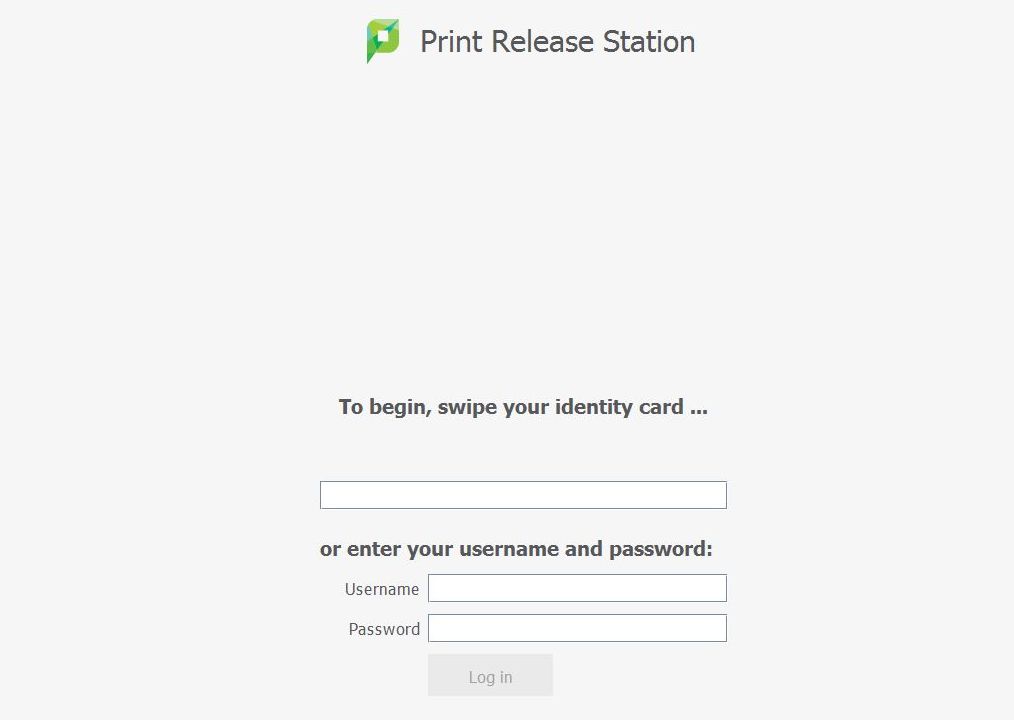
- Release your print job: at the print station, swipe your WatCard or type in your WatIAM credentials.
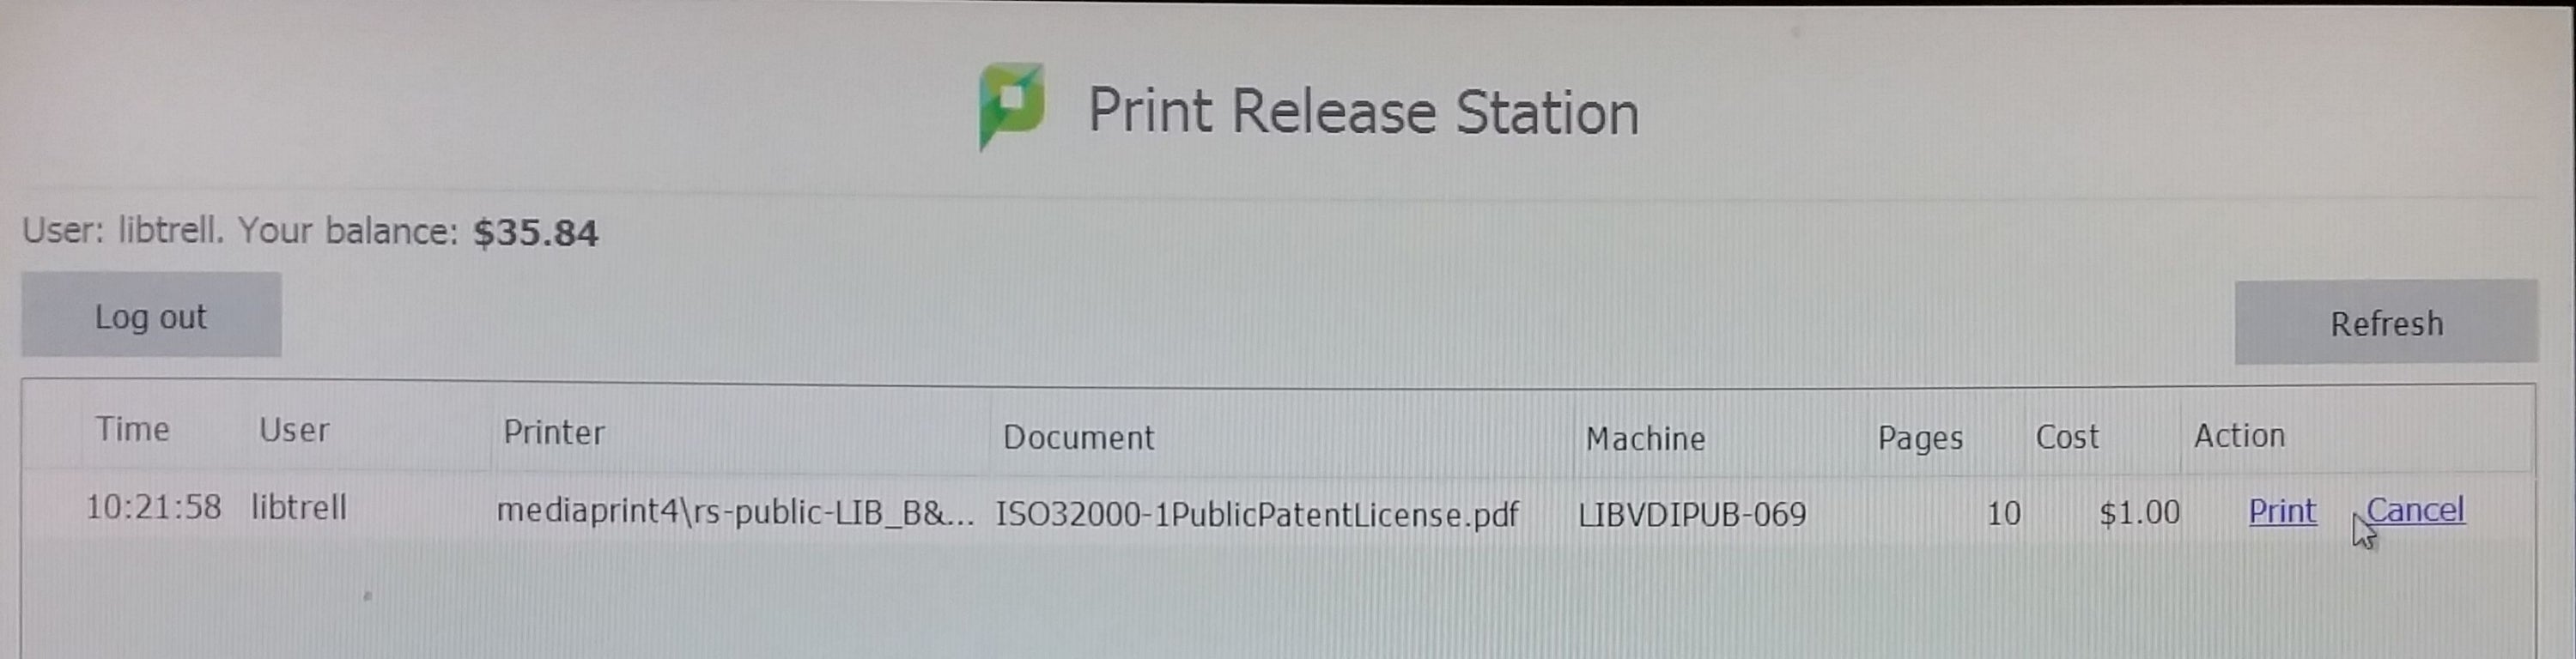
- Highlight the job(s) from the list and select print. If you have enough money on your card to pay for the printout, it is printed and the price is deducted from your card. If you don't have enough money on your card, the printout remains in the queue for two hours, so you can add funds to your card.
Faculty, staff, and community borrowers
Create an account:
- Go to W Print, then click on "Register as guest card user"
-
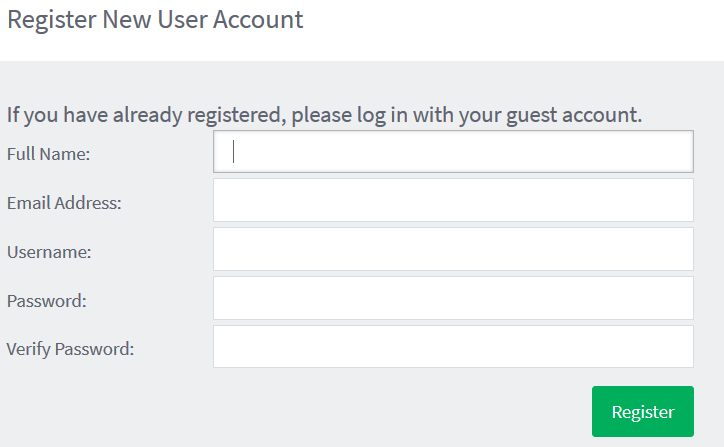
After filling in your full name, email address (UWaterloo, Gmail, Yahoo …etc), user name, and password), click on "Register"
-
You will get a message that confirms your registration and includes your registration details. Now you can click on the "Login" link at the bottom of this message.
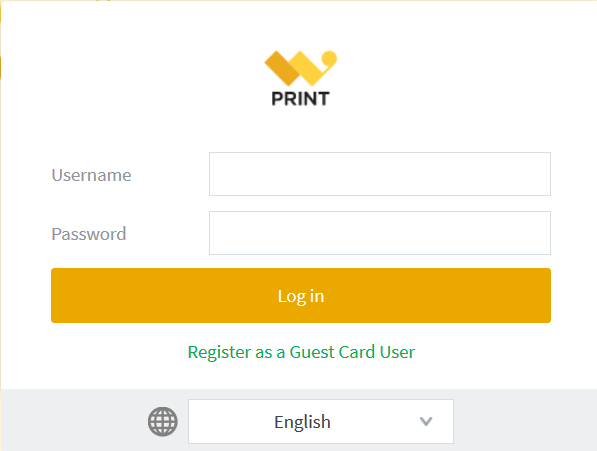
- To log in, enter your user name and the password that you created in the registration, then click on "Log in"
Add funds to your account:
- Purchase a W Print card from the Circulation desk. They are sold in amounts of $2, $5, $10.
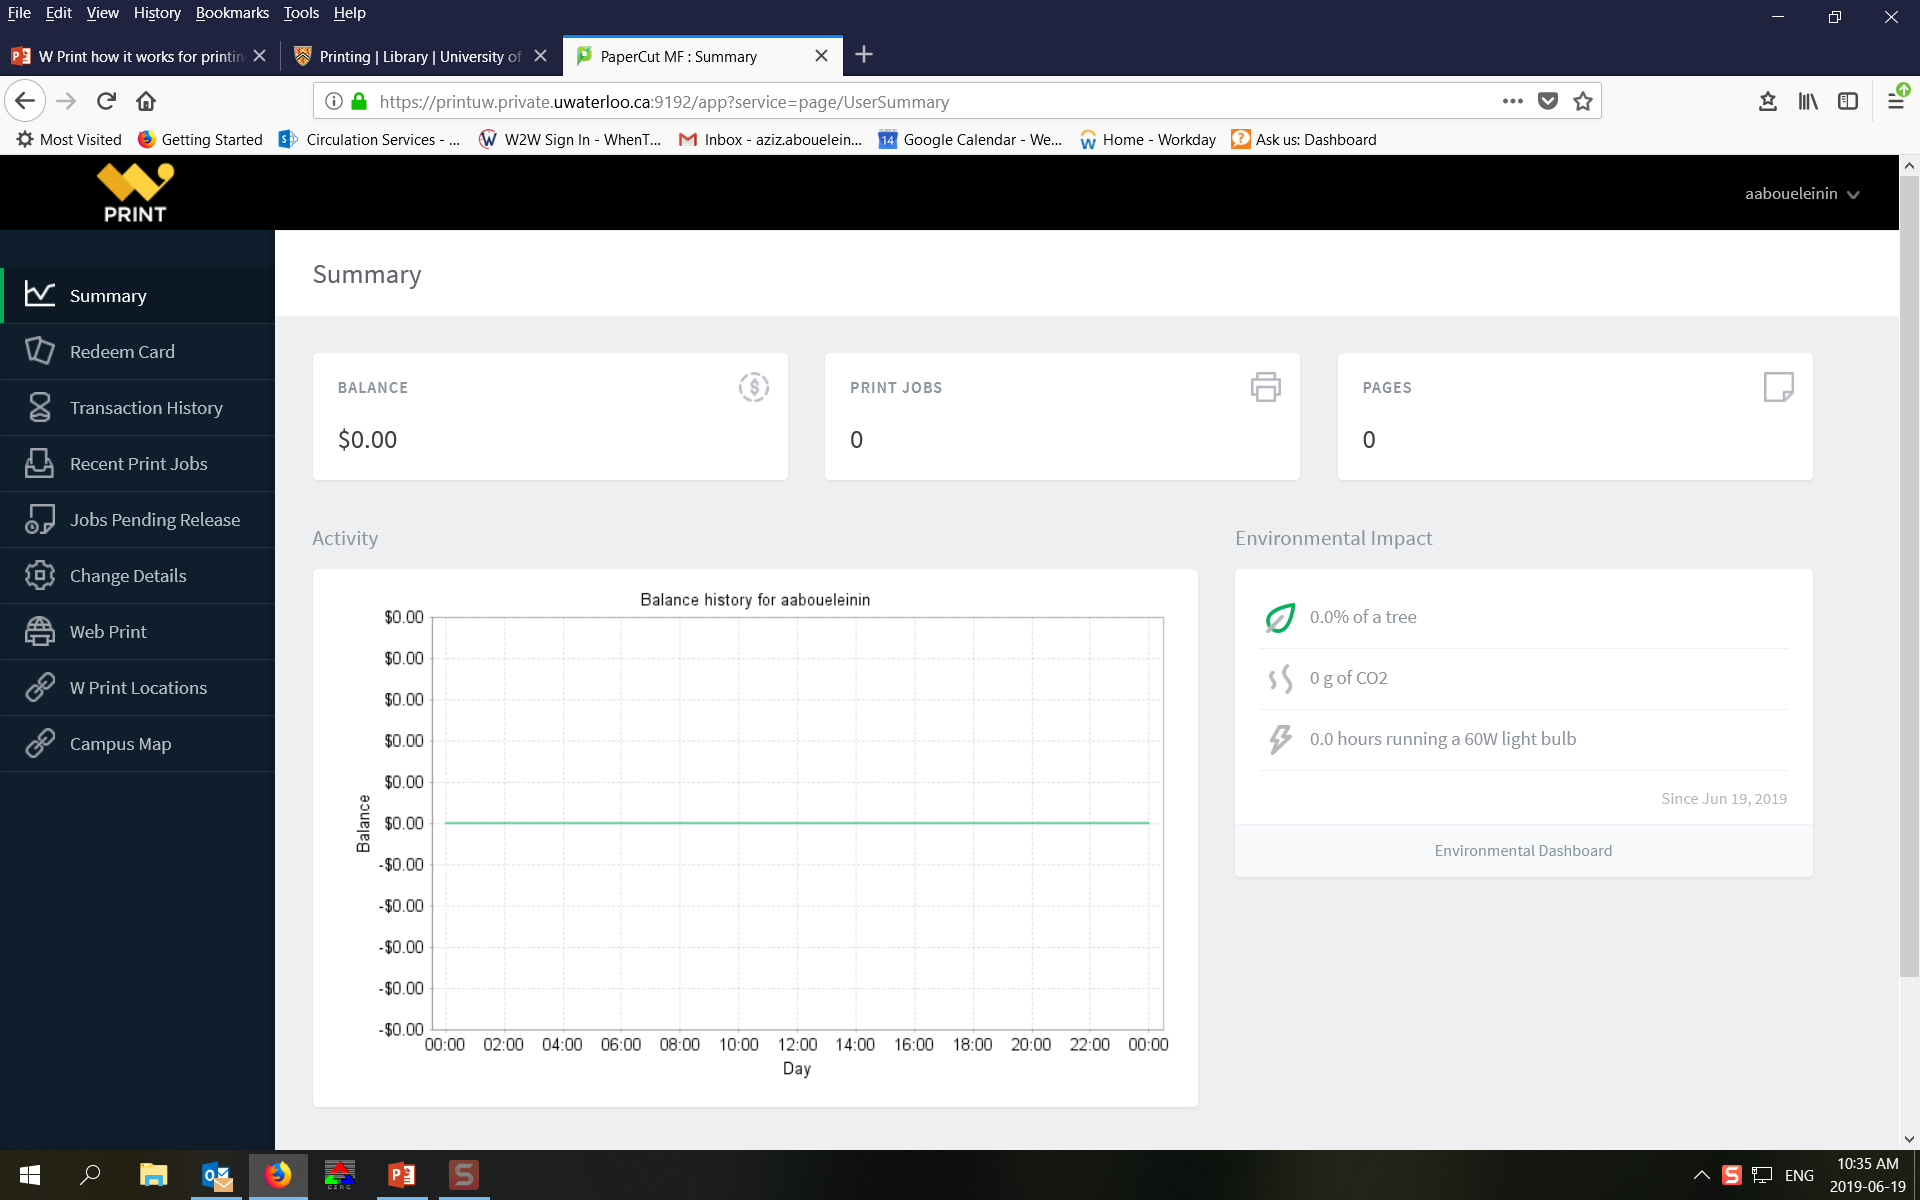
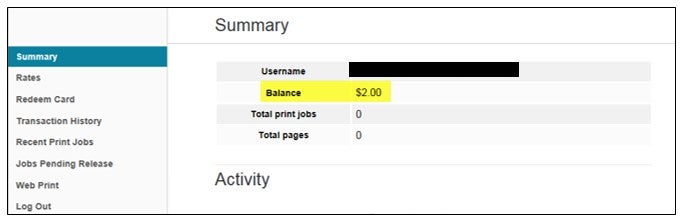
- Login to your account. You’ll see the summary page that shows your username, balance, total print jobs, and total pages.
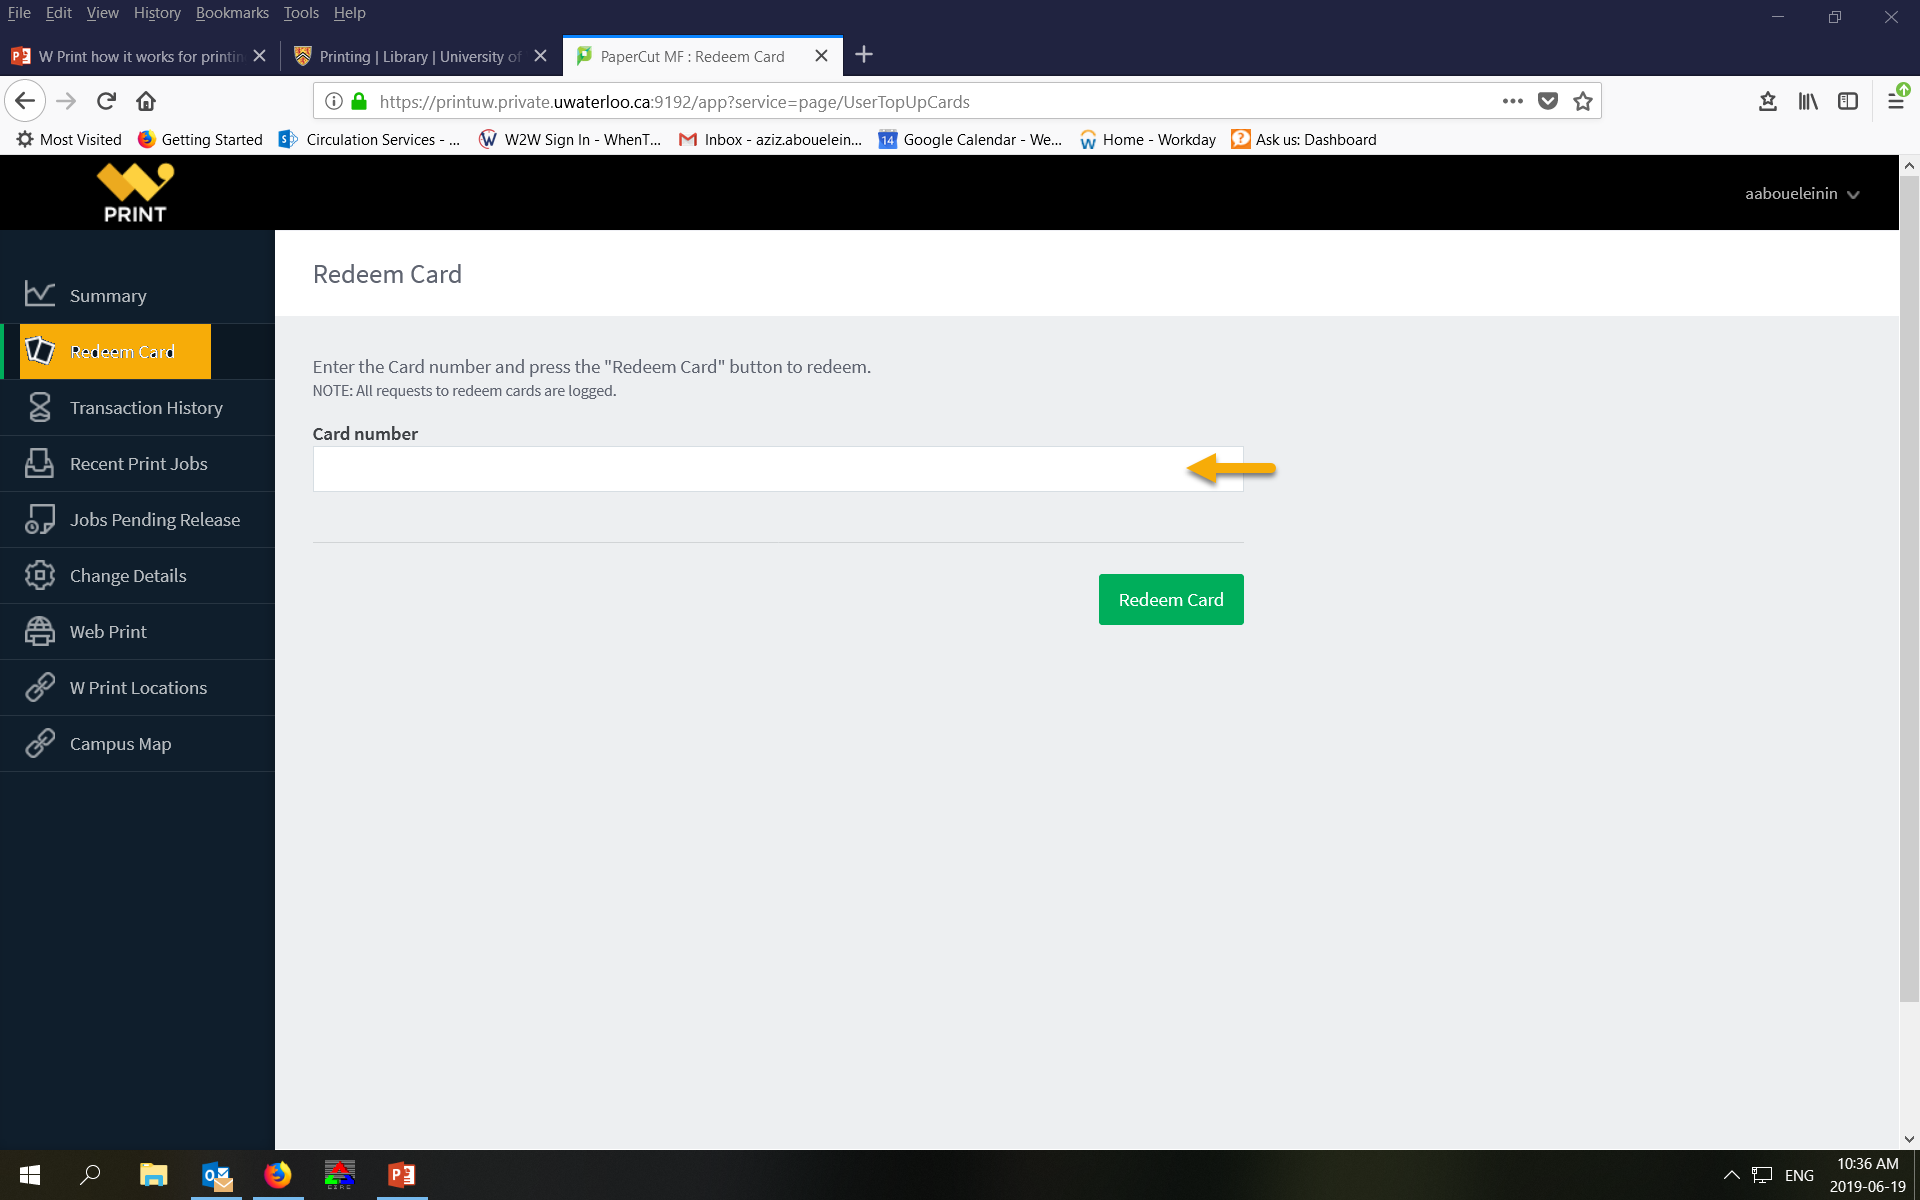
- From the left menu of the page click on "Redeem card"; enter the card number and press the "Redeem Card" button to redeem.
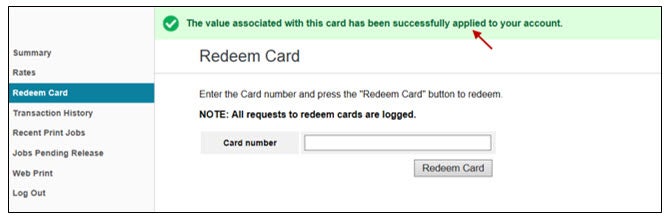
- You should see a message saying "The value associated with this card has been successfully applied to your account"
- To make sure that the fund has been successfully added to your account, click on "Summary" in the left menu. Now you can see the amount added beside the "Balance".
Print your job:
- Once the account is created, you can print from the library public computers. To release your job using the Libraries' release stations, you will need to type in your W Print account username and password.
- To print from your laptop, you will need to login into W Print using your W Print account username and password.
Cost and refunds
Troubleshooting
Technical support
Copying
Library self-serve photocopiers and scanners are operated by using your WatCard. You will need to have funds available on your card. Add money to your WatCard account online or at the circulation desk.
Scanning
All library self-serve photocopiers have scanning option. You may either scan documents to a USB or to your University of Waterloo email.
Cost for scanning is $0.02 per page.