Welcome to UWaterloo!
If this is your first year at the University of Waterloo, you may feel overwhelmed by all sorts of new names, acronyms, and terminology. Eduroam? Nexus? Quest? This article will be a friendly introduction to some of Waterloo’s most-used tech services.
Eduroam
Waterloo’s secure wireless network is called eduroam. Eduroam is accessible anywhere across campus as well as at eduroam hotspots available at research and education institutions around the world [1].
Classrooms, offices, and residence buildings at all major Waterloo campus locations offer this service at no cost. You can connect to it through any computer, tablet, or smartphone and receive fast, reliable wireless internet service [2]. To access eduroam for the first time:
- Open the list of available Wi-Fi connections on your device and ensure that “eduroam” is an available option.
- Select “eduroam” from the list.
- When prompted (the first time you connect and any time you have changed your password), enter your Waterloo identity (userID@uwaterloo.ca) and WatIAM password.
Usually, the steps above should be enough. However, sometimes you will be prompted for additional information. In this case, enter the following settings (where appropriate):
- Network SSID: eduroam
- Network authentication method: WPA2 Enterprise
- Data encryption method: AES
- Authentication method: Protected EAP (PEAP)
- Inner authentication (or Phase 2 Authentication): MSCHAPv2
- CA Certificate: GlobalSignRootCA
- User ID: userid@uwaterloo.ca
- Password: Your WatIAM password
Eduroam Configuration Assistance Tool (CAT)
The Eduroam Configuration Assistance Tool (CAT) is a downloadable program that configures and connects devices to the eduroam wireless network (Windows 10, 8.1, 7, Vista, MacOS, iOS, Linux). It is unique to each university campus and is available for free at the eduroam CAT web page.
*NOTE: Android and Blackberry devices should follow the device’s specific connection guides in order to connect. See Connecting to the eduroam wireless network to find out more.
Connecting to the Eduroam wireless network
- Visit the eduroam CAT web page.
- At the bottom of the page, click Click here to download your eduroam® installer.
- In the window that appears, select the University of Waterloo option. If this option does not appear, search University of Waterloo in the search box near the bottom of the window.
- Once you have ensured that the operating system you are using is listed correctly, press Download your eduroam® installer. If the operating system selected is not correct, click on the Choose another installer to download option to show a list of all compatible operating systems.
- If a prompt appears below this box, read the information carefully and press Continue
- Your browser will now download the .exe file shortly. Check the downloads window of your browser to find it. Once it is finished downloading, click on the file to run it.
- Follow the instructions in the installer and input your user credentials when necessary.
Once the installation is complete, your system will be fully configured to connect to Eduroam.
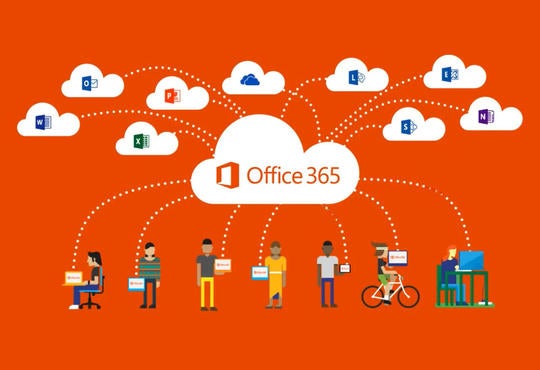
Email (Office 365)
All undergraduate students at the University of Waterloo have their own Waterloo Office 365 email account. The email address consists of the individual’s user ID followed by “@edu.uwaterloo.ca” (eg. jsmith@edu.uwaterloo.ca). The benefits of having an Office 365 account include [3]:
- integration with OneDrive (5TB of personal storage space accessible from anywhere)
- access to the Microsoft Office suite (eg. Word, Powerpoint, Excel)
- 50GB individual mailbox quota storage
- fully integrated email, calendar, tasks, and contacts available on all devices
To access your new Office 365 account:
- Ensure you have activated your WatIAM account and set a password. You can activate your WatIAM account by clicking the Account Activation link on WatIAM.
- Go to the Office Portal Login.
- Enter your email address as follows: userID@edu.uwaterloo.ca
- Click the “next” option. This will redirect you to the University of Waterloo organization sign in page. Ensure that your email is in the correct format: userID@edu.uwaterloo.ca. If not, click the “Back” button and re-enter your email in the proper format.

- Enter your WatIAM password and click “Sign In”.
*NOTE: If you have issues signing in, try clearing your browser’s history, cached data, and cookies.
Change Email display settings for Office 365:
- From the Office home page, select the “Outlook” application.
- At the Office 365 Outlook dashboard, click on the “Settings” icon at the top right (gear icon).
- Select the “Display Settings” option in the list that appears. Here, you can adjust your email account display settings when you log in through Office 365.
Creating Folders:
Once you begin to use your email, you may decide to organize messages into folders. To make a folder:
- From the office home page, select the “Outlook” application.
- On the left-hand side, in the “Folders” sidebar, there should be a few dropdown items including an item with your name. Right click your name and select the “Create new folder” option.
- The dropdown item with your name will expand and reveal a text box with a blinking cursor. Type the name of the folder you wish to create.
Filtering incoming Emails:
You can used a variety of filters to sort incoming mail into specific folders. To do this:
- From the Office 365 Outlook Dashboard, click the “Settings” icon at the top right (gear icon).
- At the bottom of the “Settings” side bar, under the “Your app settings” heading, select the “Mail” option.
- In the dropdown list in the left side bar, under the “Automatic processing” heading, click the “Inbox and Sweep Rules” option.
In this menu, you can add/modify rules to filter emails to your liking [4]. To add a new rule, click the “+” icon under the “Inbox rules” heading.
For more information, see Getting Started with Office 365.
Quest
Quest is one of Waterloo’s main information systems for students. It can be accessed using your WatIAM credentials and is accessible from a web browser on any desktop or mobile device [5]. Quest offers features and information to students such as:
- Grades and transcripts
- Class schedules
- Course enrollment
- Application information
- Financial information (eg. Tuition fees, financial aid)
- Contact information
For more information, visit Quest’s Frequently Asked Questions (FAQs):
LEARN
LEARN provides online educational content and resources for many courses offered at the University of Waterloo. LEARN is accessed with your WatIAM account and allows access to many (or all) of your UWaterloo courses including content such as:
- educational documents
- quizzes and assignments (with deadline notifications)
- forums (for communication with instructors and other students)
- campus-wide announcements
- messages from instructors
LEARN is being steadily integrated into many courses at Waterloo and may soon become the main educational content management system for all courses.
Navigating the Homepage:
When you first log into LEARN, you will be taken to the LEARN homepage. Here, you will find a variety of features [6] such as:
- Notification Taskbar (with links to your calendar, notifications, profile settings and more)
- System Alert (for urgent alerts)
- Courses and Communities (courses and course contents of different study terms)
- Announcements (from instructors and professors or campus-wide alerts)

Many of these widgets can be configured or minimized based on preference.
Finding course content:
LEARN provides an overwhelming amount of information. Finding class notes, quizzes, and assignments can be a challenge! To easily access content of a desired course:
- In the “Courses and Communities” widget, select the desired term and course.
- This will redirect you to the course’s homepage. Note that depending on the course, the contents of the course homepage may slightly vary. Here, you can access course specifics such as:
- Content – majority of all relevant course documents and content
- Grades – list of both unmarked and marked assessments
- Connect – content such as class lists, discussion forums, and course groups (eg. labs, projects)
- Submit – Dropbox for assignment submission, online quizzes/surveys
- Resources – additional resources, usually specified by the instructor/professor
W Print
W Print is a recently implemented system for campus-wide printing. W Print services can be accessed by using a computer in a campus lab or logging on to the W Print website from any device. Once signed in, users can upload files for printing at any W Print locations on campus.
The charge for printing comes directly from a user’s WatCard Flex account [7]. It is a quicker and more efficient alternative compared to directly printing from designated computers.
To use the W Print service:
- Go to the W Print website (https://printuw.private.uwaterloo.ca:9192/user) and log in with your WatIAM credentials.
- On the left sidebar, click on “Web Print”.
- Click on “Submit a Job”.
- From the table, select the printer you wish to print from. The table of printers can extend over multiple pages (navigated using the arrows at the top of the table). There is also a search bar function for filtering through printer names or locations/departments.
- Once you have selected your printer, click “2. Print Options and Account Selection >>” at the bottom right of the page.
- Indicate the number of copies you would like to print and click “3. Upload Documents >>”.
- Drag the desired files to the indicated box or browse for the files on your computer.
- Click “Upload and Complete >>”. Your print job is now queued for printing.
- In the left sidebar, click on “Jobs Pending Release”. This will show a list of all jobs you have queued for printing. Here, you can cancel or edit any pending jobs.
- Once ready, you can individually release jobs to be printed at their respective printers. Alternatively, you can click “Release All” to print all pending jobs. The corresponding charges will be charged to your WatCard Flex account.
If you are having any issues with W Print or printing jobs in the Faculty of Arts, please contact the ACO help desk.
References
[1]“Where Can I eduroam?” Eduroam. N.p., n.d. Web. 25 July 2016. <https://eduroam.org/where/>.
[2]“Wireless service (eduroam).” Information Systems & Technology. University of Waterloo. Web. June 2. 2015. <https://uwaterloo.ca/information-systems-technology/services/eduroam-wireless-network>
[3] “About Microsoft Office 365”. University of Waterloo. Web. May 30. 2017. <https://uwaterloo.ca/information-systems-technology/services/microsoft-office-365-education/about>
[4]“Working with Message Folders in Outlook on the Web in Business.” – Outlook. N.p., n.d. Web. 13 July 2016. https://support.office.com/en-us/article/Working-with-message-folders-in-Outlook-on-the-web-in-business-6bb0723a-f39f-4a8d-bb3f-fab5dcc2510a?ui=en-US&rs=en-US&ad=US
[5]“About Quest.” Student Information System. University of Waterloo. Web. June 2. 2015. <https://uwaterloo.ca/quest/about-quests>
[6]“LEARN.” Information Systems & Technology. University of Waterloo. Web. June 2. 2015. https://uwaterloo.ca/information-systems-technology/services/learn
[7]“New W Print for Waterloo Students – Print from anywhere on campus.” New W Print for Waterloo Students – Print from anywhere on campus. University of Waterloo. Web. June 2. 2015.<https://printuw.private.uwaterloo.ca:9192/user>