To instead see instructions for adding a web video (Youtube, Vimeo) see: Adding a web video (Youtube, Vimeo) to your course.
Summary of steps
Here is a summary of the tasks you will need to complete to insert a video.
Upload video(s) to your course
To upload a video in your course:
- If you are not already in the CMS editor, navigate to any page in your course and click 'Edit this Page'. (For additional help on this step see: How to update a page in the CMS.)
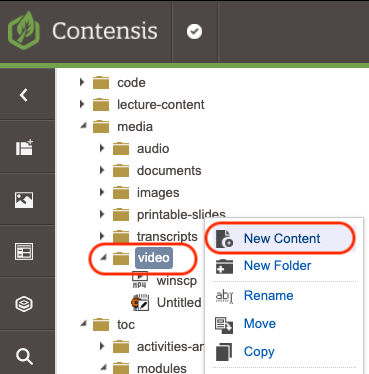
- In your course navigate to the / media / video / folder and click on the folder name video. (note: all videos need to be stored in this location).
- From the dropdown menu, click on 'New Content'.
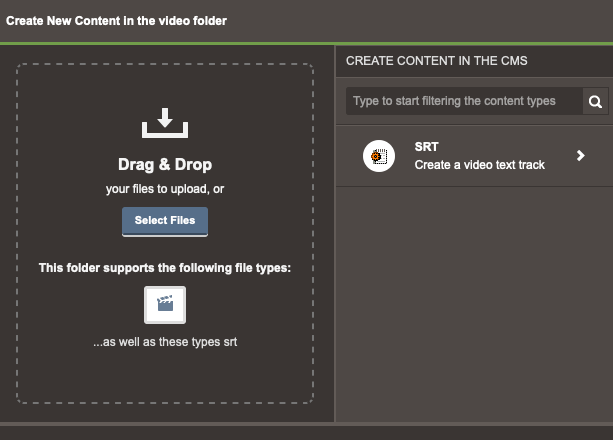
- This will bring up a dialog box where you can either drag and drop your selected video(s) to the dotted area on the left or click on the blue 'Select Files' button.
- Allow time for the file to upload.
- When the upload is complete, select 'Save and Approve', and then 'Return to Editor'.
- If you need to upload supporting files associated with the video such as a transcript, closed caption file, or poster, you can upload these files to the locations specified here:
- Poster (jpg or png, optional), uploaded to / media/ images /
- Transcript (optional), uploaded to / media / transcripts /
- Closed Caption (.srt, optional), uploaded to / media / transcripts /
- Now that the file upload is complete, you can move to the next stage and add the video to your page.
Add a video to your page
Note: Before initiating these steps, use the steps above to upload the video file(s) to your course.
- If you haven't already, in the CMS editor select 'Edit' for the page you would like to add the video to.
- Place the cursor on the page in the position you would like the video to be added.
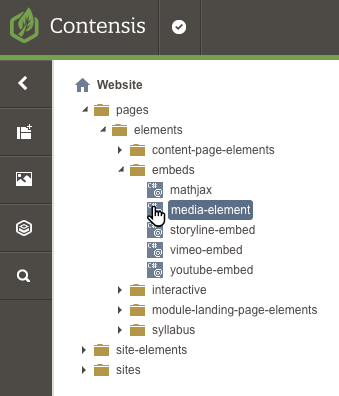
- From the left sidebar, open the path to display / pages / elements / embeds /.
- From under / embeds /, drag the 'media-element' icon onto your page (don't forget to drag the icon, not the file name), to your chosen location.
-
This will open a dialog box with three tabs: 'Media', 'Features', and 'Copyright'.
Media Tab
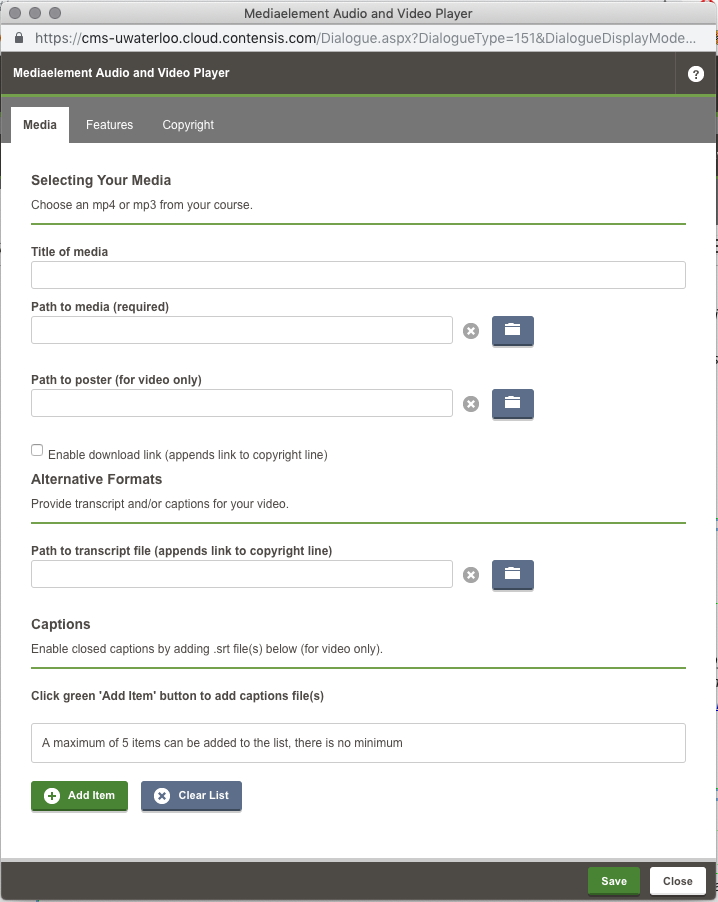
- Selecting Your Media
- In the dialog box, enter the Title of your media
- Select the path to your video by clicking on the blue 'File' button and navigating to your / media / video / folder and locating your video file
- Optional:
- Select the path to your video poster by clicking on the blue 'File' button and navigating to your / media / images / folder and locating the poster image (a poster image is displayed before the video is played).
- If you would like to make this video available for download, check the 'Enable download link' checkbox.
- This will add a 'Download MP4/MP3' link to the end of your copyright line
- Alternative Formats
- If you have a transcript for the video, select the path to your transcript file by clicking on the blue 'File' button and navigating to your / media / transcripts / folder and locating the transcripts page
- This will add a 'Transcript' link to the end of your copyright line
- If you have a transcript for the video, select the path to your transcript file by clicking on the blue 'File' button and navigating to your / media / transcripts / folder and locating the transcripts page
- Captions
- If you have a caption file (.srt file), click on the green 'Add Item' button, and then click on the blue 'File' button and navigate to your / media / transcripts / folder and locating the caption file (.srt)
- You can add multiple language tracks if you have them
- This will add a 'CC' button to the player to toggle the captions
Features Tab
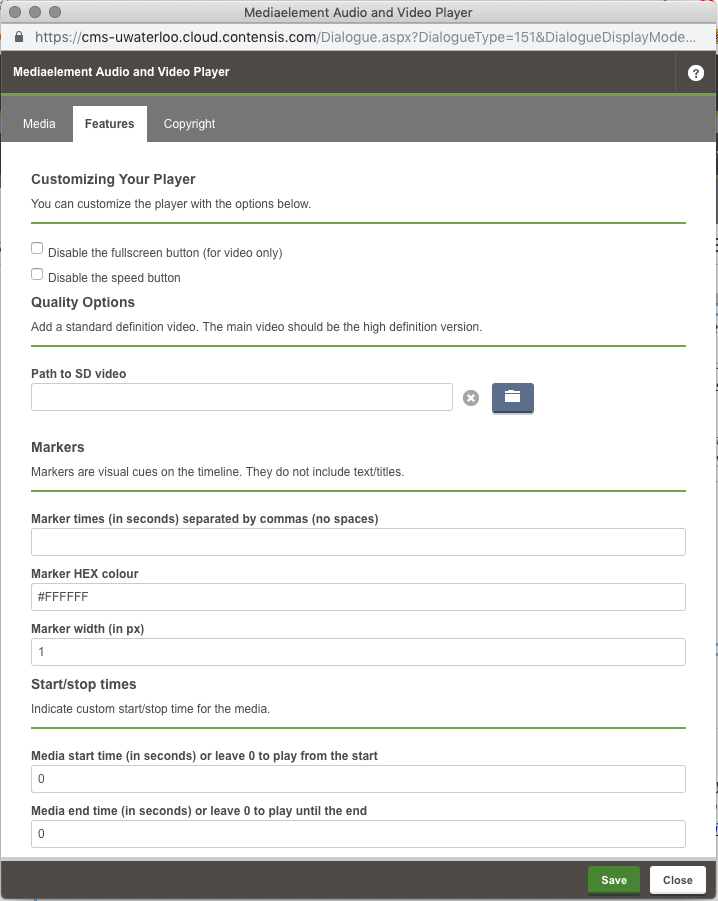
- Customizing Your Player
- If desired, click on the checkbox to disable the fullscreen button
- this will remove the fullscreen button from the player
- If desired, click on the checkbox to disable the speed button
- this will remove the speed button from the player
- If desired, click on the checkbox to disable the fullscreen button
- Quality Options
- If you have a second, standard definition video (which is preferable for lower internet speeds, or for less data usage), you can link to it here, by clicking on the blue 'File' button and navigate to your / media / video / folder and locating the standard definition video file
- this will add a 'SD/HD' button to the player
- If you have a second, standard definition video (which is preferable for lower internet speeds, or for less data usage), you can link to it here, by clicking on the blue 'File' button and navigate to your / media / video / folder and locating the standard definition video file
- Markers
- Markers are visual cues on the timeline. They do not include text/titles. They can be used to highlight a particular time in the video you may want viewers to focus on (i.e., you could include in the surrounding text, "Jump to the 1st marker to see an important scene.")
- Markers can be added by entering all of the marker times into the first box, measured in seconds, with a comma between each time (for instance: '5, 55, 126' - markers will appear at 5 seconds, 55 seconds and 126 seconds)
- You can choose the colour of your marker by inputting a hex code (default is #FFFFFF [white])
- Enter the desired width of the marker (measured in pixels)
- Start/stop times
- If you would like to enter a start or stop time, to show only one section of your video, you can enter a start time and/or a stop time.
- This can be used in cases where you want to change how much of the video is displayed on the page. The same video file could be used in multiple places or instances and show different parts of the video using this feature.
Copyright Tab
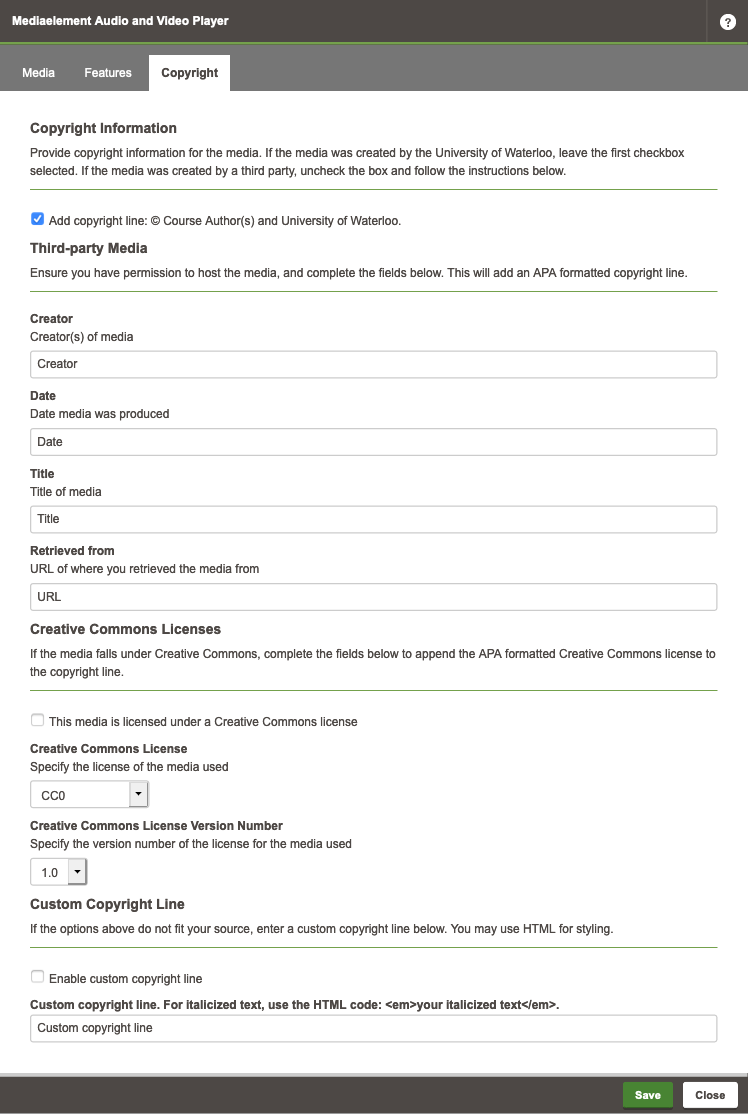
- You must provide copyright details for your video. If the video was created with CEL, you may leave the checkbox checked for 'Add copyright line: © Course Author(s) and University of Waterloo'. For details on copyright at Waterloo, see: Frequently asked questions | Copyright at Waterloo
- Third-party Media
If you have an alternate source, you uncheck this checkbox and continue filling out the entry boxes.- Creator
- Date
- Title
- Retrieved From (URL)
- Creative Commons License
If the video is licensed under a Creative Commons license, you must add the license and version number to the Copyright line.- Creative Commons License
- Creative Commons License Version Number
- Custom Copyright Line
- If you need a custom copyright line, check the checkbox for 'Enable custom copyright line'
- Custom copyright line: Enter your details here
Save and Finish
- Once you have selected all of the options needed for the video, click the 'Save' button to save your settings and return to your page editor.
- On your page a video placeholder will appear where the video will be displayed:
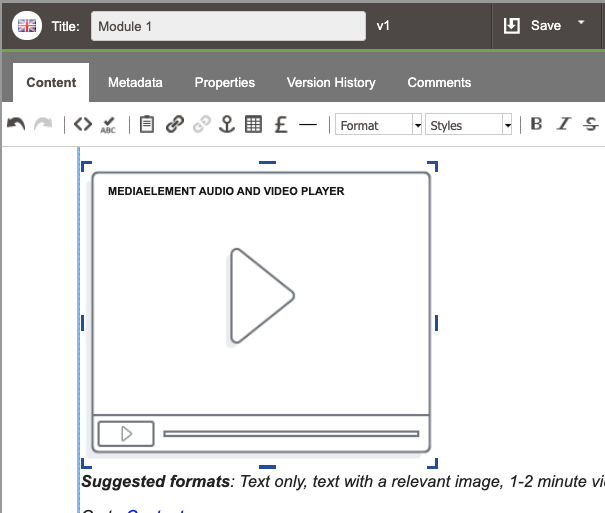
- If you need to make adjustments to the video, right-click on the media element placeholder and select 'Webcontrol properties'.
- When you are finished editing the page, select 'Save' and then Workflow > 'Submit and Approve'.