Did you know that you can use webforms to create custom search blocks, using the site doing the search as the "confirmation" URL? All you need is a page that can perform searches based on parameters in part of the URL, or in the query string. This post will walk through creating a basic search block, and then some fancier examples.
Step 1: create a form
This is the basis for everything. You must have the "form editor" role applied to your account on the site where you will be creating the search block; if you do not, this can be added by a user with the site owner role, who may need to confirm with the web site lead.
Create a form and then go to settings, and disable saving of submissions using the option under general settings. Once you have done this, a warning will appear - disable this using the "ignore disabled results warning" checkbox. (It is generally considered to be a violation of user privacy to store search queries, and you should only do so after appropriately warning the user.)

Step 2: add a search field
For our basic example, we will just add a field for the search text.
Go to the build tab, and add a text field element. Give it a title, mark it as required (unless you want to allow submitting blank searches and the destination supports it) and save it. In our example, we're naming the field "Search for", which gives it a machine name of "search_for" (which we will need to know later to use in a token).

Step 3: set the confirmation URL
At this point, you'll need to know the URL for the thing you are searching, and where the search text needs to go in that URL.
For our simple example, we'll use Google itself. Google's search uses a "q" query string on the end of the URL for the search term (e.g. https://www.google.com/search?q=cats).
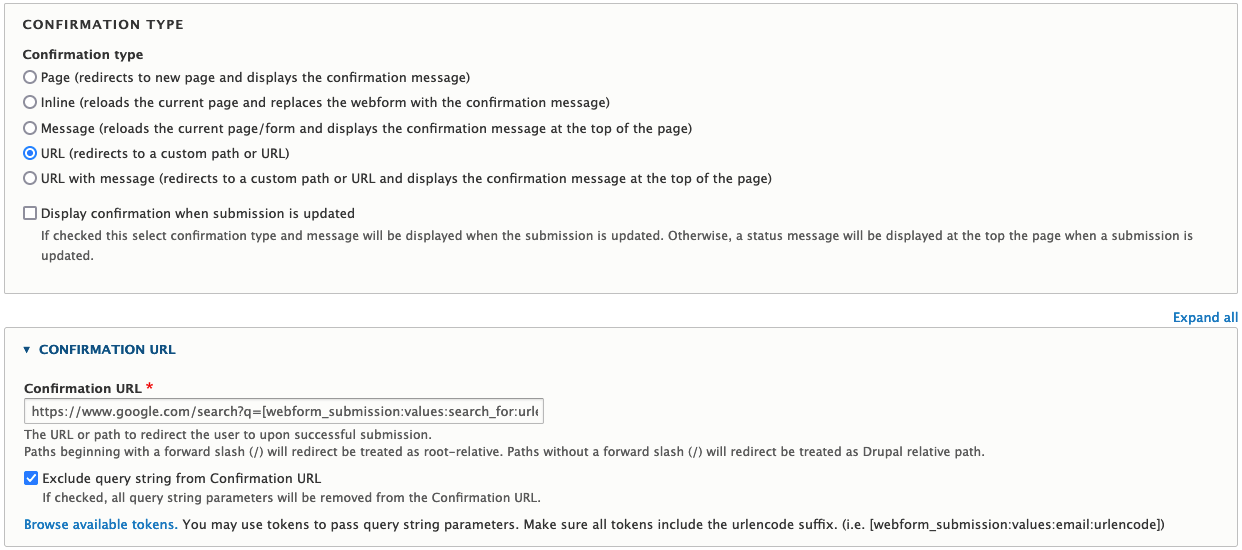
Go to the settings tab for your form, and then the "confirmation" section. Set the confirmation type to URL, and add the URL for the search. Replace the search term in your URL with the token for the field with the search text, set to "urlencode" the text. For our example, this will be "https://www.google.com/search?q=[webform_submission:values:search_for:urlencode]".
You should also check the "Exclude query string from Confirmation URL" box. This will prevent any other potential query strings used on the page from being passed on with the search.
Finally, save the settings.
Step 4: test the form
Go to your form's view tab. You should be able to enter a search term, and have it perform a Google search.

Step 5: add the form to a page
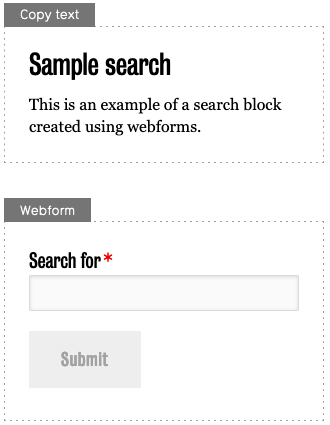
Create a new page, or edit the layout of an existing page, and add a webform block referencing your form. You can add additional blocks for page content or to add context to your form. For our example, we created a two-column section, larger left, with a copy text block and the webform block in the right column.
If you save the layout builder page as draft or needs review, you can test the form before you make it live.
Getting slightly fancier: other search destinations
Different search tools will have different URL structures. It can be time consuming and often difficult to find documentation on what they're looking for - often the easiest way to figure it out is to try a search on the site yourself, and reverse-engineer the needed URL from that.
For example, if you go to Google Maps and search for the University of Waterloo, then use "search nearby" to search for cats, the resulting URL is https://www.google.com/maps/search/cats/@43.4723262,-80.5628822,14z/data=!3m1!4b1!4m7!2m6!3m5!2sUniversity+of+Waterloo,+200+University+Ave+W,+Waterloo,+ON+N2L+3G1!3s0x882bf6ad02edccff:0xdd9df23996268e17!4m2!1d-80.5448576!2d43.4722854?entry=ttu.
Since we know we searched for "cats", we know that's the portion of that URL that needs to be replaced with our search term. Go to the form's confirmation settings page and set the confirmation URL to https://www.google.com/maps/search/[webform_submission:values:search_for:urlencode]/@43.4723262,-80.5628822,14z/data=!3m1!4b1!4m7!2m6!3m5!2sUniversity+of+Waterloo,+200+University+Ave+W,+Waterloo,+ON+N2L+3G1!3s0x882bf6ad02edccff:0xdd9df23996268e17!4m2!1d-80.5448576!2d43.4722854?entry=ttu and save.
Now if you go to the view tab, or to the page you set up, you will see that a search uses Google Maps to find places matching your term that are near the University of Waterloo. A working sample of this form is embedded below - try searching for "grocery".
Getting fancier still: multiple search options
If you go to the WCMS Knowledge Base and search for cats, the resulting URL is https://uwaterloo.atlassian.net/wiki/search?text=cats&spaces=WCMSKB. We can substitute "cats" with the token as before and update the confirmation URL.
But looking at this URL, we can see that there is a key for "spaces" that is populated by "WCMSKB", and what if changing that key would let you search different knowledge bases?
Sure enough, if we go to the IST Knowledge Base and search for cats, the resulting URL is https://uwaterloo.atlassian.net/wiki/search?type=page&text=cats&spaces=ISTKB. The only differences between the two URLs are the addition of a "type" key, and the different value for the key for "spaces". We can speculate that the "type" key is not necessarily required, and test removing it, and sure enough the search does work without it. (We could also try adding the "type" key to the other URL, but for the purposes of this example we'll just leave it out.)
Let's use this information to adjust our form so that it can search either knowledge base.
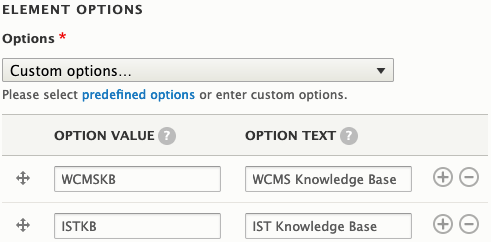
First, add a select element to the form with the two knowledge bases as options. Set the option values to the keys (WCMSKB and ISTKB) and add user-friendly names as the option text. Make this field required as well.
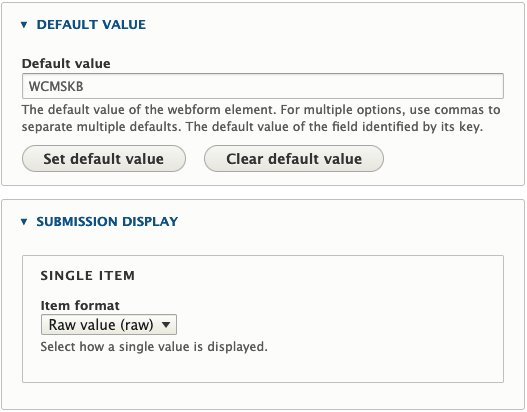
It's a good idea to set a default value for this select element. Go to its "advanced" tab and set the default value to WCMSKB.
While we are here, we should also set the submission display for this field to be the raw value, since we want the key to be passed as to the token, not the user-friendly name.
Set up the form's confirmation URL, using tokens in place of both the search term and the knowledge base to search.
Now if you go to the view tab, or to the page you set up, you will see that what knowledge base is searched depends on which one is selected. You can experiment with a working sample of this form below.
Getting crazy fancy: everything everywhere all at once
Let's put all of the search variations we've experimented with so far into a single form.
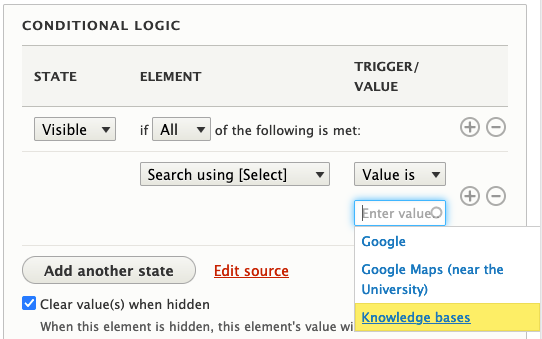
Start by going to the form's build page and adding a select element with options for "Google", "Google Maps (near the University)", and "Knowledge bases". The option values don't matter here since we're not going to be using them in URLs, just to choose which type of search to perform. We'll make the field required, and set the default value to "Google" before saving the element.
Next, we want to make sure that the choice of knowledge bases only appears when that's what's being searched. Edit that field's conditions to say that it is only visible if the field we created to choose search types has the "Knowledge bases" value, and then save the element.
Now, how do we set different confirmation URLs depending on what type of search is selected? There's a trick!
The webform's confirmation setting page only accepts a single value for the URL - set it to the pattern we used for Google so that it matches the default choice, and save the settings.
Now go to the emails / handlers section, and click "+ Add handler". Next, click "Add handler" beside the settings handler.
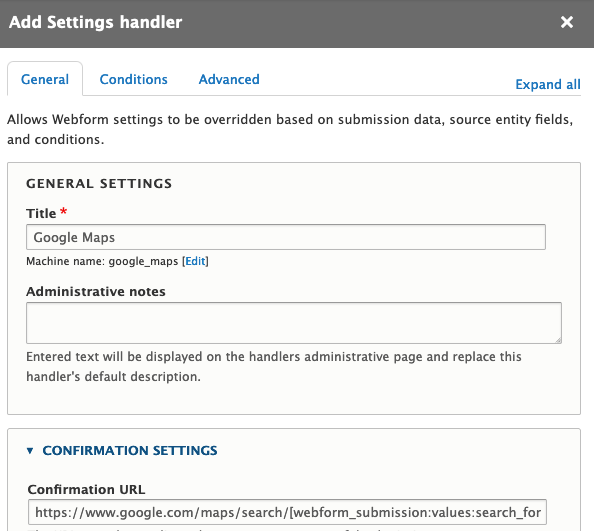
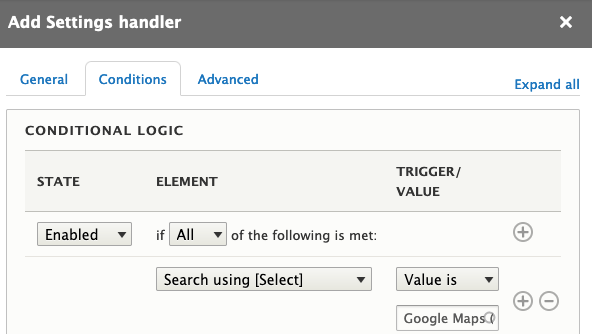
Give this handler a meaningful name, changing the default "Settings" to "Google Maps". Put the confirmation URL pattern we used for Google Maps in the confirmation URL field, and then under conditions, set it to be enabled if the field to choose search types has the matching value, then save the handler.
Now, we want to add another handler for the knowledge base search option. Set it up the same way as the other handler, setting the confirmation URL to the pattern we used for knowledge bases, and setting the conditions so it is only enabled when we're doing a knowledge base search (making sure to use the field we used to pick between the different types of search, not the one we used to pick which knowledge base).
The final form is embedded below - notice how all the options work?
In conclusion
There are a near-infinite number of things you could search using this method. Think about what else is out there, from the world of the WCMS (for example, play with the filters on a news listing page and think about how you might build a title search for posts matching a specific tag) to internal systems (perhaps searching for Jira tickets starting from your internal web site) to the big wide world (maybe Wolfram Alpha or the Wheel of Lunch?).
What will you build?