Health Computing has deployed a number of all-in-one videobars in various classrooms and meeting rooms within the faculty. These units have the hardware components required to support computer-based video conferencing on platforms such as Teams, Webex, Zoom. Specifically, these videobars have built-in video cameras, microphones and speakers.
- Placement options
- Setting up
- Troubleshooting
- If you just want to record the lecture and not actually live stream
- Special Case – SunLife Auditorium (LHS/BMH-1621)
Placement Options
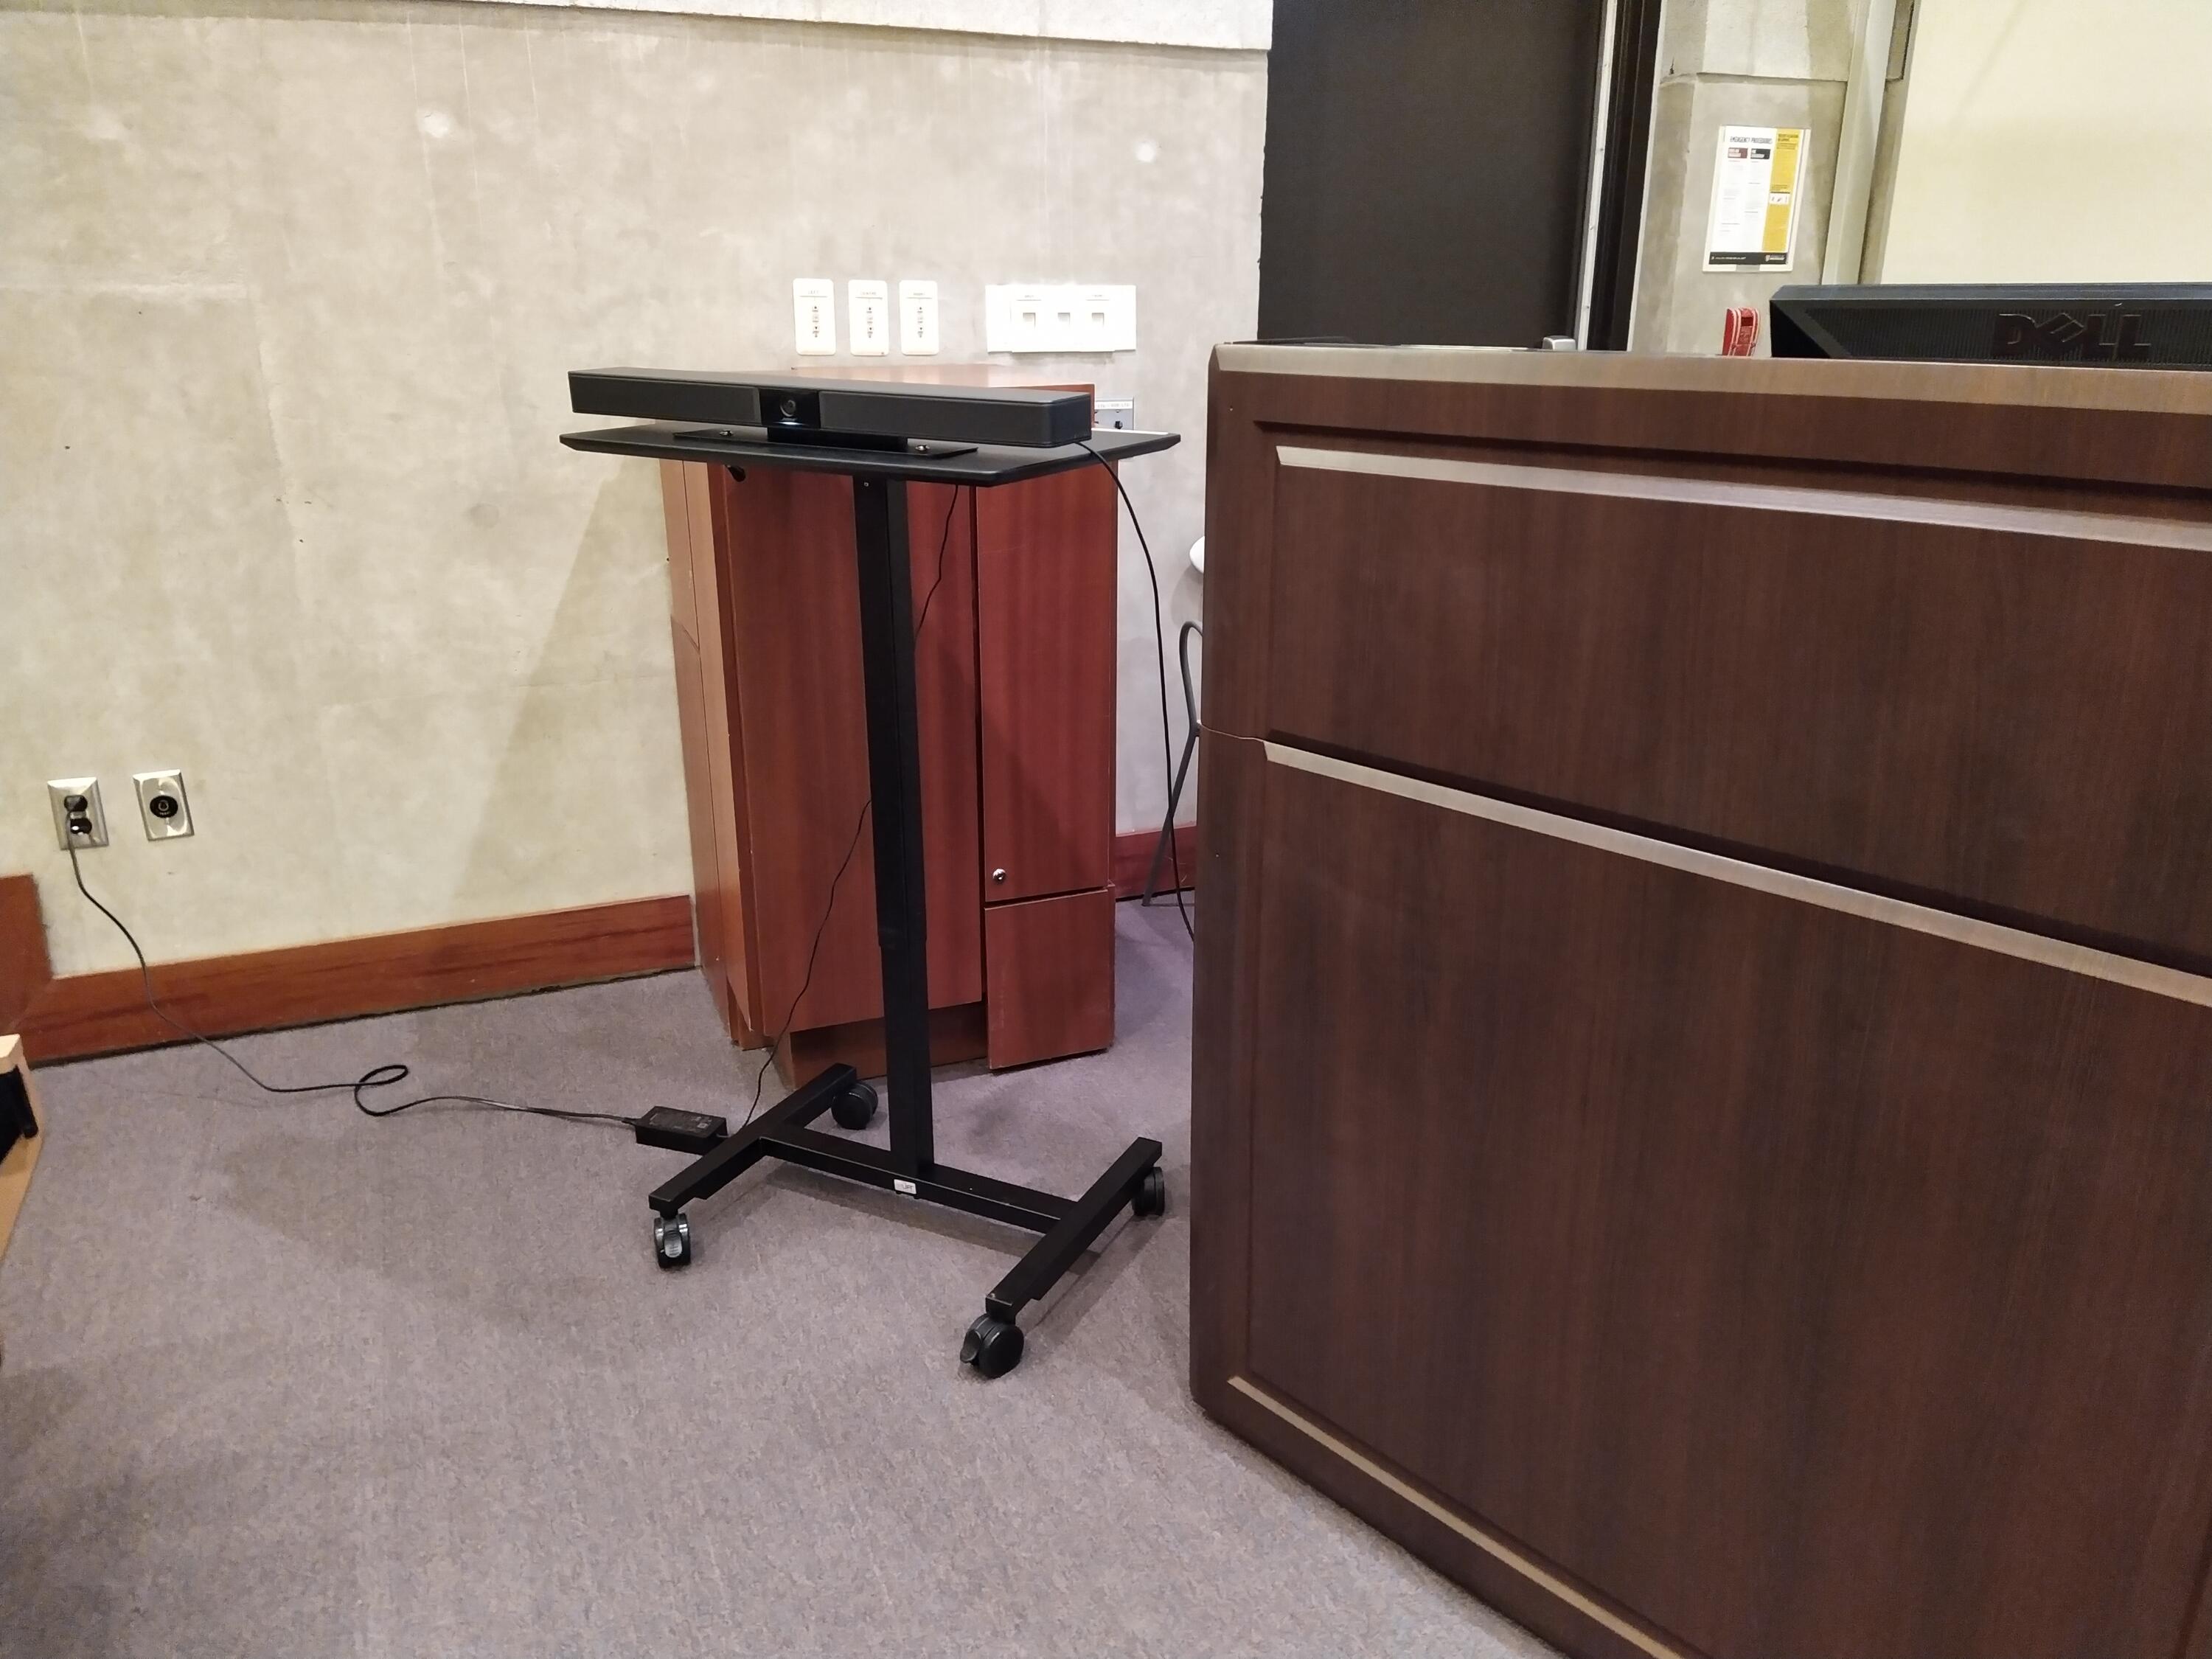
The videobars can be connected by the attached USB cable to the podium computers or to laptops brought in for presentations, etc. The videobars are mounted on carts that can be positioned in the room to according to need:
-
Audience Facing: With a guest speaker attending remotely, the videobar can be positioned to face the audience so the speaker can see the audience and respond to questions.
-
Speaker Facing: In cases where there is a local presenter and an online audience, the videobar can be positioned to point towards the podium so the remote audience can see and hear the presenter.
Setting up
-
Position the cart in the room as desired (close enough to the conferencing computer and power outlet).
-
Plug in the videobar to the power outlet near the podium or use the powerbar at the podium
-
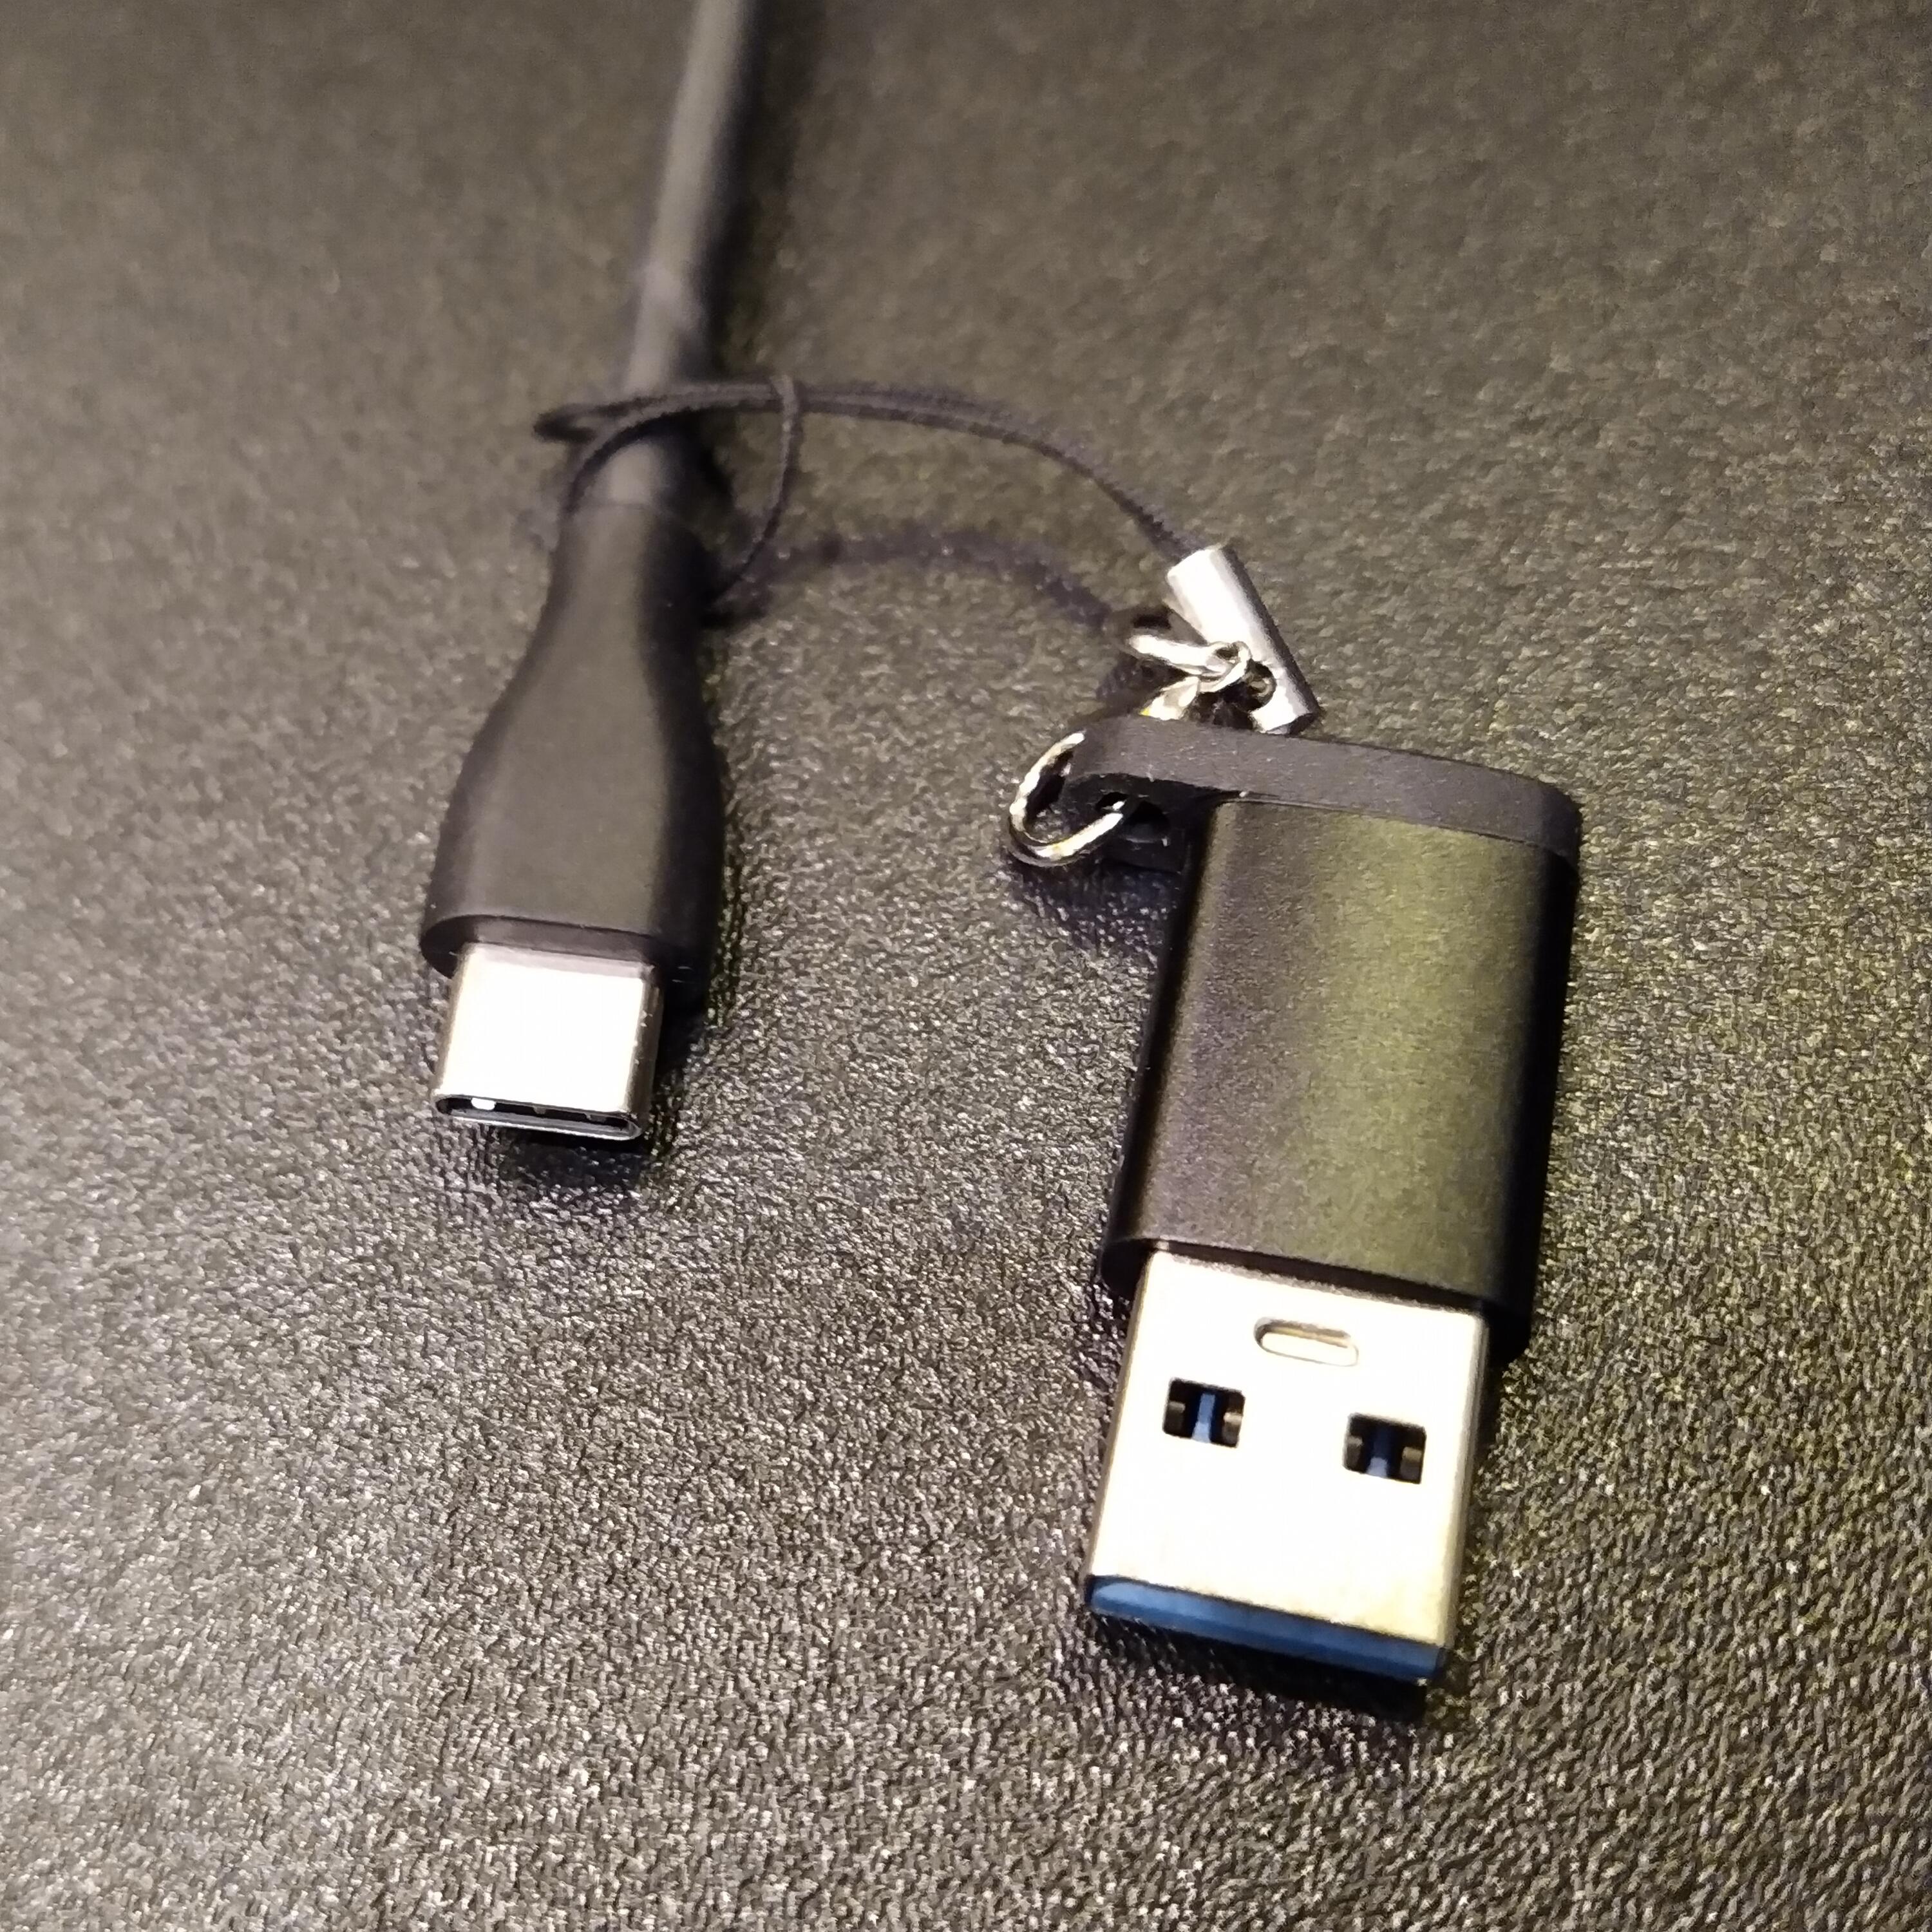
Connect the USB cable to the podium or laptop computer.
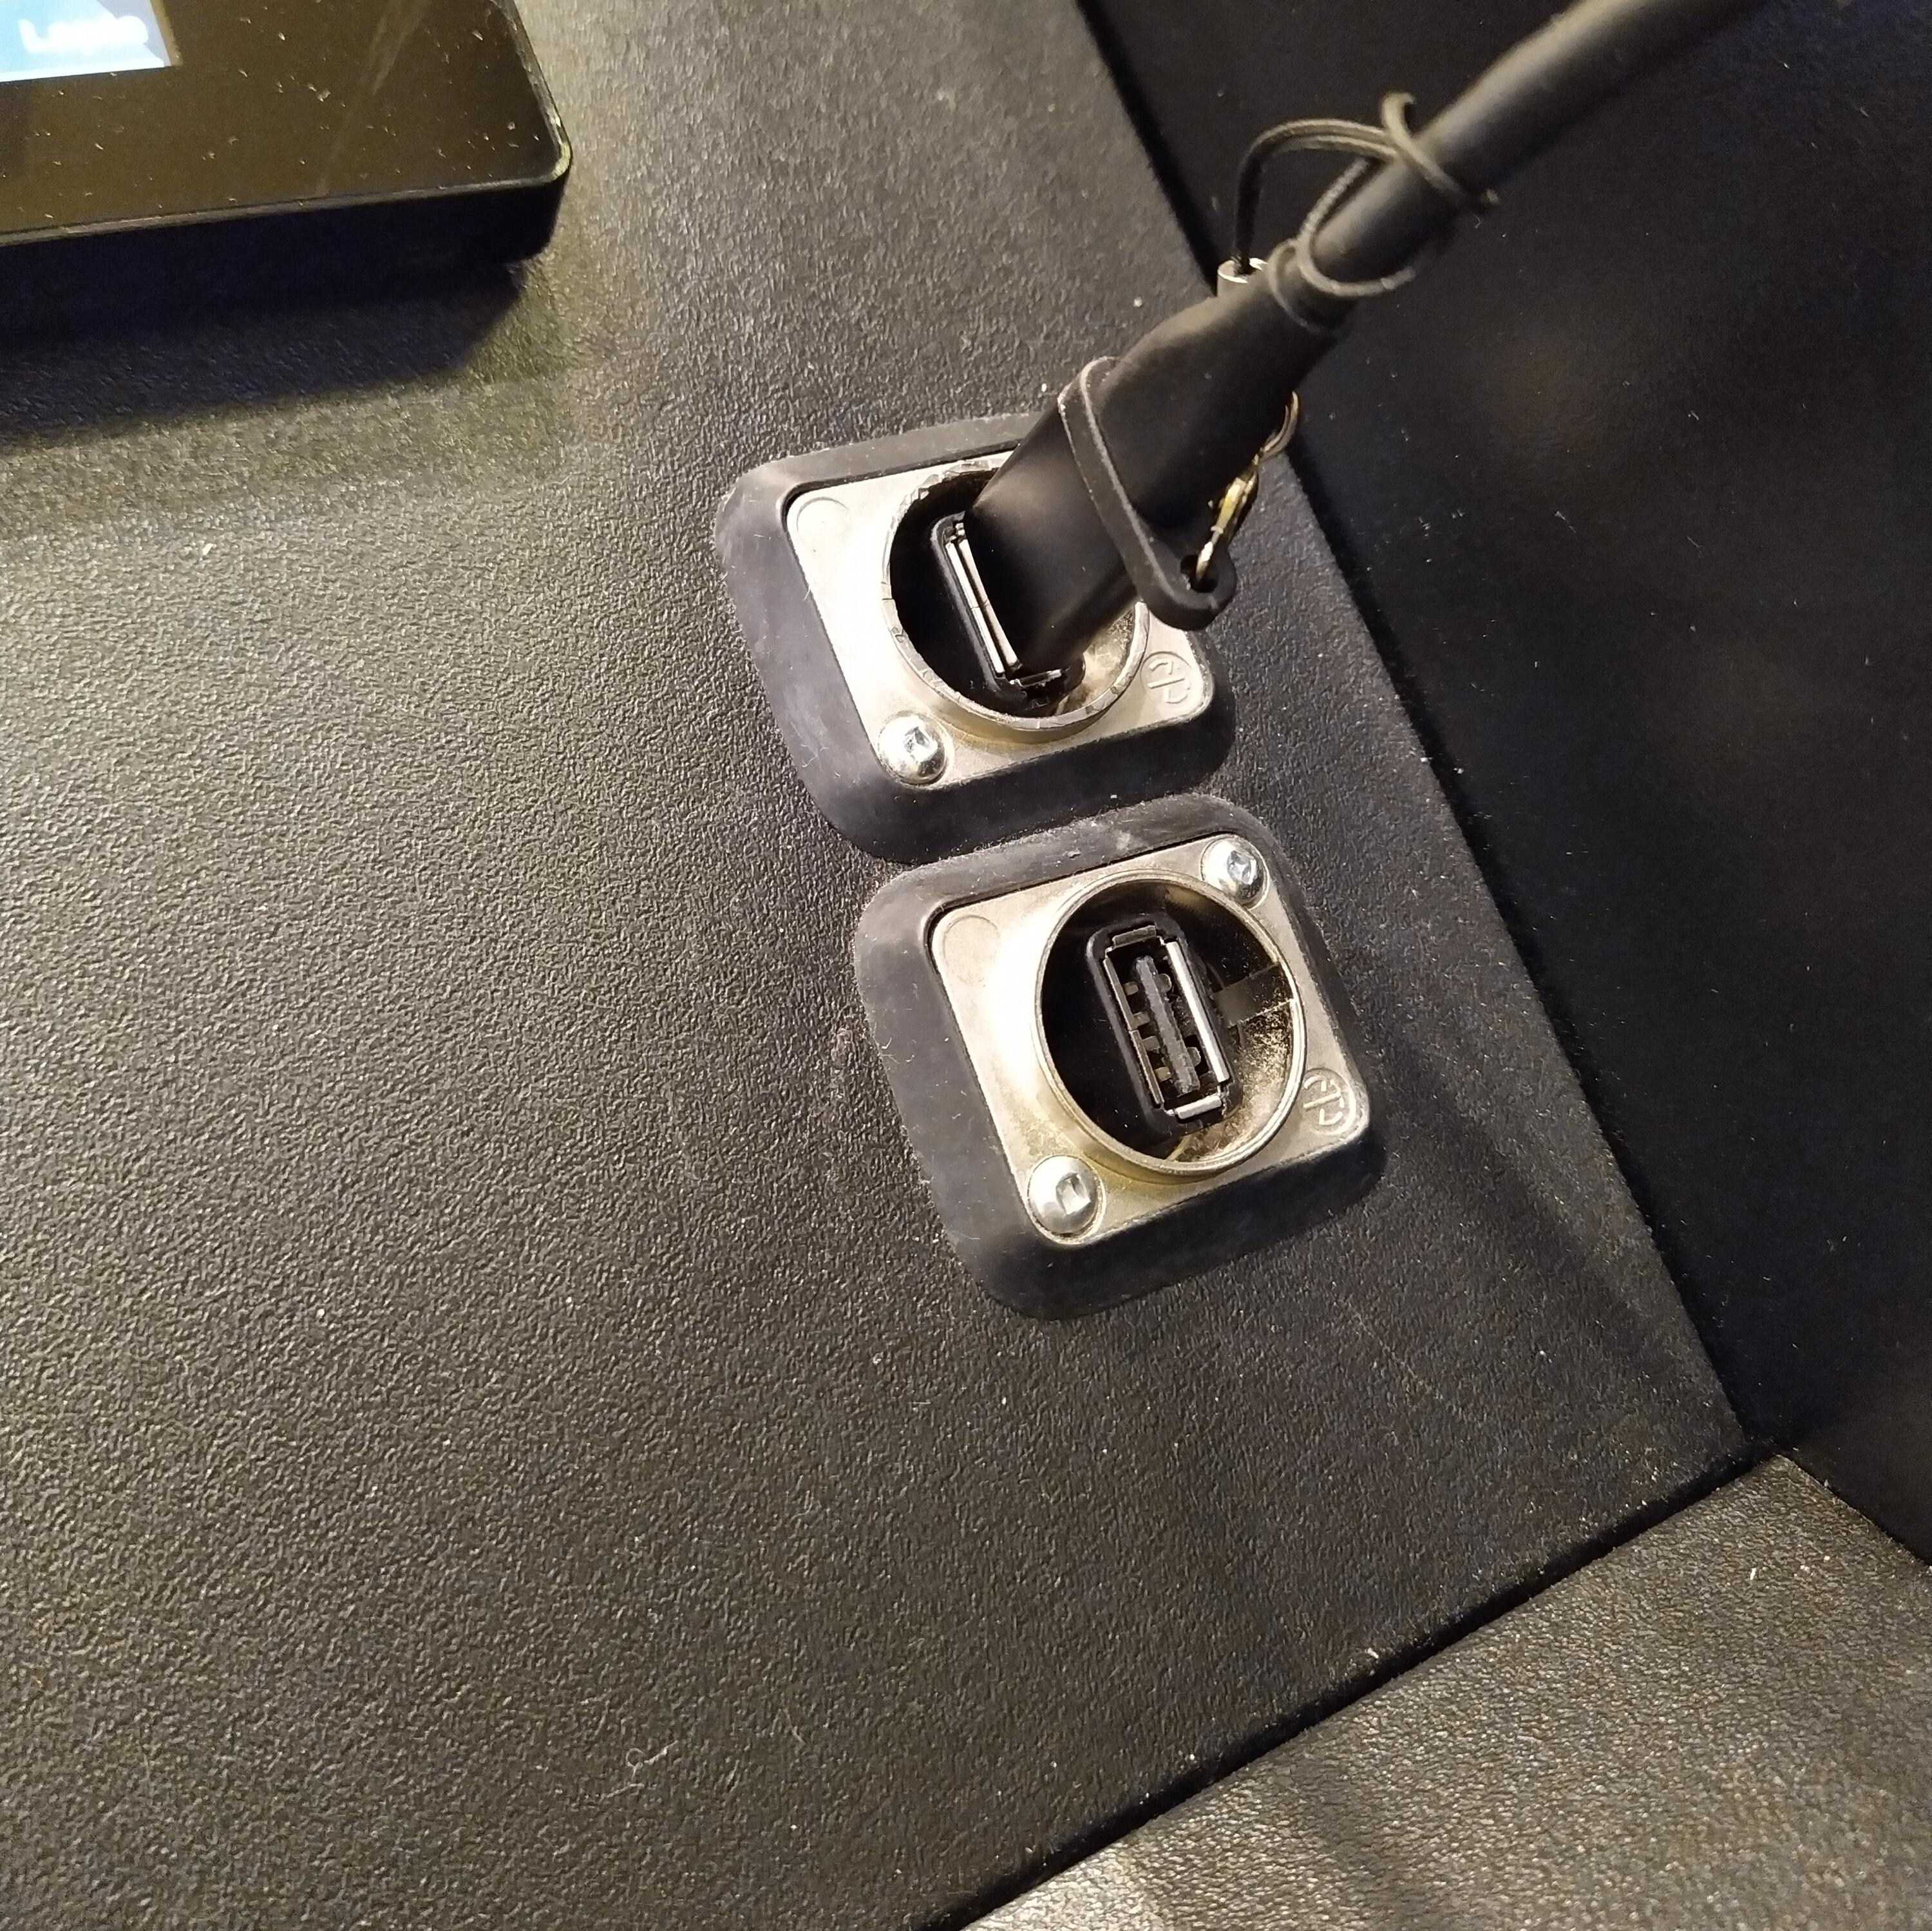
If you are using a USB-C port, disconnect the usb-a adapter from the cable to reveal the USC-C connection (see below).
-
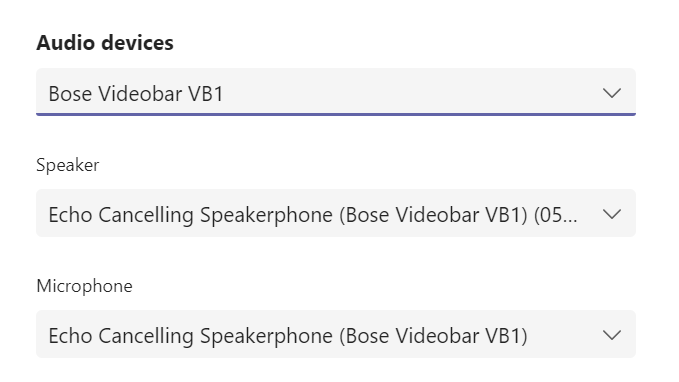
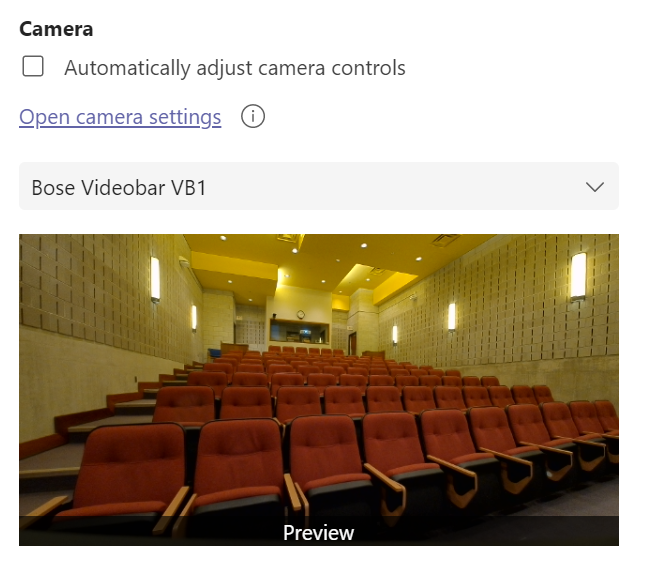
The videobar will show up in your conferencing software audio settings as an echo cancelling speakerphone (e.g. Videobar VB1)
-
The video camera will be Videobar VB1
Troubleshooting
If the videobar does not show up as an audio or video device in your meeting software, disconnect and reconnect the power from the video bar and it should appear as an option when it powers up (may need to wait 20-30 seconds).
If you just want to record the lecture and not actually live stream
- Teams: Go to the Calendar option and select “Meet now” (upper right). Give your meeting a name and click “Start meeting”. Dismiss/Close the “Invite people to join you” dialog, set your camera preference, Start recording under the more options (…) and share your screen. When done, stop sharing and stop the recording under more options (…)
- Webex : Click on “Start a Meeting”. Confirm that the camera and audio are set to the room equipment. Click Record and choose the Record in Cloud option (click the red record button). Then click the Share button on the toolbar and choose Screen1. When done click the Record button again and choose Stop
- Zoom: Click on New Meeting, Join with Computer Audio. Confirm the camera and audio are set for the room equipment. Click record and then Share Screen. When done click the Record button again and choose Stop
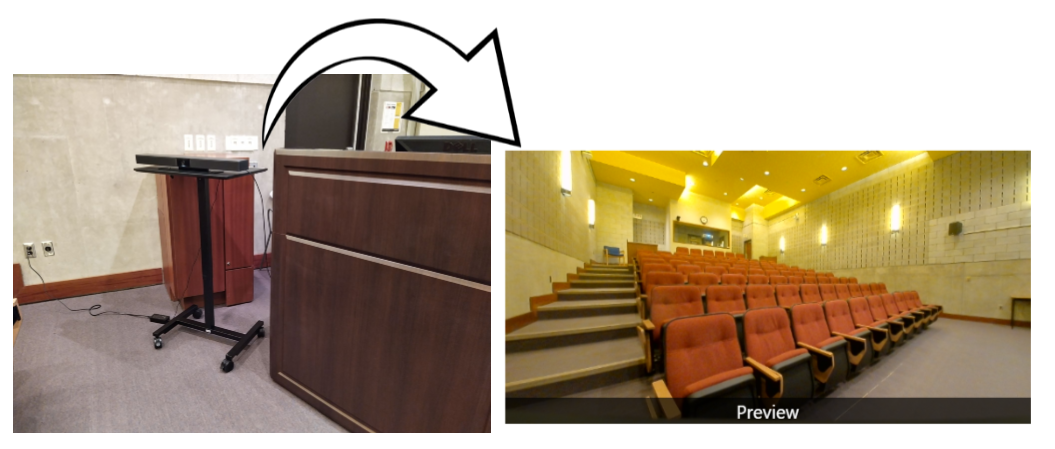
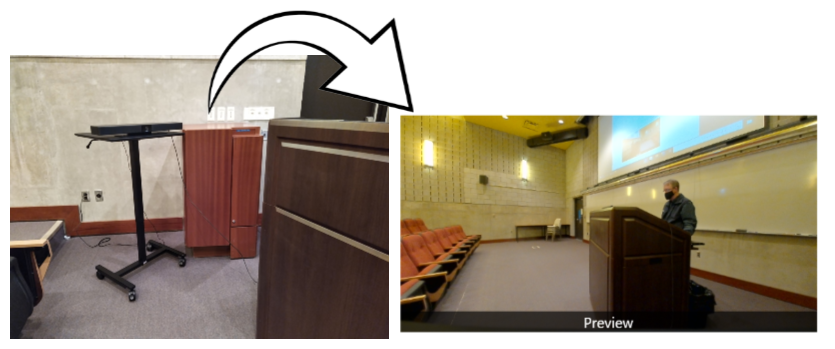
Special Case – SunLife Auditorium (LHS/BMH-1621)
This room has a podium with a Crestron control panel, a camera at the back of the room and support for a lapel mic (department issued) as well as a videobar.
Use the camera at the back of the room with the lapel mic to capture a single presenter at the front of the room with limited audience interaction. Any questions from the in-room audience should be repeated for the benefit of the online audience because the lapel mic won't pick up the question.
Use the videobar if you don't have a lapel mic or for a presentation/seminar where the in-room audience will be interacting with online participants. You can use videobar for the audio component (microphone and speaker) and video feed (optional). When you connect the videobar, it will be appear as another input device under the audio and video settings. You can mix and match the video source as needed. For the speakers, choose the videobar.
To allow a remote presenter/attendee to see and hear the audience, select the video bar as the microphone, speaker and video source for your meeting.
For an in-room presentation, select the camera at the back of the room as the video source. After the front-of-the-room presentation is completed, you can switch over to the videobar for the camera if you want to capture the audience in the room.