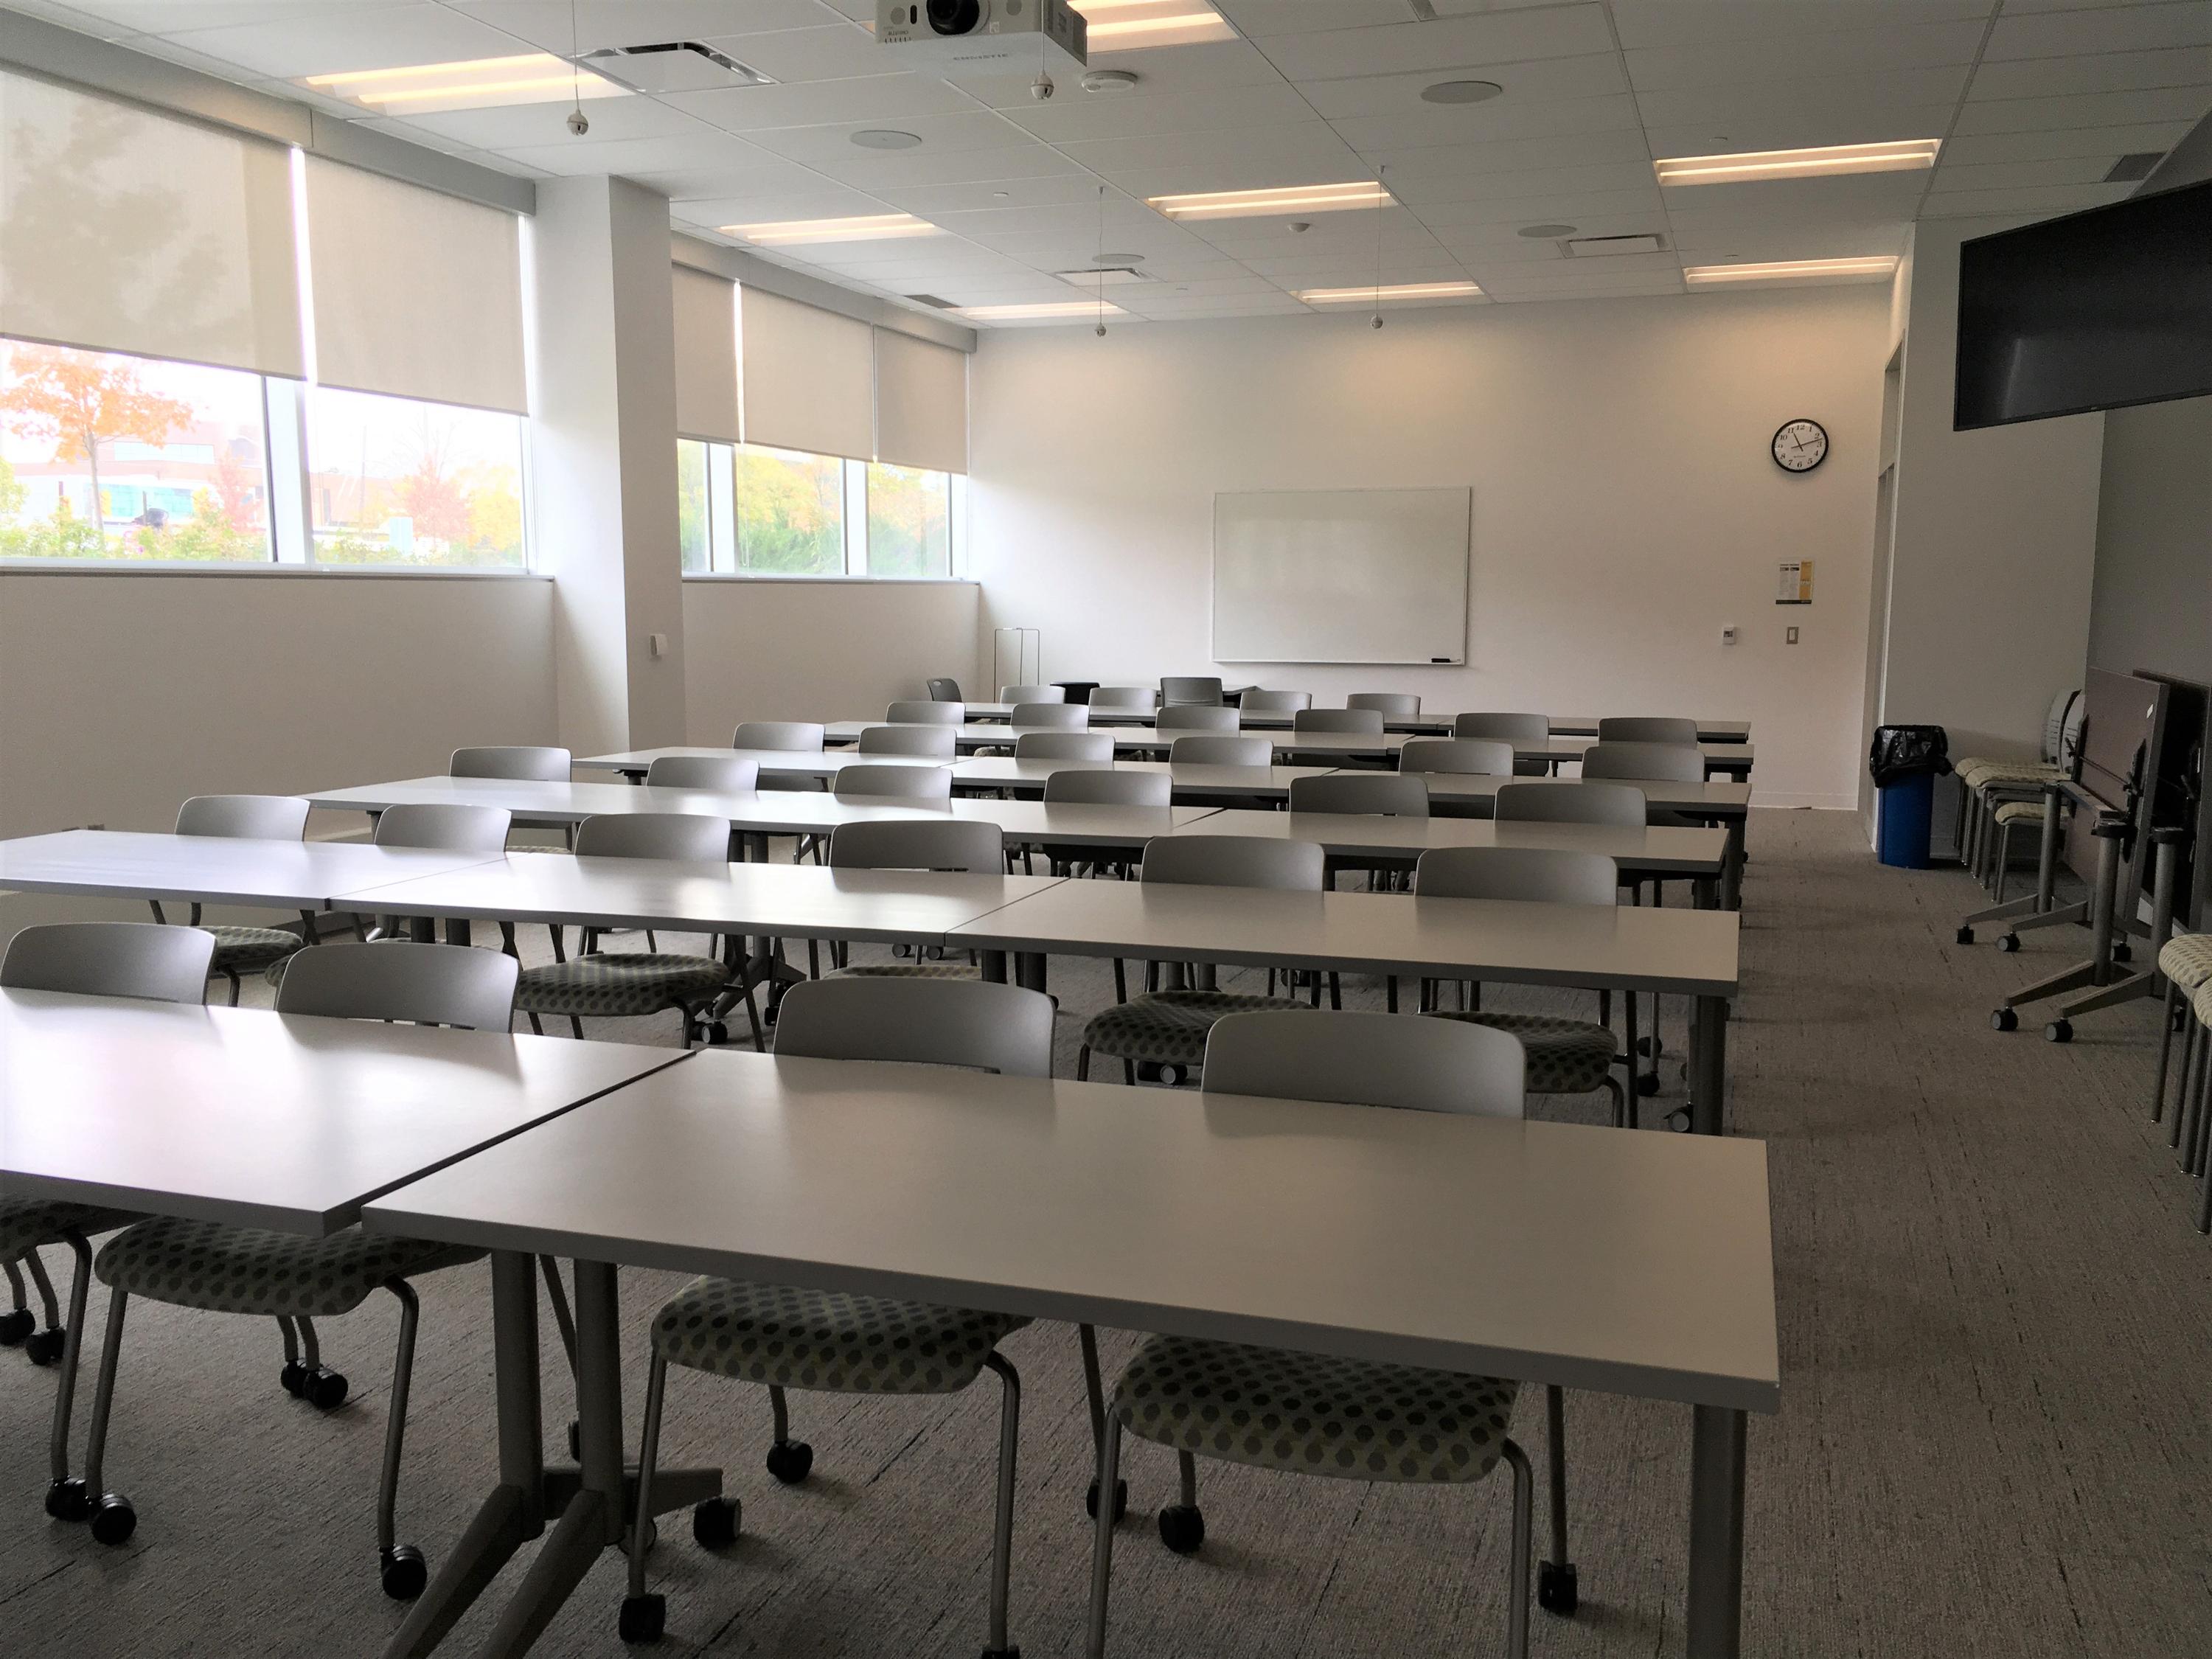
EXP-1686 (also known as the Grad Seminar Room) has a podium computer and an Audio Visual (AV) control panel that is used to control the ceiling-mounted projector and microphones, wall-mounted video cameras and TV screens. There is also a lapel microphone in the room for the person at the podium to use.
Please contact any member of the Health Computing Office for assistance or to have a demonstration of how the room works.
Here are some of the things you need to know about presenting in EXP-1686.
Room Modes
The AV control panel at the podium has a choice of three different modes that you can set for the room.
The first decision you need to make is what mode you want to have for your presentation:
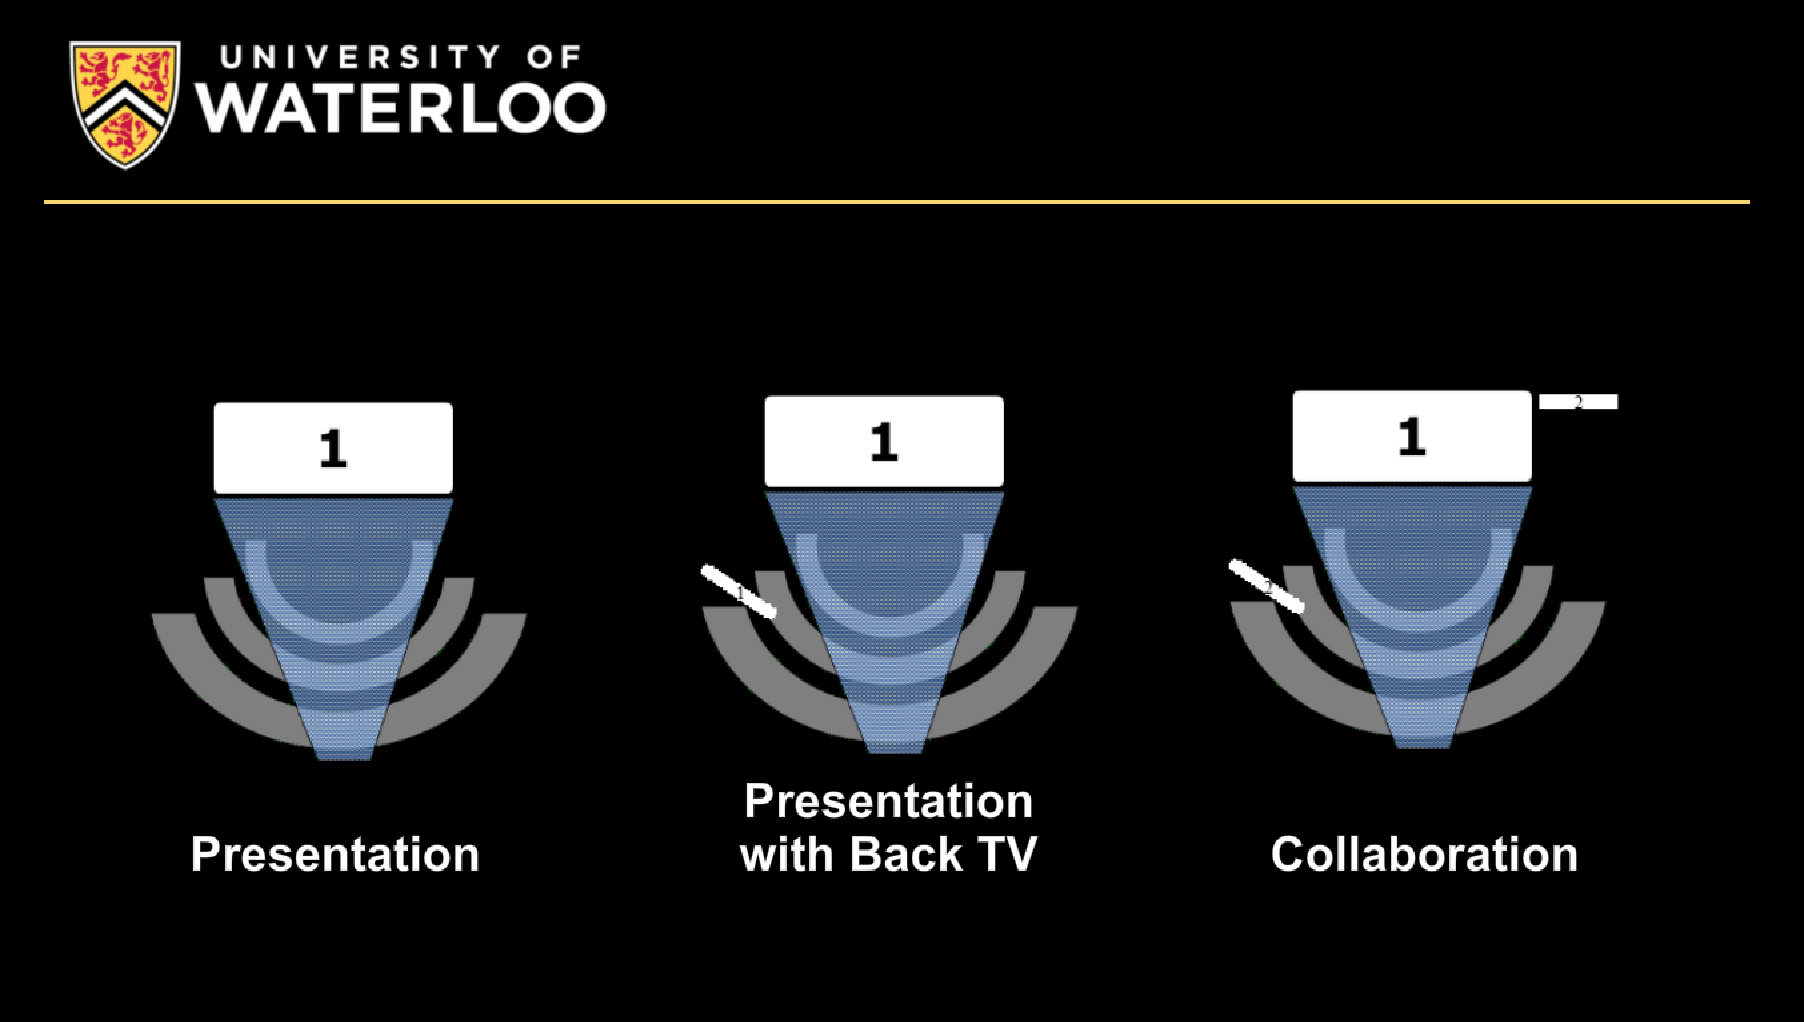
Presentation: This is the most basic room mode. It sends the computer image to the ceiling-mounted projector. No TVs, video cameras or microphones are available.
Presentation with Back TV: The computer image is sent to the front screen (projector) and TV at the back of the room which allows you to see what is on the screen without turning away from the audience. The Front TV, video cameras and microphones are off. This is the most popular mode for in-room presentations with no remote attendees.
Collaboration: All room features are available: Front Screen (projector), Front and Back TVs, Video Cameras and Microphones. By default, the computer screen will be sent to projector (front) and the camera at the back of the room will turn on and display on both Front and Back TVs. These options can be changed. You must select this mode for audio/video conferencing.
If the wrong mode is set, you can switch to another mode by selecting (tapping) the Switch Mode option on the scrolling menu along the bottom of the control panel.

Using the podium computer
- Check that the cables on the left side of the podium and computer are connected properly: Power, Network, HDMI, USB. The VGA cable is for use with older laptops and does not need to be connected to the podium laptop.
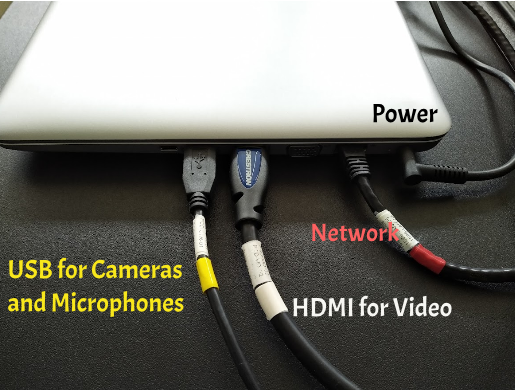
- Log on to the Laptop: With the cables all connected as shown above, power on the laptop (if needed) and then log on using your UW userid and password. The USB cable connects the laptop to the video cameras and microphones (both lapel and ceiling mounted).
Using your own computer (BYOD)
- Disconnect the HDMI and USB cables from the podium laptop and connect to your computer. You may need an adapter if your computer does not have connections for HDMI or USB Type A. The USB cable connects the laptop to the video cameras and microphones (both lapel and ceiling mounted).
- If your computer has an older VGA connection, you can use the VGA cable provided. With VGA connections, you will need to connect the audio jack to your computer if you need audio in your presentation.
- When done, please reconnect the cables to the podium computer.
Audio Setup on Windows computers
When you log on to a Windows computer, the laptop microphone may be set as the active recording device. This can cause an echo at the remote location so you need to change it if you are using Collaboration mode. Follow these instructions:
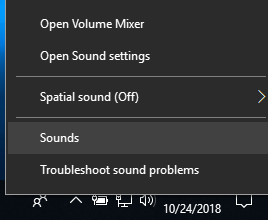
- Launch the Sound Control panel dialog. Right-click on the Sounds icon of the taskbar located in the lower right corner of the screen. Select the Sounds option from the popup menu.
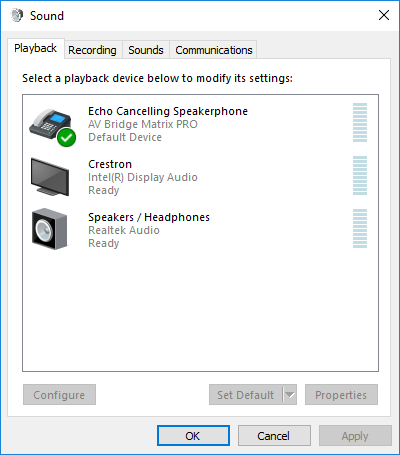
- Click on the Playback tab of the Sound control menu and select "Echo Cancelling Speakerphone" and then click on the "Set Default" button.
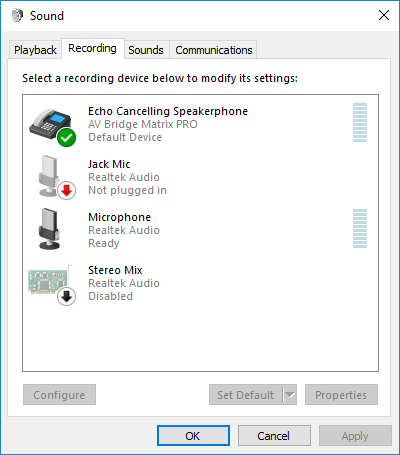
- Click on the Recording tab of the Sound control menu and select "Echo Cancelling Speakerphone" and then click on the "Set Default" button. Click OK to dismiss the Sound control menu.
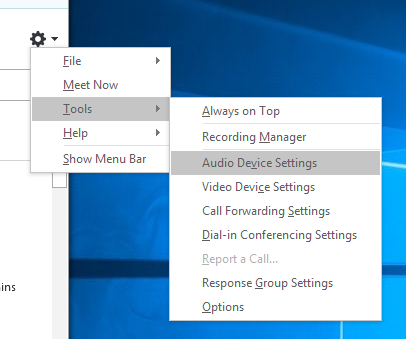
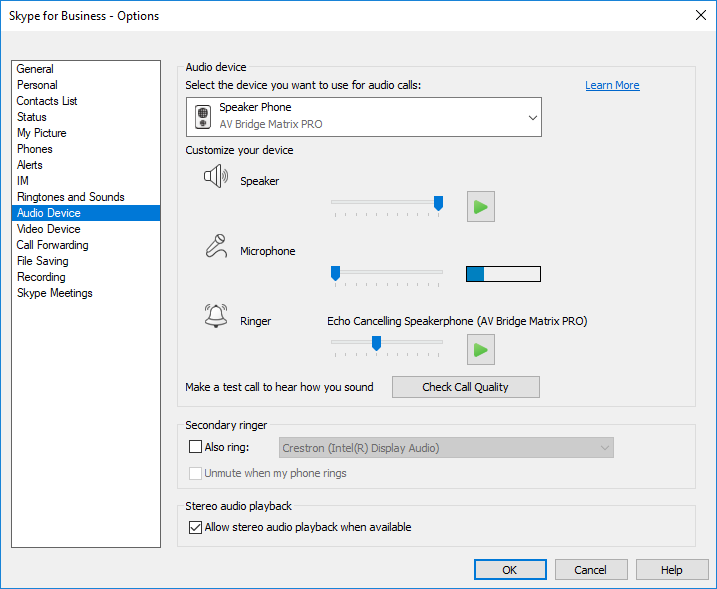
- If you are using Skype for Business confirm the setting: Navigate to the Audio Device settings by clicking on the small gear on the right side of the icon row (or click on the small triangle next to the gear and select Tools, then Audio Device Settings)
- If not already set, change the Audio Device setting in Skype for Business to "Speaker Phone - AV Bridge Matrix PRO" in the Audio device list. Click OK.
Starting your presentation
- Select the right presentation mode: If you arrive and system is powered on, it is recommended that you select the Switch Mode option to get back to the start to make sure the room is in the right mode.
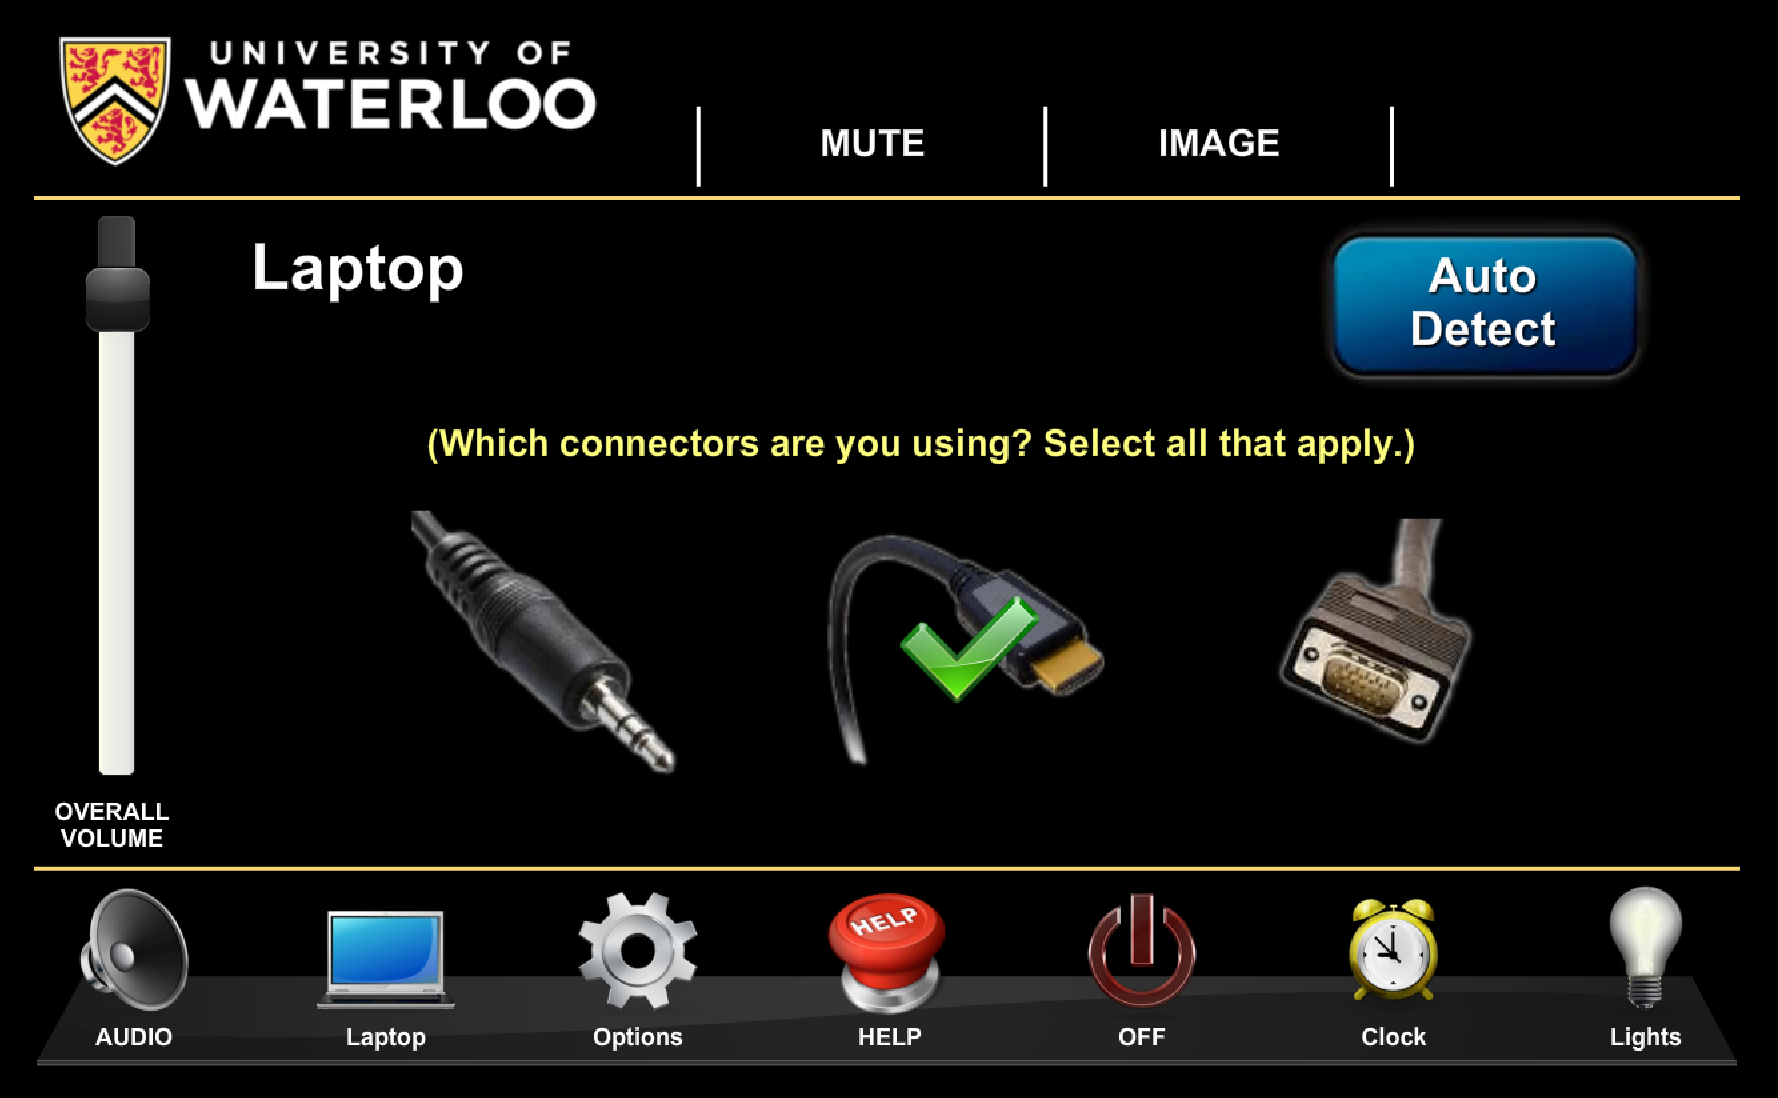
- Send the Laptop image to the screen and/or TVs: Select the Laptop option on the lower menu (if it doesn't appear, slide the scrolling menu to the right or left until the Laptop option appears).
- Choose the input that matches what you have connected (see below): HDMI (middle) carries audio and video, VGA (right) carries only video so you will need to select the audio jack also (and have it connected to the headphone output on computer). Tap the appropriate connection.
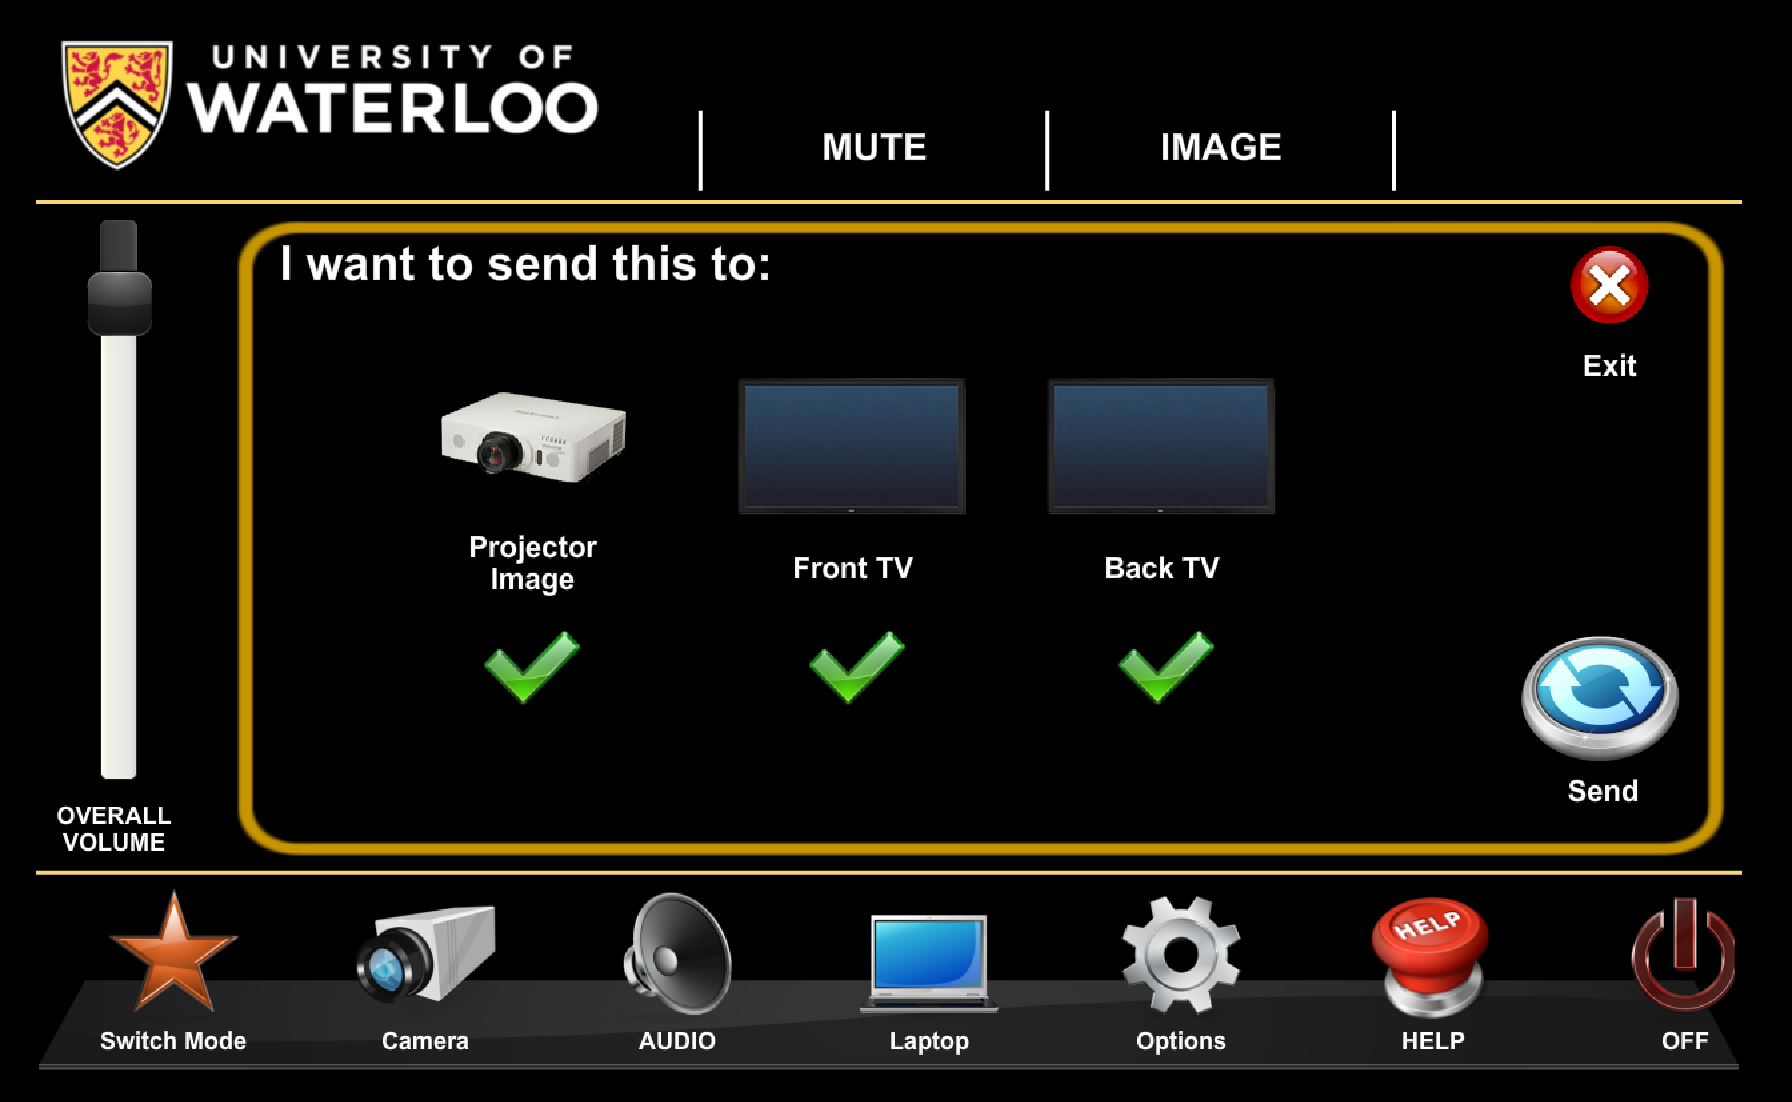
- The control panel will then show the available options for displaying the laptop image (see below): Projector, Front TV, Back TV. The options shown will depend upon which presentation mode you have selected. When you have chosen the options you want, hit the "Send" icon to send the screen to the selected devices.
Turning TVs on and off
In Presentation with Back TV and Collaboration modes you can turn the available TVs on and off using the Options selection on the scrolling menu along the bottom.

Working with the cameras
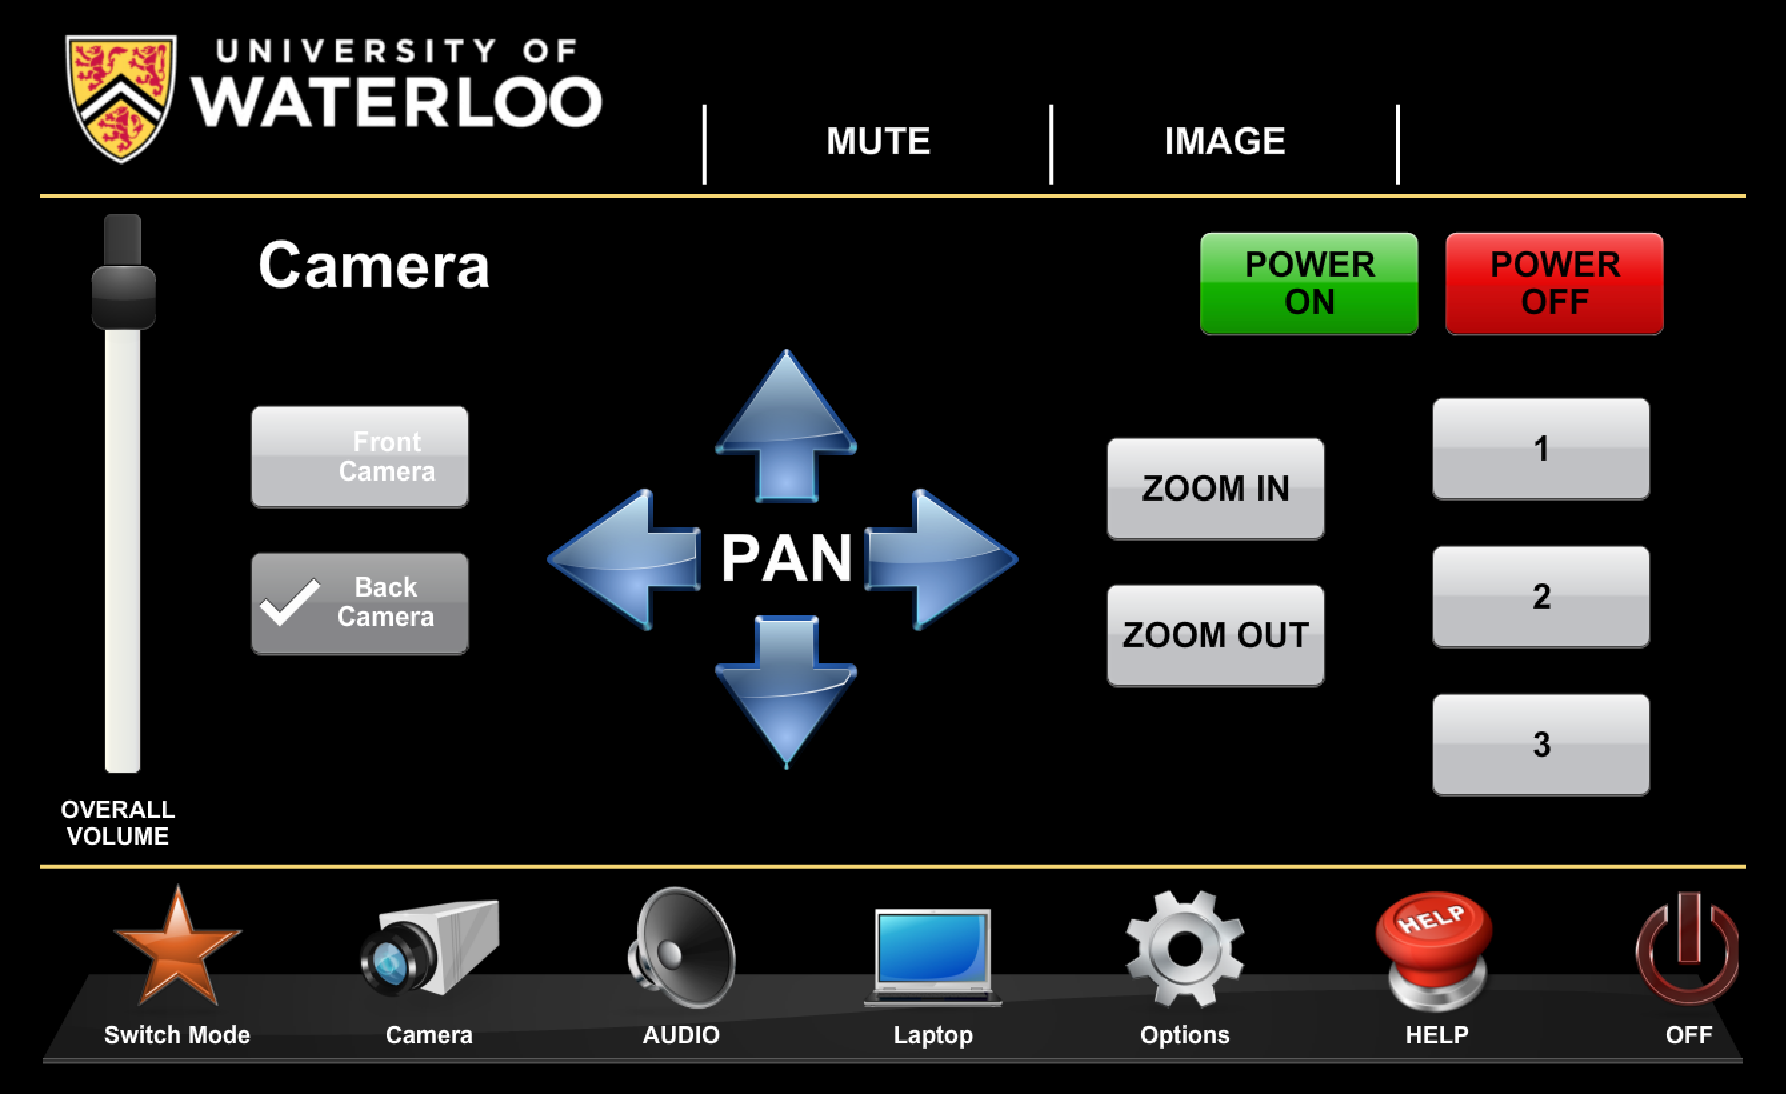
When you select the Camera option from the scrolling menu, you will first be shown options for displaying the camera image. Choose a screen (Back TV) by touching one of the options and then hit Send. While not required, this is useful for setting the camera pan and zoom angles and you can then either turn off the TV screens or send the laptop display to the TVs.

The Camera menu allows you to switch the active camera between Front and Back cameras. Use the "Zoom In" and "Zoom Out" buttons to
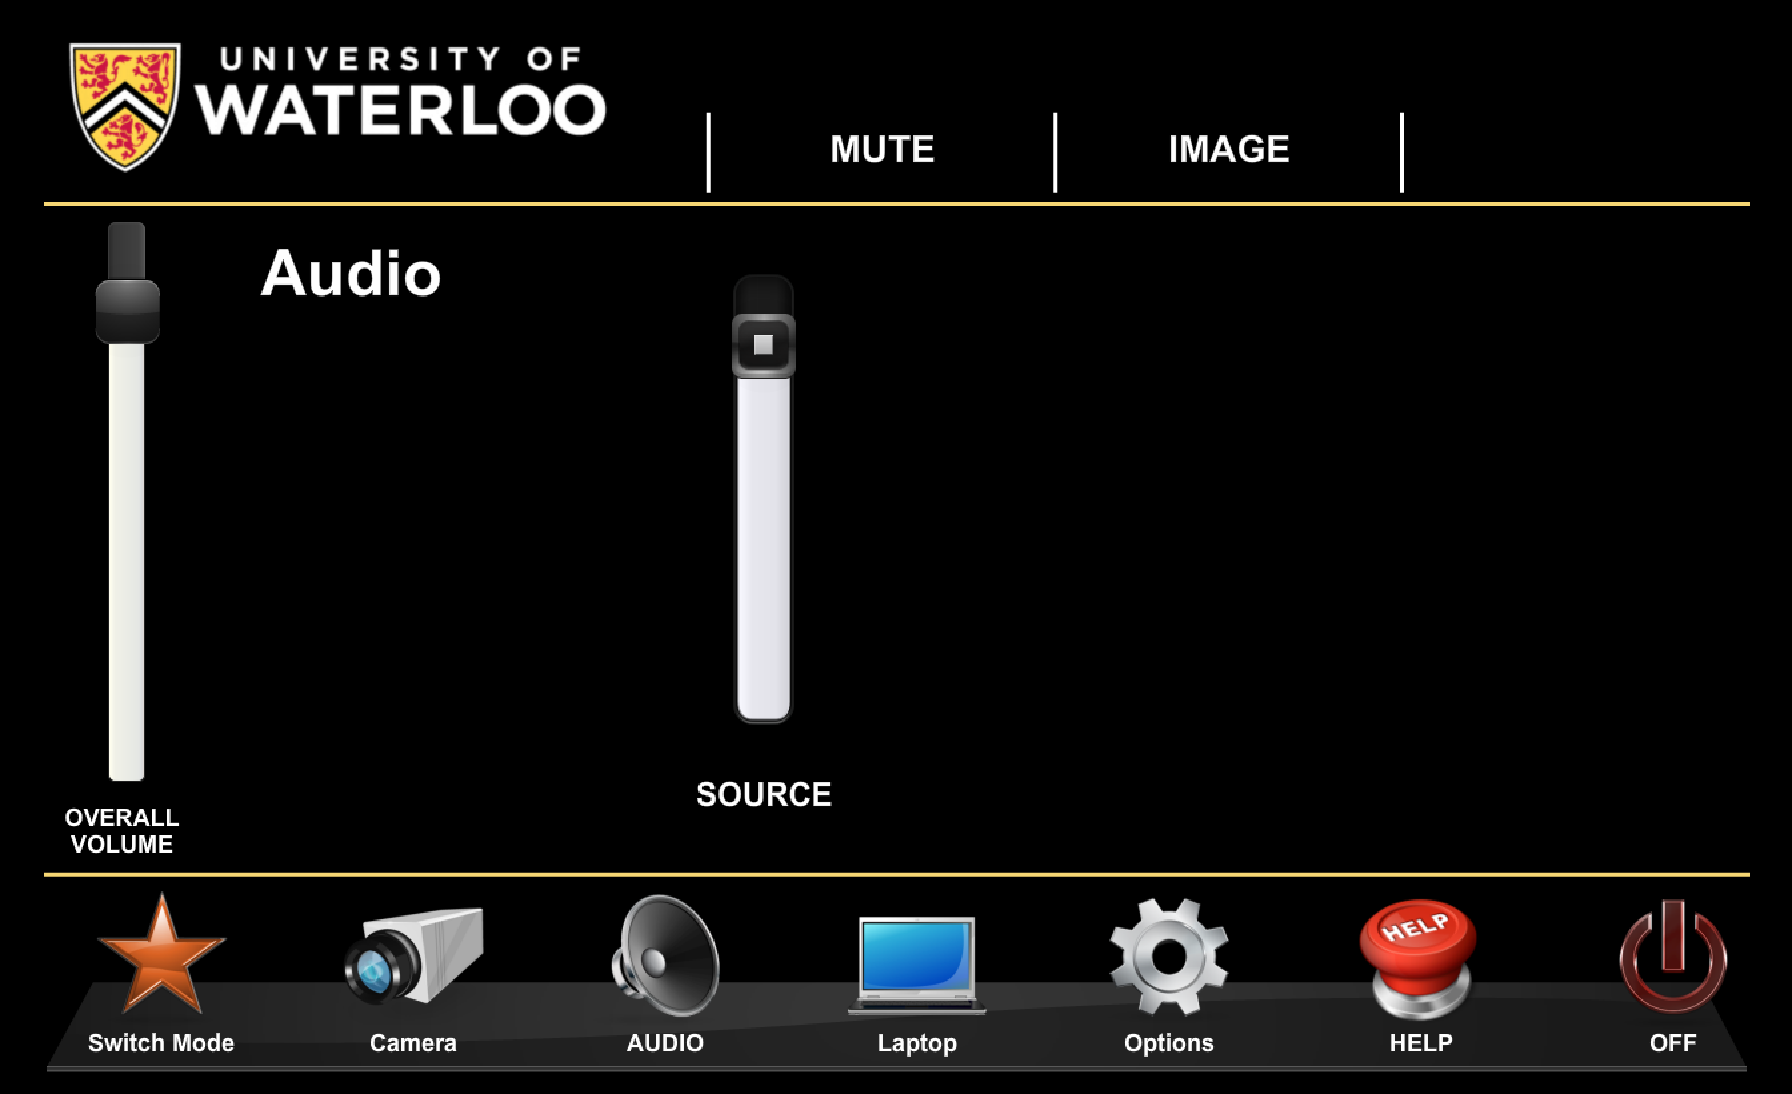
Adjusting the volume
If the sound from the speakers is too loud, you can adjust it from the control panel by selecting the Audio option from the scrolling menu