How do I setup eduroam?
NOTE: If you have a Robot that doesn't support wpa2 enterprise please create a ticket with IST by email: helpdesk@uwaterloo.ca telling them that you need a Wi-fi access for this device.
Staff, Faculty and Students with a WatIAM account
Waterloo Identity and Access Management (WatIAM) credentials are required to authenticate to the wireless network.
Table of contents
How do I connect to Eduroam automatically
- Select Eduroam from the list of available Wi-Fi networks
- When asked for a userid and password, please enter:
- youruserid@uwaterloo.ca
- Your WatIAM password
How do I connect using eduroam configuration assistant tool?
The eduroam Configuration Assistant Tool is recommended to configure most popular devices for the eduroam wireless network (Windows 10, 8.1, 7, MacOS, Linux, iOS). Android and Blackberry devices should follow the device specific connection guides in order to connect.
To download the eduroam configuration file for your device:
- Visit: eduroam Configuration Assistant Tool. If you are connectet to "uw-wifi-setup-no-encryption", you will see a link to follow that will take you to the configuration assistant tool if you open a web browser.
- Click "Download your Eduroam installer" at the bottom of the page
- Select "University of Waterloo" from the home institution list. If University of Waterloo is not automatically listed, you will need to search for it in the list.
- Select the type of device you are using and download and run the configuration file.
- Follow the on screen instructions and enter your WatIAM credentials. Upon entering your credentials, please attempt connecting to Eduroam.
How do I connect to the eduroam wireless network using Windows 10?
If you're unable to connect to Eduroam on Windows 10 using the Configuration Assistant Tool, these detailed instructions will help you to connect to the network.
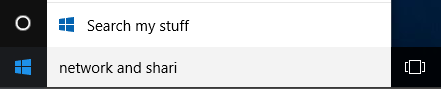
- Using the taskbar search field, search for Network and Sharing Center.
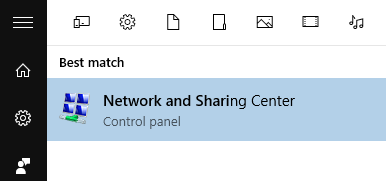
- When the Network and Sharing Center option appears, click on it.
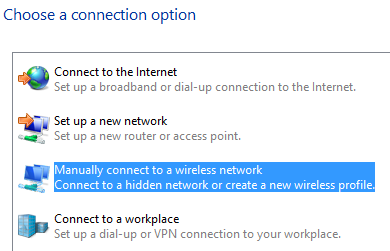
- Click on Set up a new connection or network link.
- Select Manually connect to a wireless network option, and click Next.
- Configure as follows:
- Network Name: Eduroam
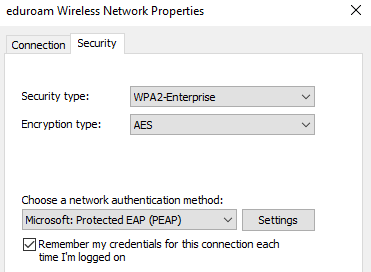
- Security type: WPA2-Enterprise
- Encryption type: AES
- Check Start this connection automatically
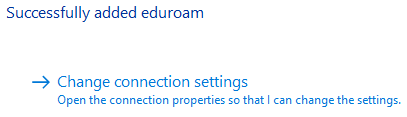
- Click Next
- Select Change connection settings.
- Go to the Security tab, and click Settings (right of Microsoft: Protected EAP (PEAP).
- Under Trusted root Certification Authorities, slect GlobalSign Root CA and then click Configure...(right of Secure password (EAP-MSCHAP v2 dropwdown).
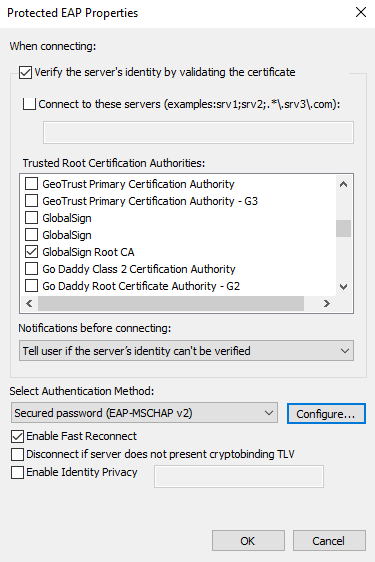
- Ensure "Automatically use my Windows login name and password (and domain if any)" is unchecked, and click OK.
- Close Protected EAP Properties and eduroam Wireless Network Properties boxes by clicking OK twice.
- Close Manually connect to a wireless network window.
- Exit Network and Sharing Center window.
- When logging in to Eduroam, you will be prompted to enter userid@uwaterloo.ca and WatIAM password.
How do I connect to eduroam wireless network using a iOS device?
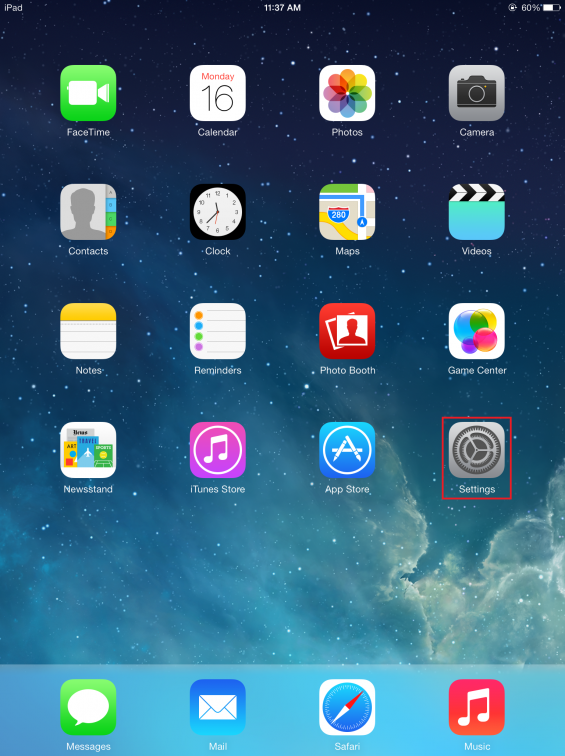
- In order to connect to eduroam from your iOS device, locate and open the Settings application on your home screen.
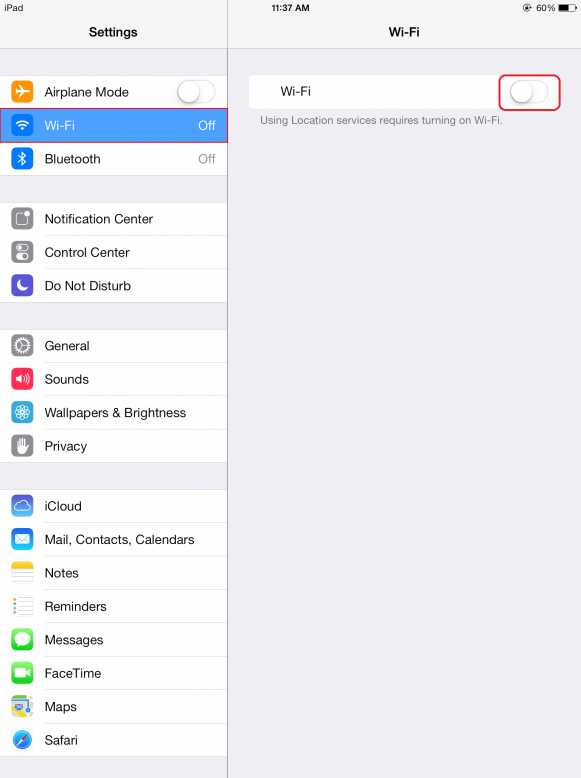
- Select the Wi-Fi option from the left hand side menu and make sure that the Wi-Fi is turned on by toggling the button.
- You will then be presented with a list of available networks under the CHOOSE A NETWORK option. From this list, select eduroam.

- You will be prompted to input a username and password, please enter your QuestID@uwaterloo.ca and your password for the username and password respectively.
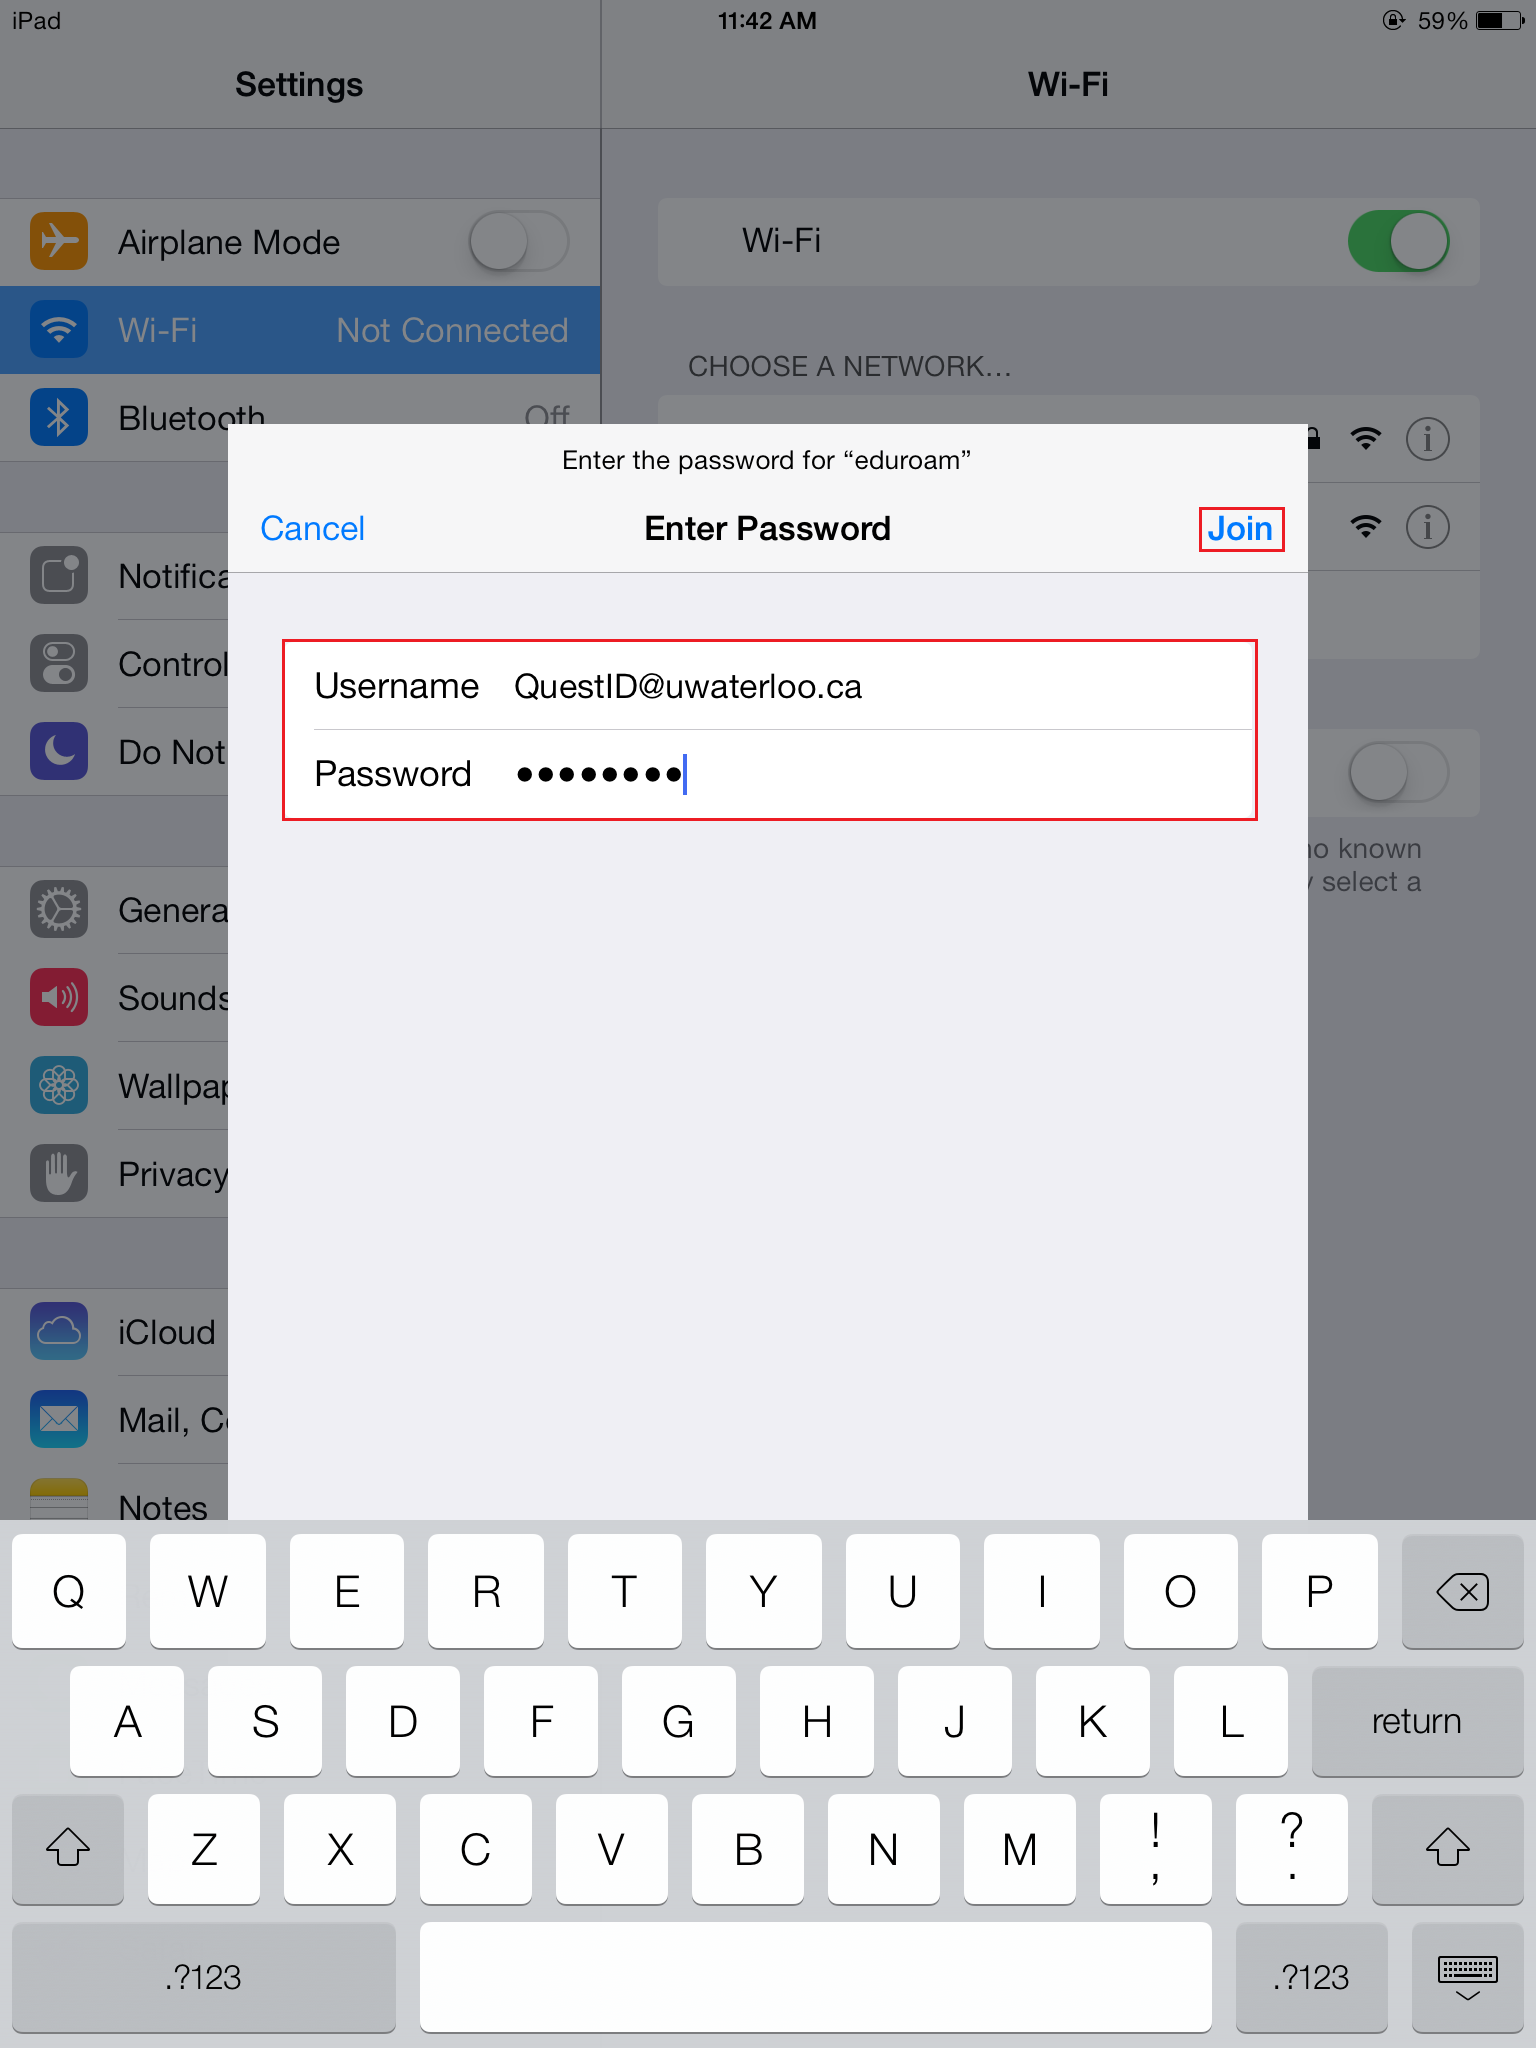
- Select Join once you have entered your username and password.
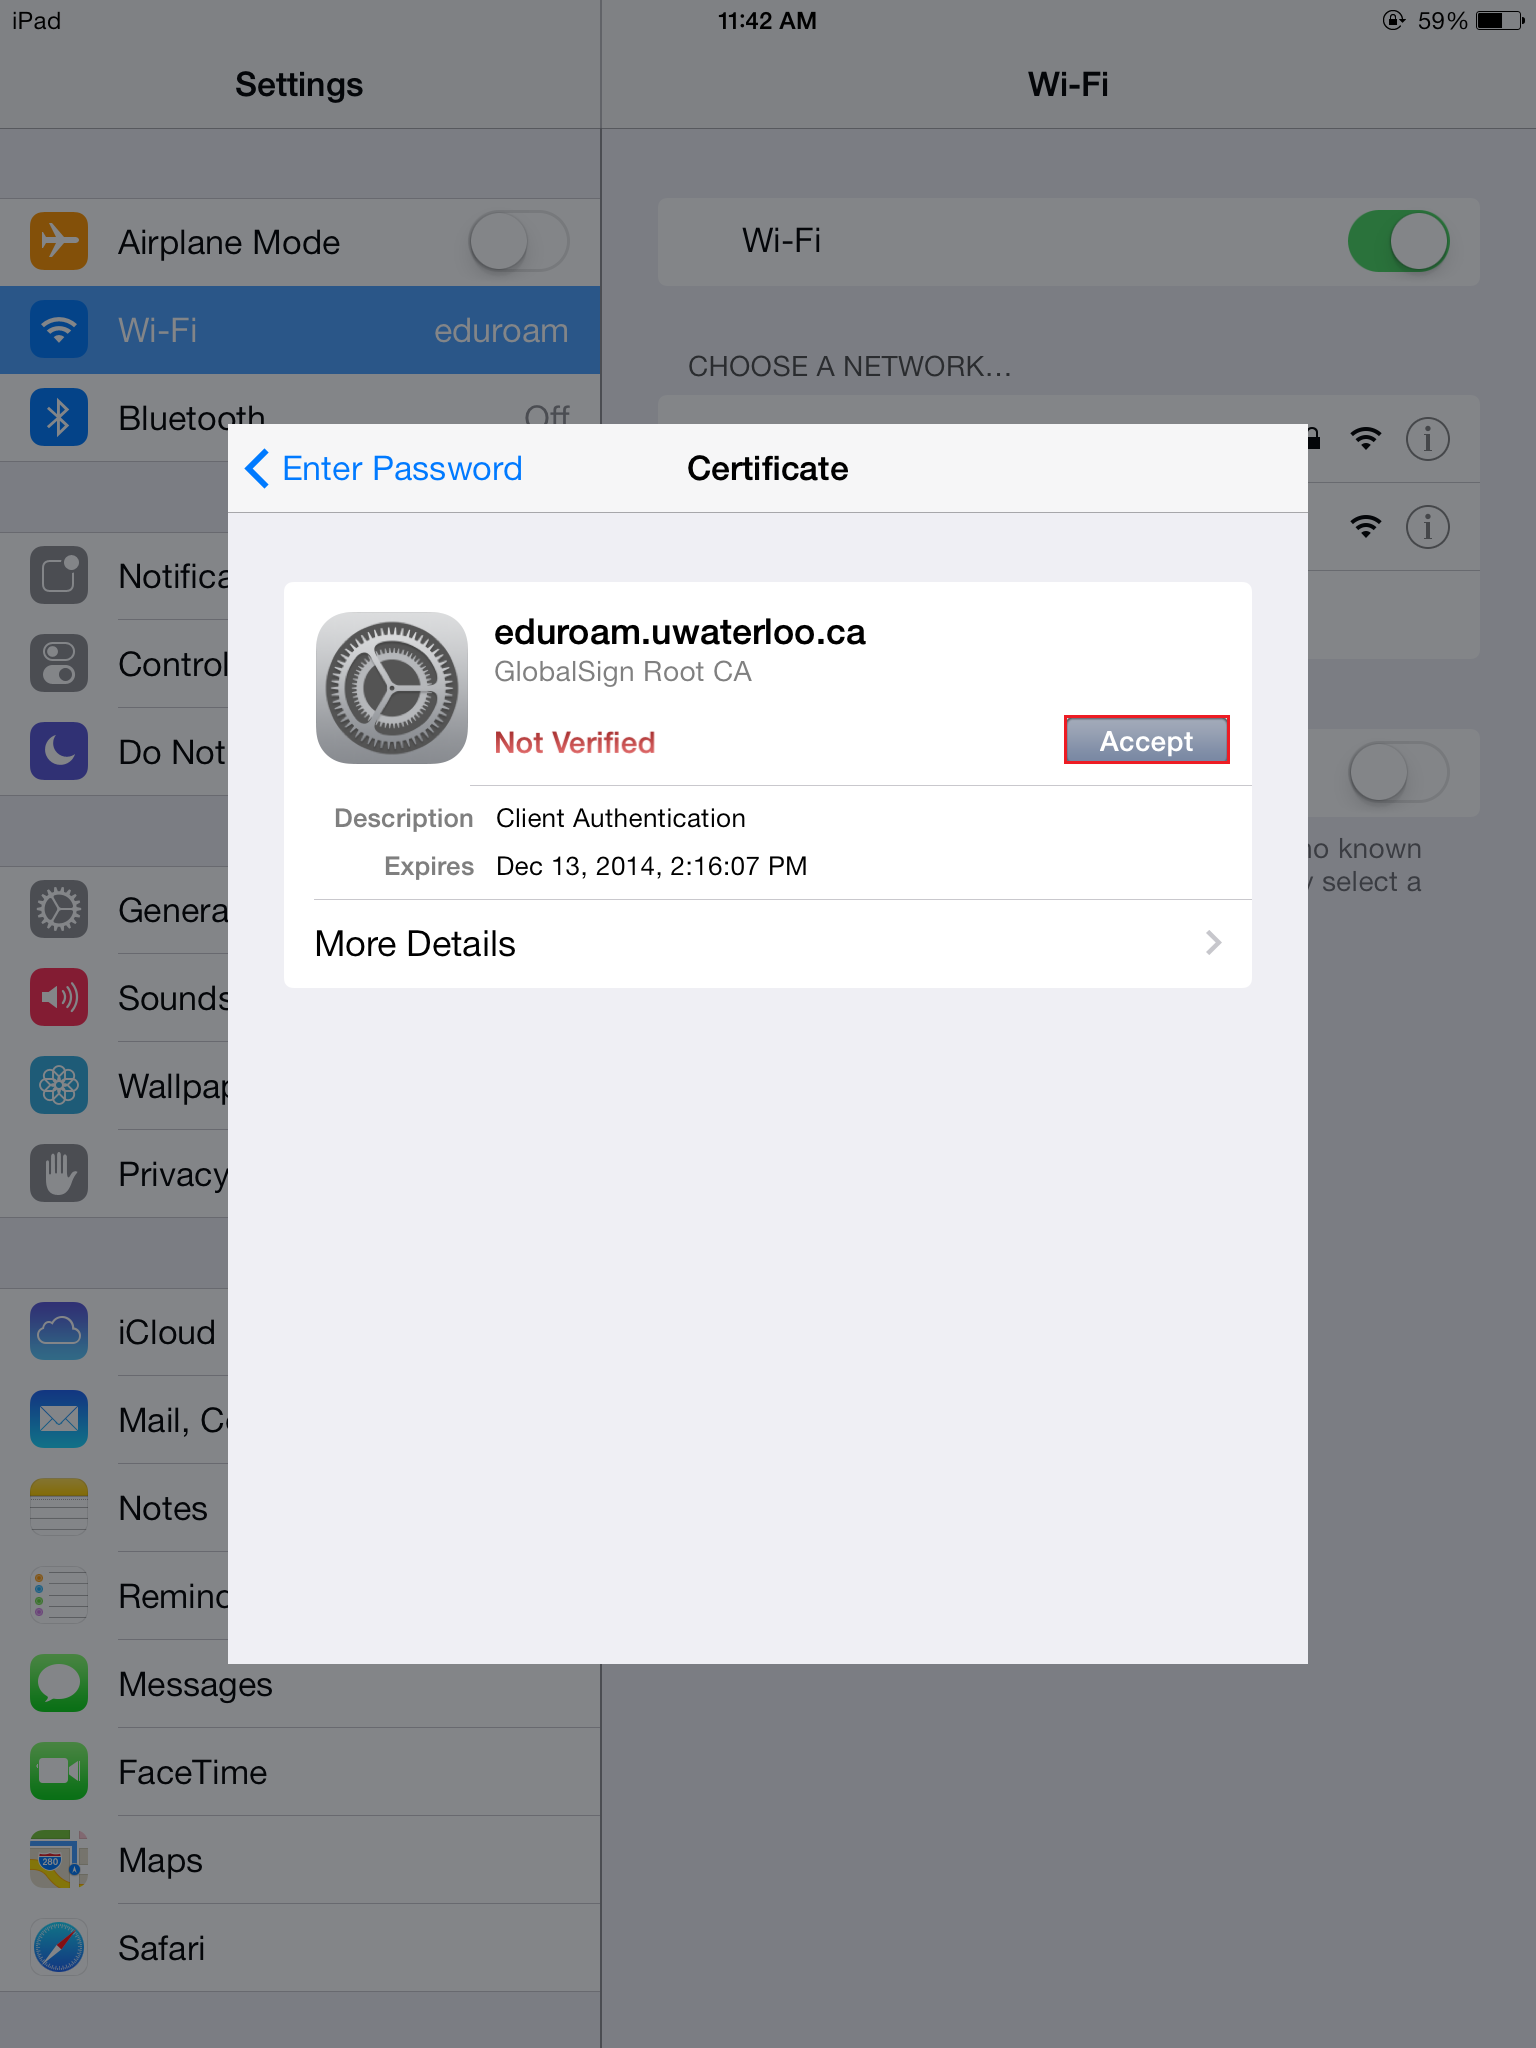
- You will then be prompted to Accept a certificate in order to connect to the network.
- Once you have accepted the certificate, you will be connected to the network and you will notice that it is now listed under Wi-Fi and there will be a Wi-Fi icon at the top of your screen.
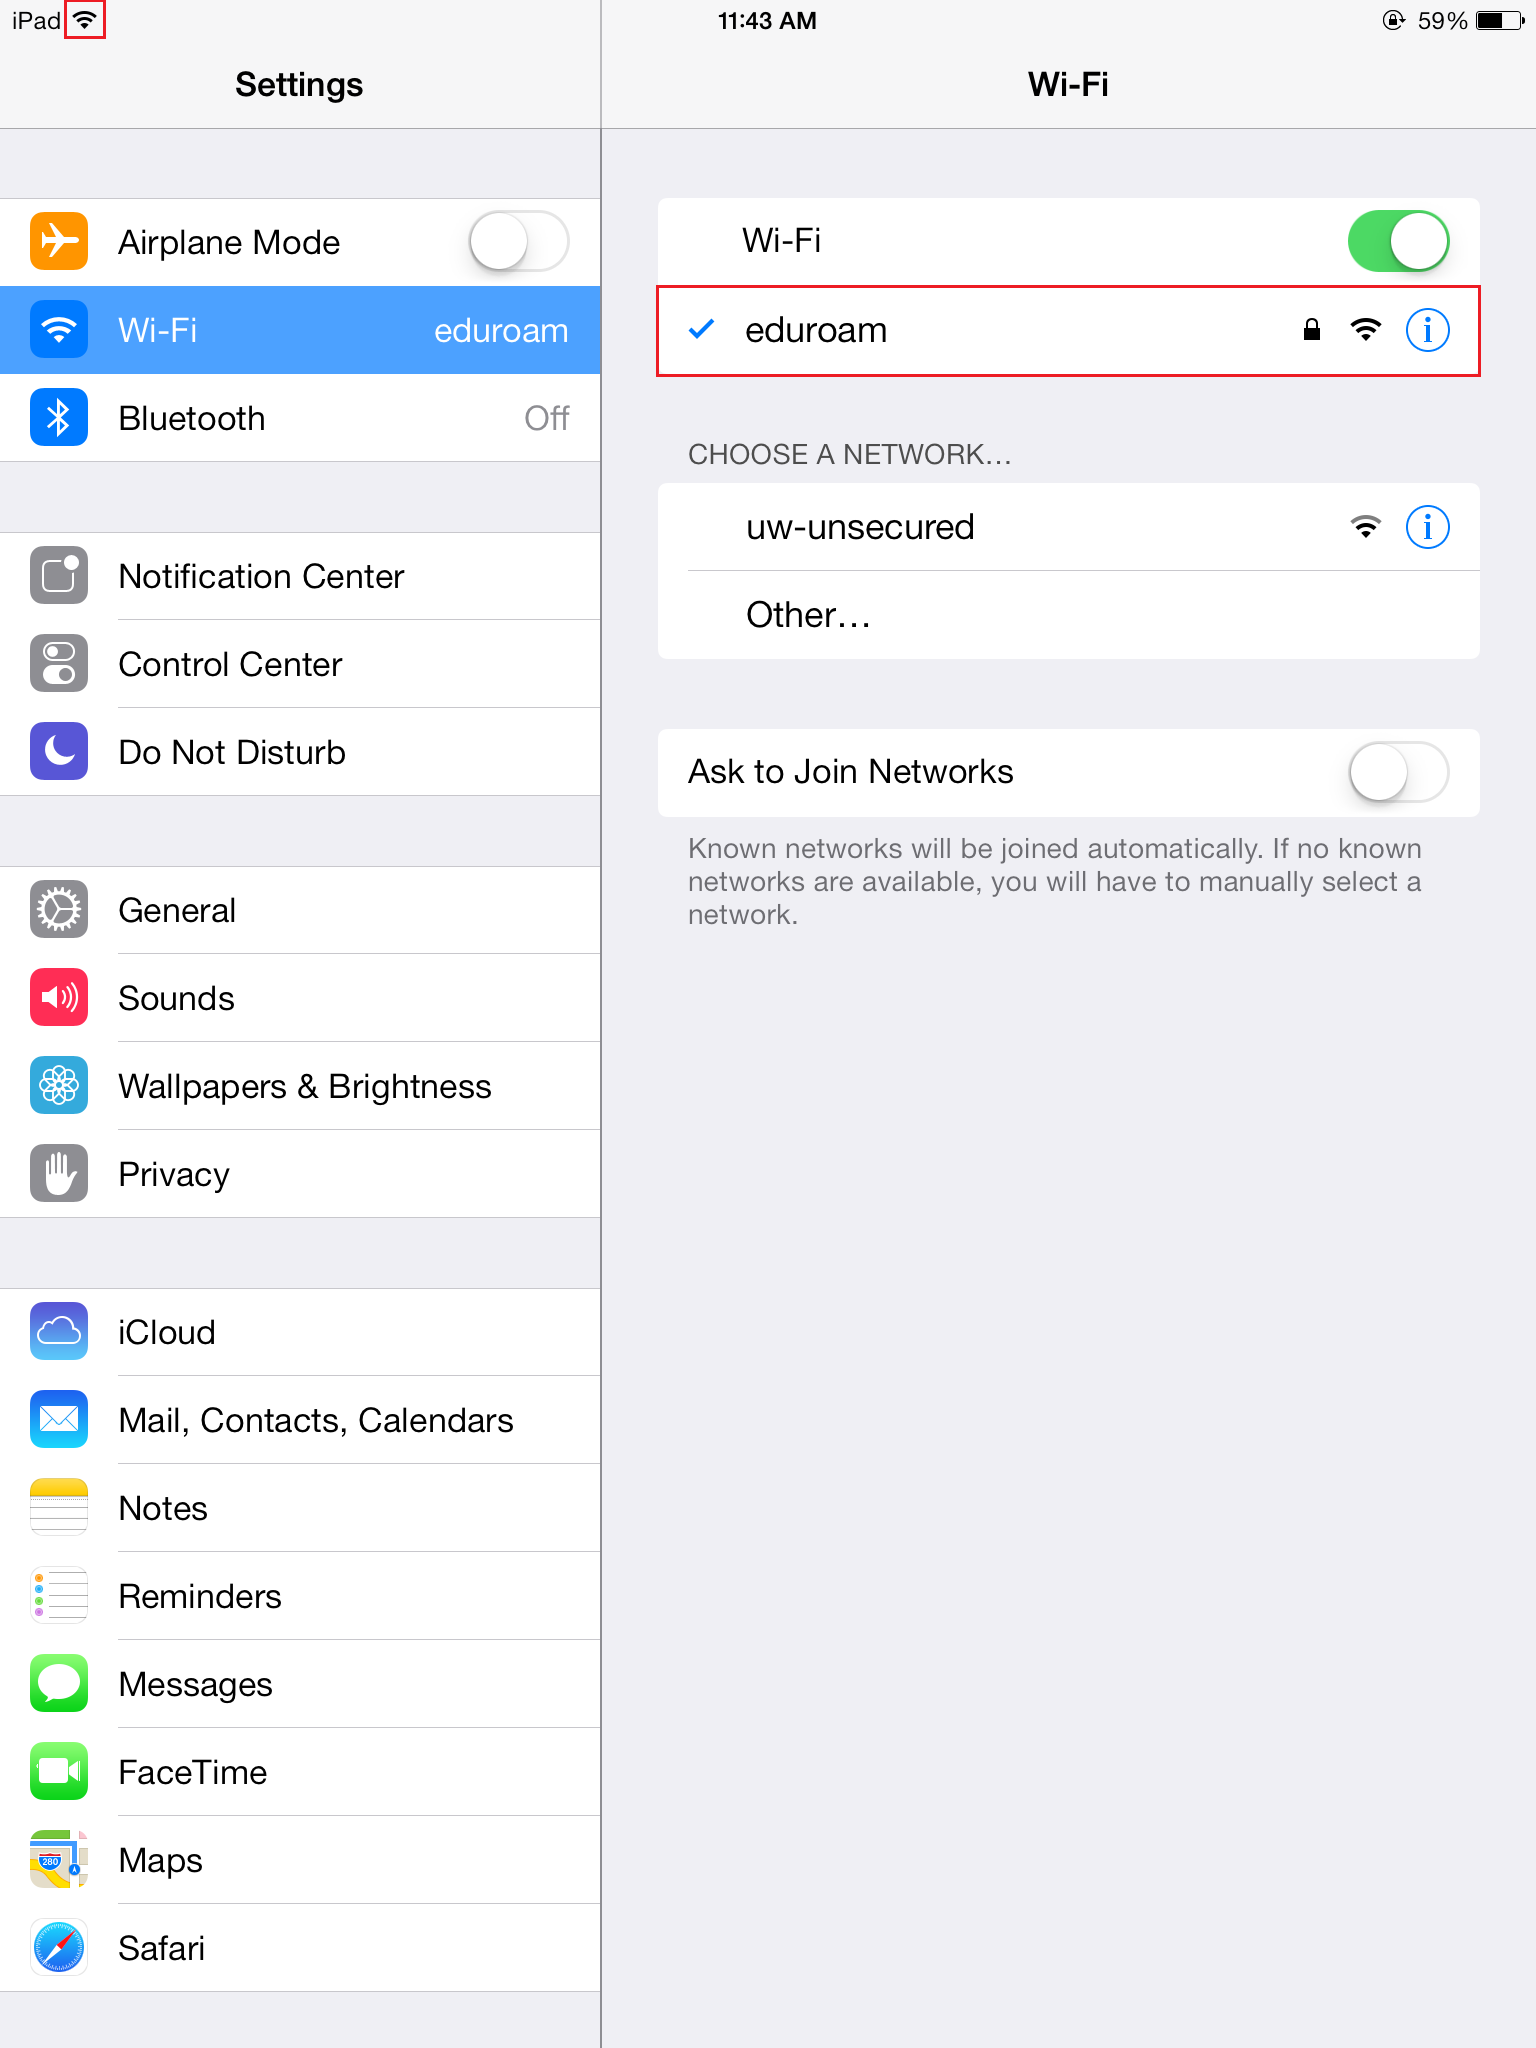
You are now connected to the eduroam wireless network. From now on, your computer will automatically connect to this wireless network.
How to connect to the eduroam wireless network using an android device
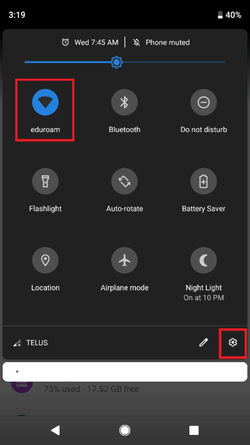
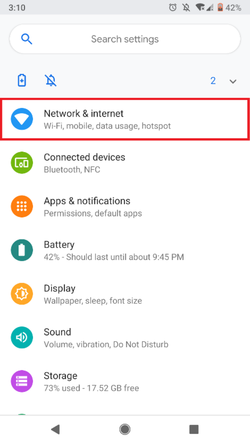
- From the home screen, pull down the drag menu on the top of the screen. Press and hold on the wi-fi icon OR select Settings by clicking the gear icon. In Settings, go to Network & Internet and then click Wi-Fi. Edit media
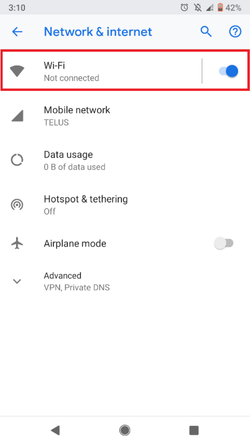
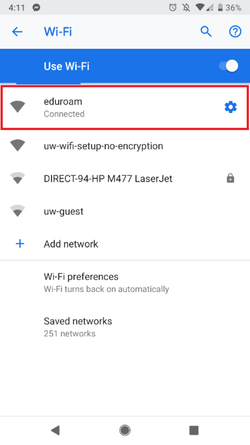
2. Ensure that Wi-Fi is turned on and locate the eduroam wireless network.

3. After clicking on Eduroam, a setting popup where you will configure Eduroam for use.
- Set the EAP method as PEAP
- Set Phase 2 Authentication as MSCHAPV2
- Set CA Certificate as (Unspecified)
- Enter your uwaterloo email address in the Identity field in the format userID@uwaterloo.ca (replace userID with your WatIAM userID)
- Leave Anonymous blank
- In the Password field, enter your WatIAM password
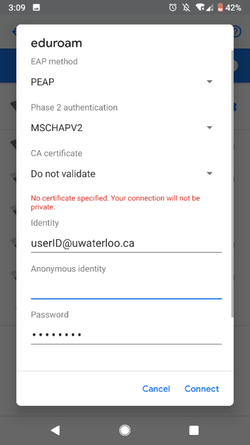
- Click Connect and you should be connected.
Eduroam and Android 7.x.x
- Tap Settings.
- From the menu, tap Wireless networks.
- Tap Wi-Fi settings.
- Tap eduroam.
- From the EAP method drop-down list, tap PEAP.
- From the Phase 2 authentication drop-down list, tap MSCHAPv2.
- From the CA certificate drop-down list, tap Use system certificates.
- In the Domain text box, type: eduroam.uwaterloo.ca
- In the Identity text box, type your UWaterloo email address in the format watiam@uwaterloo.ca(replace watiam with your WatIAM username).
- Clear the Anonymous identity text box so that it is empty.
- In the Password text box, type your WatIAm password.
- Tap Connect.
How do I connect to the eduroam wireless network using Linux (Ubuntu)
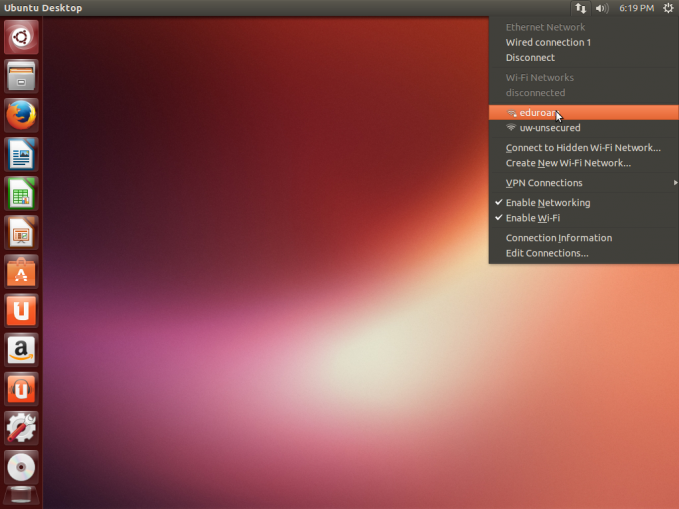
- Click on the wireless option at the top right of your screen and select the eduroam network.
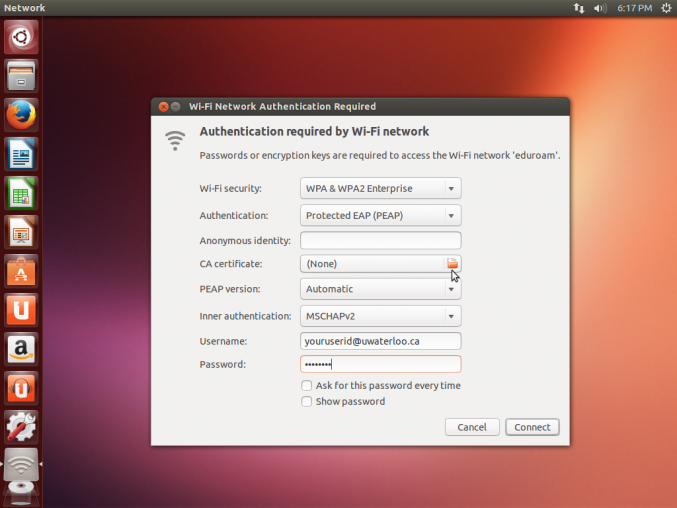
- A window will appear with numerous options and a username/password field. Match those options to the ones shown below and place your UWaterloo user ID (followed by “@uwaterloo.ca”) in the username field, with your UWaterloo password in the password field.
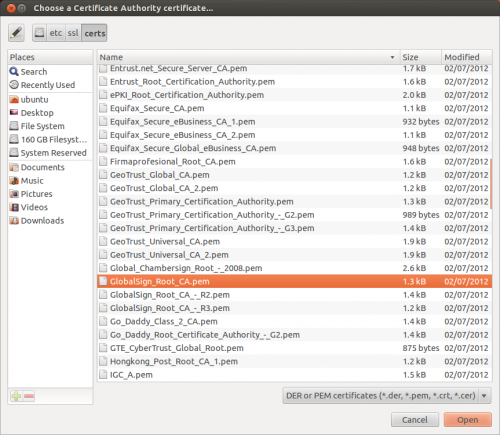
- Then, click on the folder icon next to the CA certificate field. In the file picker dialog, choose file system on the left, and then navigate to: /etc/ssl/certs and choose "GlobalSign_Root_CA.pem".
- After choosing the appropriate CA certificate, your screen should look like the following picture. You can now click the “Connect” button.
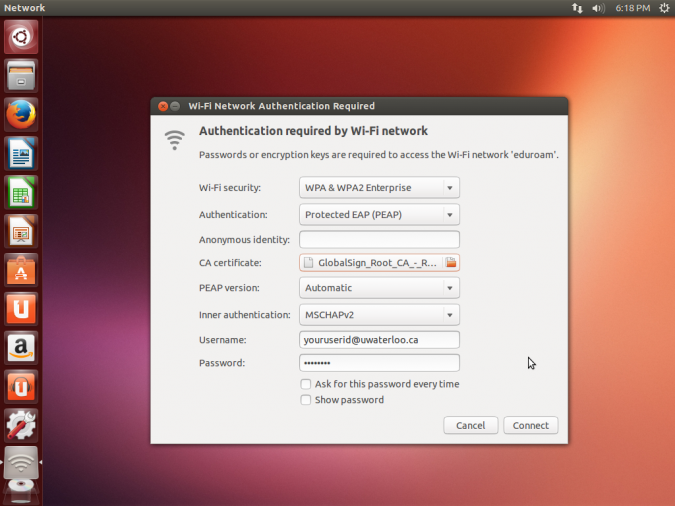
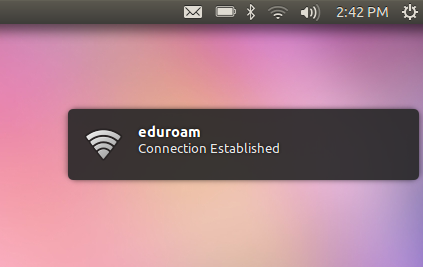
- Upon clicking “Connect” your computer will require a few moments to connect to the Internet. After the process succeeds, you will see a confirmation message in the top right of your screen which states that you are connected to Eduroam.
- The instructions above have been certified to work with Ubuntu 12.04 LTS and 13.04. If you were unable to connect via the above instructions, please try connecting with one of the other 2 Global Sign Root CA certificates shown in Step three. For other versions of Ubuntu, the process may differ slightly.
- For non-Ubuntu distributions, the process is similar. Check to see if your distribution uses the Network Manager applet. If so, you may be able to use the steps above. However, if your distribution does not include the Network Manager applet, or if your distribution uses wicd, you may need to install and configure wpa_suppliant manually.
- If you would like to download your own copy of the certificate, you can find the certificate text on the Global Sign website. You may do so by using wired Internet access, or by using the uw-unsecured network.
What if my device is not listed above?
If your device isn’t listed above, here are the full settings (but in most cases, after selecting the Eduroam wi-fi network, you should just need to enter your userid@uwaterloo.ca and your password).
- Network SSID: eduroam
- Network authentication method: WPA2 Enterprise
- Data encryption method: AES
- Authentication method: Protected EAP (PEAP)
- Inner authentication(or Phase 2 Authentication): MSCHAPv2
- CA Certificate: GlobalSignRootCA
- User ID: userid@uwaterloo.ca
- Password: Your WatIAM password
How do I map a campus-based network drive over Wi-Fi
In order to get access to your files located on a network drive, while you are having a presentation using a laptop with Wi-Fi connection, make sure your laptop is:
- Connected to Wi-Fi (eduroam)
- Connected to Virtual Private Network (VPN)
- If you accessing a network drive, make sure your drive is mapped
Map a network drive (Windows)
- In the Start menu, click Computer.
- In the next window, click Map Network Drive.
- In the Folder box, select letter “N” and type the path to the server:
\\ecfile1.uwaterloo.ca\userid - Click Reconnect at logon
- In the User name box, type your WatIAM ID: nexus\yourid
- In the Password box, type your WatIAM password, and then click OK
Map a network drive (MacOS)
-
Switch to the “Finder” application (click on any empty place on your Mac desktop).
-
Click “Go” on the Finder menu, then click “Connect to Server…” from the drop-down list, or use the keyboard shortcut “command+K”.
-
Enter the following for the N drive in the “Server Address:” input field: N drive: smb://ecfile1.uwaterloo.ca/userid
-
Click on the “Connect” button in the lower-right corner of the window.
-
You will be prompted for your WatIAM credentials: userid and your password.
How do I remove Wi-Fi profiles from Windows 10
When you connect to a wireless network, the settings and profile of that specific network is saved on your computer so that you won’t have to re-enter your network credentials, such as the wireless security key to connect the next time. Once your computer is in range with the wireless network profile that is saved on your computer, it will automatically attempt to connect to that wireless network you have previously connected to.
If you have connected to various wireless networks before, your computer may have problems connecting wirelessly. Removing wireless network profiles on your computer will improve your wireless connectivity.
To start a command prompt as an administrator
In the search box on the taskbar input "Command Prompt"
Right-click Command prompt, and then click Run as administrator.
If the User Account Control dialog box appears, confirm that the action it displays is what you want, and then click Continue.
Type the following command:
netsh wlan show profiles > press enter
Locate the name of the wireless profile you'd like to forget.
Type the following command:
netsh wlan delete profile “PROFILE NAME”
Replace the “Profile Name” with the name of the Wi-Fi network you want to erase.
Example:
netsh wlan delete profile eduroam or netsh wlan delete profile uw-unsecured
Now, you are ready to connect to eduroam secured network AT Univertsity of Waterloo
Connecting to the eduroam wireless network
Waterloo Identity and Access Management (WatIAM) credentials are required to authenticate to the wireless network.
- Select Eduroam from the list of available Wi-Fi networks.
- When asked for a userid and password enter your full userid@uwaterloo.ca and your WatIAM password.
How do I remove wi-fi profiles from OS X
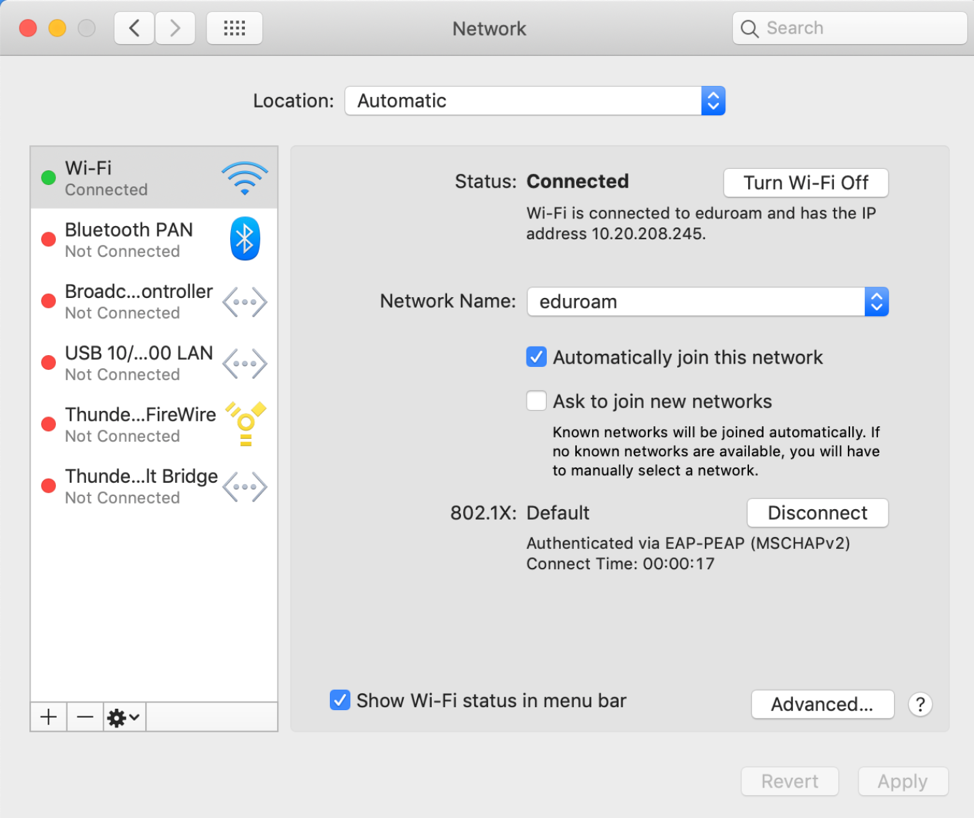
- Go to System Preferences > Network and select Wi-Fi on the left side as shown below:
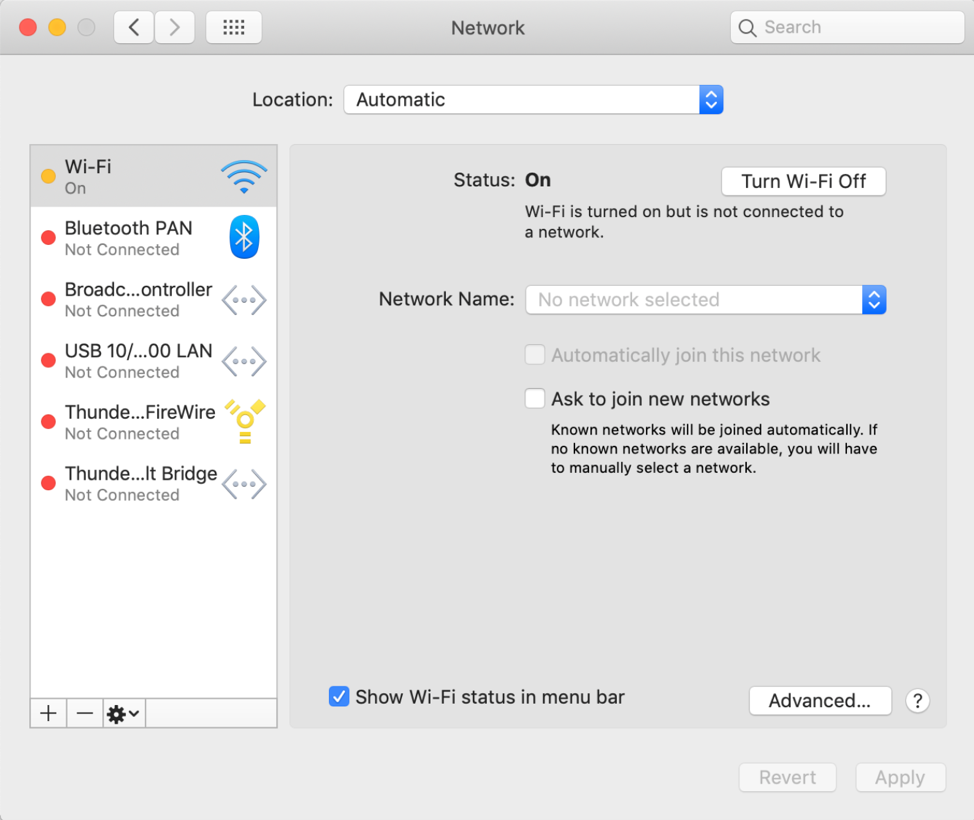
- Ensure you are disconnected from the wireless network by clicking on the Disconnect button. The Network Name should show No network selected as seen below:
- Click on the Advanced button
- Select the wireless network from the list as shown:
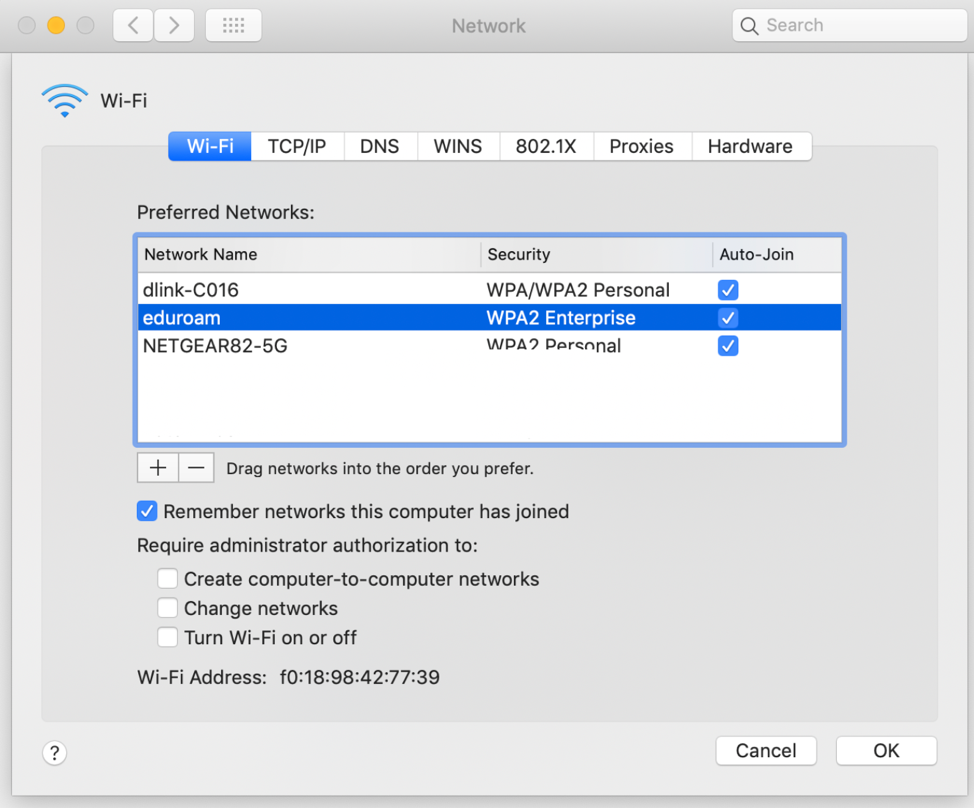
- Then click on the "-" button to remove it from the list
- Note: you maybe prompted to confirm the removal
- Click on the OK button
- Click the Apply button
How to connect a Raspberry Pi to Eduroam
Please follow the instructions below:
- Please download the certificate first and save it somewhere on your machine's hard drive. Here is the link: Global Sign Certs
- Open "/etc/network/interfaces"
Go to File Manager, and navigate to "/etc/network" (no quotes).. Right click on the file called interfaces, and select Open With... → proceed to Custom Command Line. Under the Command line to execute, type in "sudo leafpad" (no quotes). Press Ok - Edit "/etc/network/interfaces" (ignore all "#" lines; they are just there for comments). Save and Close afterwards.
- auto lo
- iface lo inet loopback
- iface eth0 inet manual
- allow-hotplug wlan0
- iface wlan0 inet manual
- wpa-roam /etc/wpa_supplicant/wpa_supplicant.conf
- iface default inet dhcp
- Open "/etc/wpa_supplicant/wpa_supplicant.conf"
Navigate to "/etc/wpa_supplicant" (no quotes). Right click on the file called wpa_supplicant.conf. Then, select Open With... → proceed to Custom Command Line. Under the Command line to execute, type in "sudo leafpad" (no quotes). Press Ok. - Edit "/etc/wpa_supplicant/wpa_supplicant.conf". Don't forget to Save and Close the file.
Don't just copy and paste the code below. Please read to make sure to read every line carefully before editing the wpa_supplicant.conf script. (Note: "#" is a comment to guide you where you need to go.) - This is the common configuration script for "wpa_supplicant.conf" file you will need to connect to Eduroam:
- network={
- ssid="eduroam"
- identity="myuserid@uwaterloo.ca"
- password="mypass"
- ca_cert="/etc/certs/ROOT-R1.crt"
- ## replace ROOT-R1.crt with the certs file
- key_mgmt=WPA-EAP
- eap=PEAP
- phase2="auth=MSCHAPV2"
- scan_ssid=0
- mode=0
- }