Printing services
MME request that all printers be setup and configured by the IT team. We ensure the printer is locked down for users via active directory security groups and the printer is located on a private network to reduce the risk of unauthorized access. Please email: mmehelpdesk@uwaterloo.ca for help setting up and configuring your printer.
Instructions on how to
Table of Contents Printers
Install a printer using Windows
Step by step walk through:
- Go to Type here to search
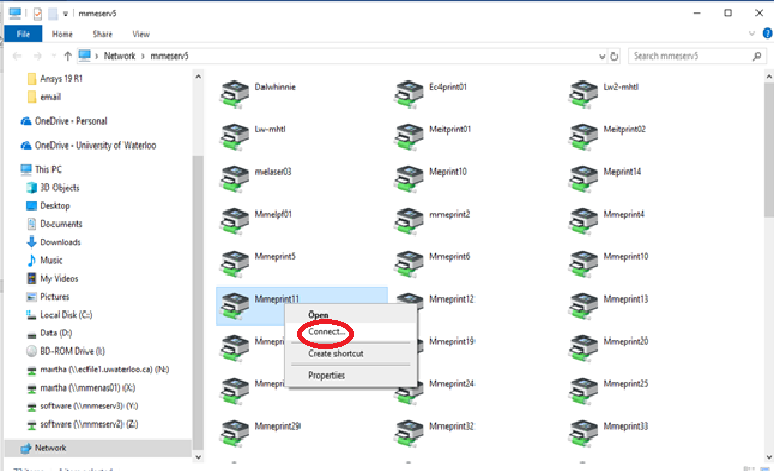
- Type in \\mmeserv5.nexus.uwaterloo.ca

- Press enter
- Make sure you are login with your nexus/quest account. If you are not, then enter nexus\your_userID in the User name field. Do not include your @uwaterloo.ca. Ex. nexus\mmwoldea.
- Enter your Password.
- Check the "Remember my credentials" checkbox.
- Click OK.
- A list of printers should appear; right Click on a printer that you want to connect to.
- Click Connect.
Installing a printer using MacOS
-
To install a printer, go to the System Preferences...located under the Apple Menu (on the top left).

-
Double-click on the Printers & Scanners icon.

-
Click on the plus (+) sign to add a new printer. If the lock at the bottom left of the window is locked, unlock it.

- The following window will open, and you will fill in the spaces as per instructions below:
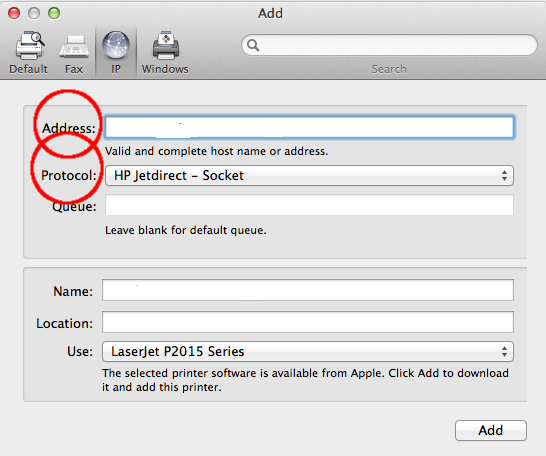
- Click on the IP tab.
- On the Address field, enter: printername.uwaterloo.ca
- Set Protocol field to: Line Printer Daemon -- LPD or HP if it is an HP printer
- On the Queue field, enter the desired printer name as indicated on the table above (see step 1).
- On the Name field, enter the official queue name or some other name (using official queue name will make troubleshooting easier).
- On the Location field, enter the printer location(optional).
- On the Use field, choose Select Software and locate the printer driver for your printer.
- Choose OK and then Add.
- You may need to set some options for some printers.
- Under Default Printer field, you can choose to make this printer the default.
Removing old printers
- Double-click on the Printers & Scanners icon.
- Select the printer you'd like removed.
- Click on the minus (-) sign.
Installing a printer using Ubuntu
-
At the bar, go to System Settings --> Printers
-
Click Add and select Find Network Printer
-
Enter printername.uwaterloo.ca (eg. mmeprint16.uwaterloo.ca) or the IP Address if you know it in the Host field, and click Find.
-
The system should now have found your printer.
-
Click Forward and wait while the system searches for drivers.
-
Choose the driver and install it (Look for the mark and model on the printer to guide your choice).
-
Customize the Installed options page if you know the defaults are not correct, for example, check Duplex Unit if you know the printer can print double-sided.
-
Customize printer name, description, and location if you'd like.
-
Click Apply to finish.