Table of Contents Printers
How do I install a printer using Windows
- Go to Type here to search
- Type in \\mmeserv5.uwaterloo.ca

- Press enter
- Make sure you are in the NEXUS domain. If you are not in the Nexus domain, enter nexus\your_userID in the User name field. Do not include your @uwaterloo.ca. Ex. nexus\mmwoldea.
- Enter your Password
- Check the "Remember my credentials" checkbox
- Click OK
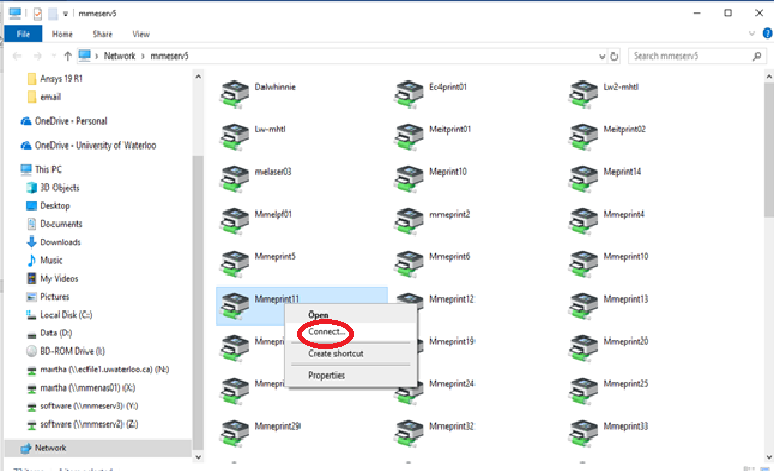
- A list of printers should appear. Right click on a printer that you want to connect to.
- Click Connect
How do I install a printer in MacOs
-
To install a printer, go to the System Preferences...located under the Apple Menu (on the top left).

-
Double-click on the Printers & Scanners icon.

-
Click on the plus (+) sign to add a new printer. If the lock at the bottom left of the window is locked, unlock it.

- The following window will open, and you will fill in the spaces as per instructions below:
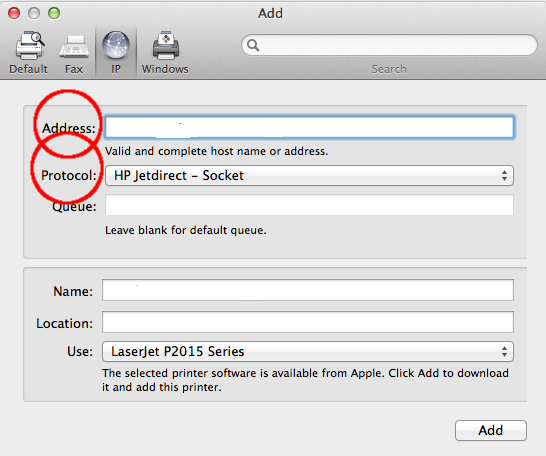
- Click on the IP tab.
- On the Address field, enter: printername.uwaterloo.ca
- Set Protocol field to: Line Printer Daemon -- LPD or HP if it is an HP printer
- On the Queue field, enter the desired printer name as indicated on the table above (see step 1).
- On the Name field, enter the official queue name or some other name (using official queue name will make troubleshooting easier).
- On the Location field, enter the printer location(optional).
- On the Use field, choose Select Software and locate the printer driver for your printer.
- Choose OK and then Add.
- You may need to set some options for some printers.
- Under Default Printer field, you can choose to make this printer the default.
How do I install a printer using Ubuntu
-
At the bar, go to System Settings --> Printers
-
Click Add and select Find Network Printer
-
Enter printername.uwaterloo.ca (eg. mmeprint16.uwaterloo.ca) or the IP Address if you know it in the Host field, and click Find.
-
The system should now have found your printer.
-
Click Forward and wait while the system searches for drivers.
-
Choose the driver and install it (Look for the mark and model on the printer to guide your choice).
-
Customize the Installed Options page if you know the defaults are not correct, for example, check Duplex Unit if you know the printer can print double-sided.
-
Customize Printer Name, Description, and Location if you'd like.
-
Click Apply to finish.