Luka Cepuran, Darren Murdoch, and Immanuel Simon, second-year Biomedical Engineering (BME) undergraduate students, share their experience designing a low-cost, EMG-controlled prosthetic designed specifically for handling a soldering iron.
What inspired your design, and who are you designing for?
Our design, "Solder Man", was inspired by the Cybathlon Arm Prosthesis Race, specifically the “Do It Yourself” task, which challenges participants to create a prosthesis capable of controlling a hand tool. We created a device that enables people with limited hand function to use a soldering iron, a tool that requires precise grip, steady wrist control, and careful coordination to safely manipulate the iron.
Can you describe your solution?
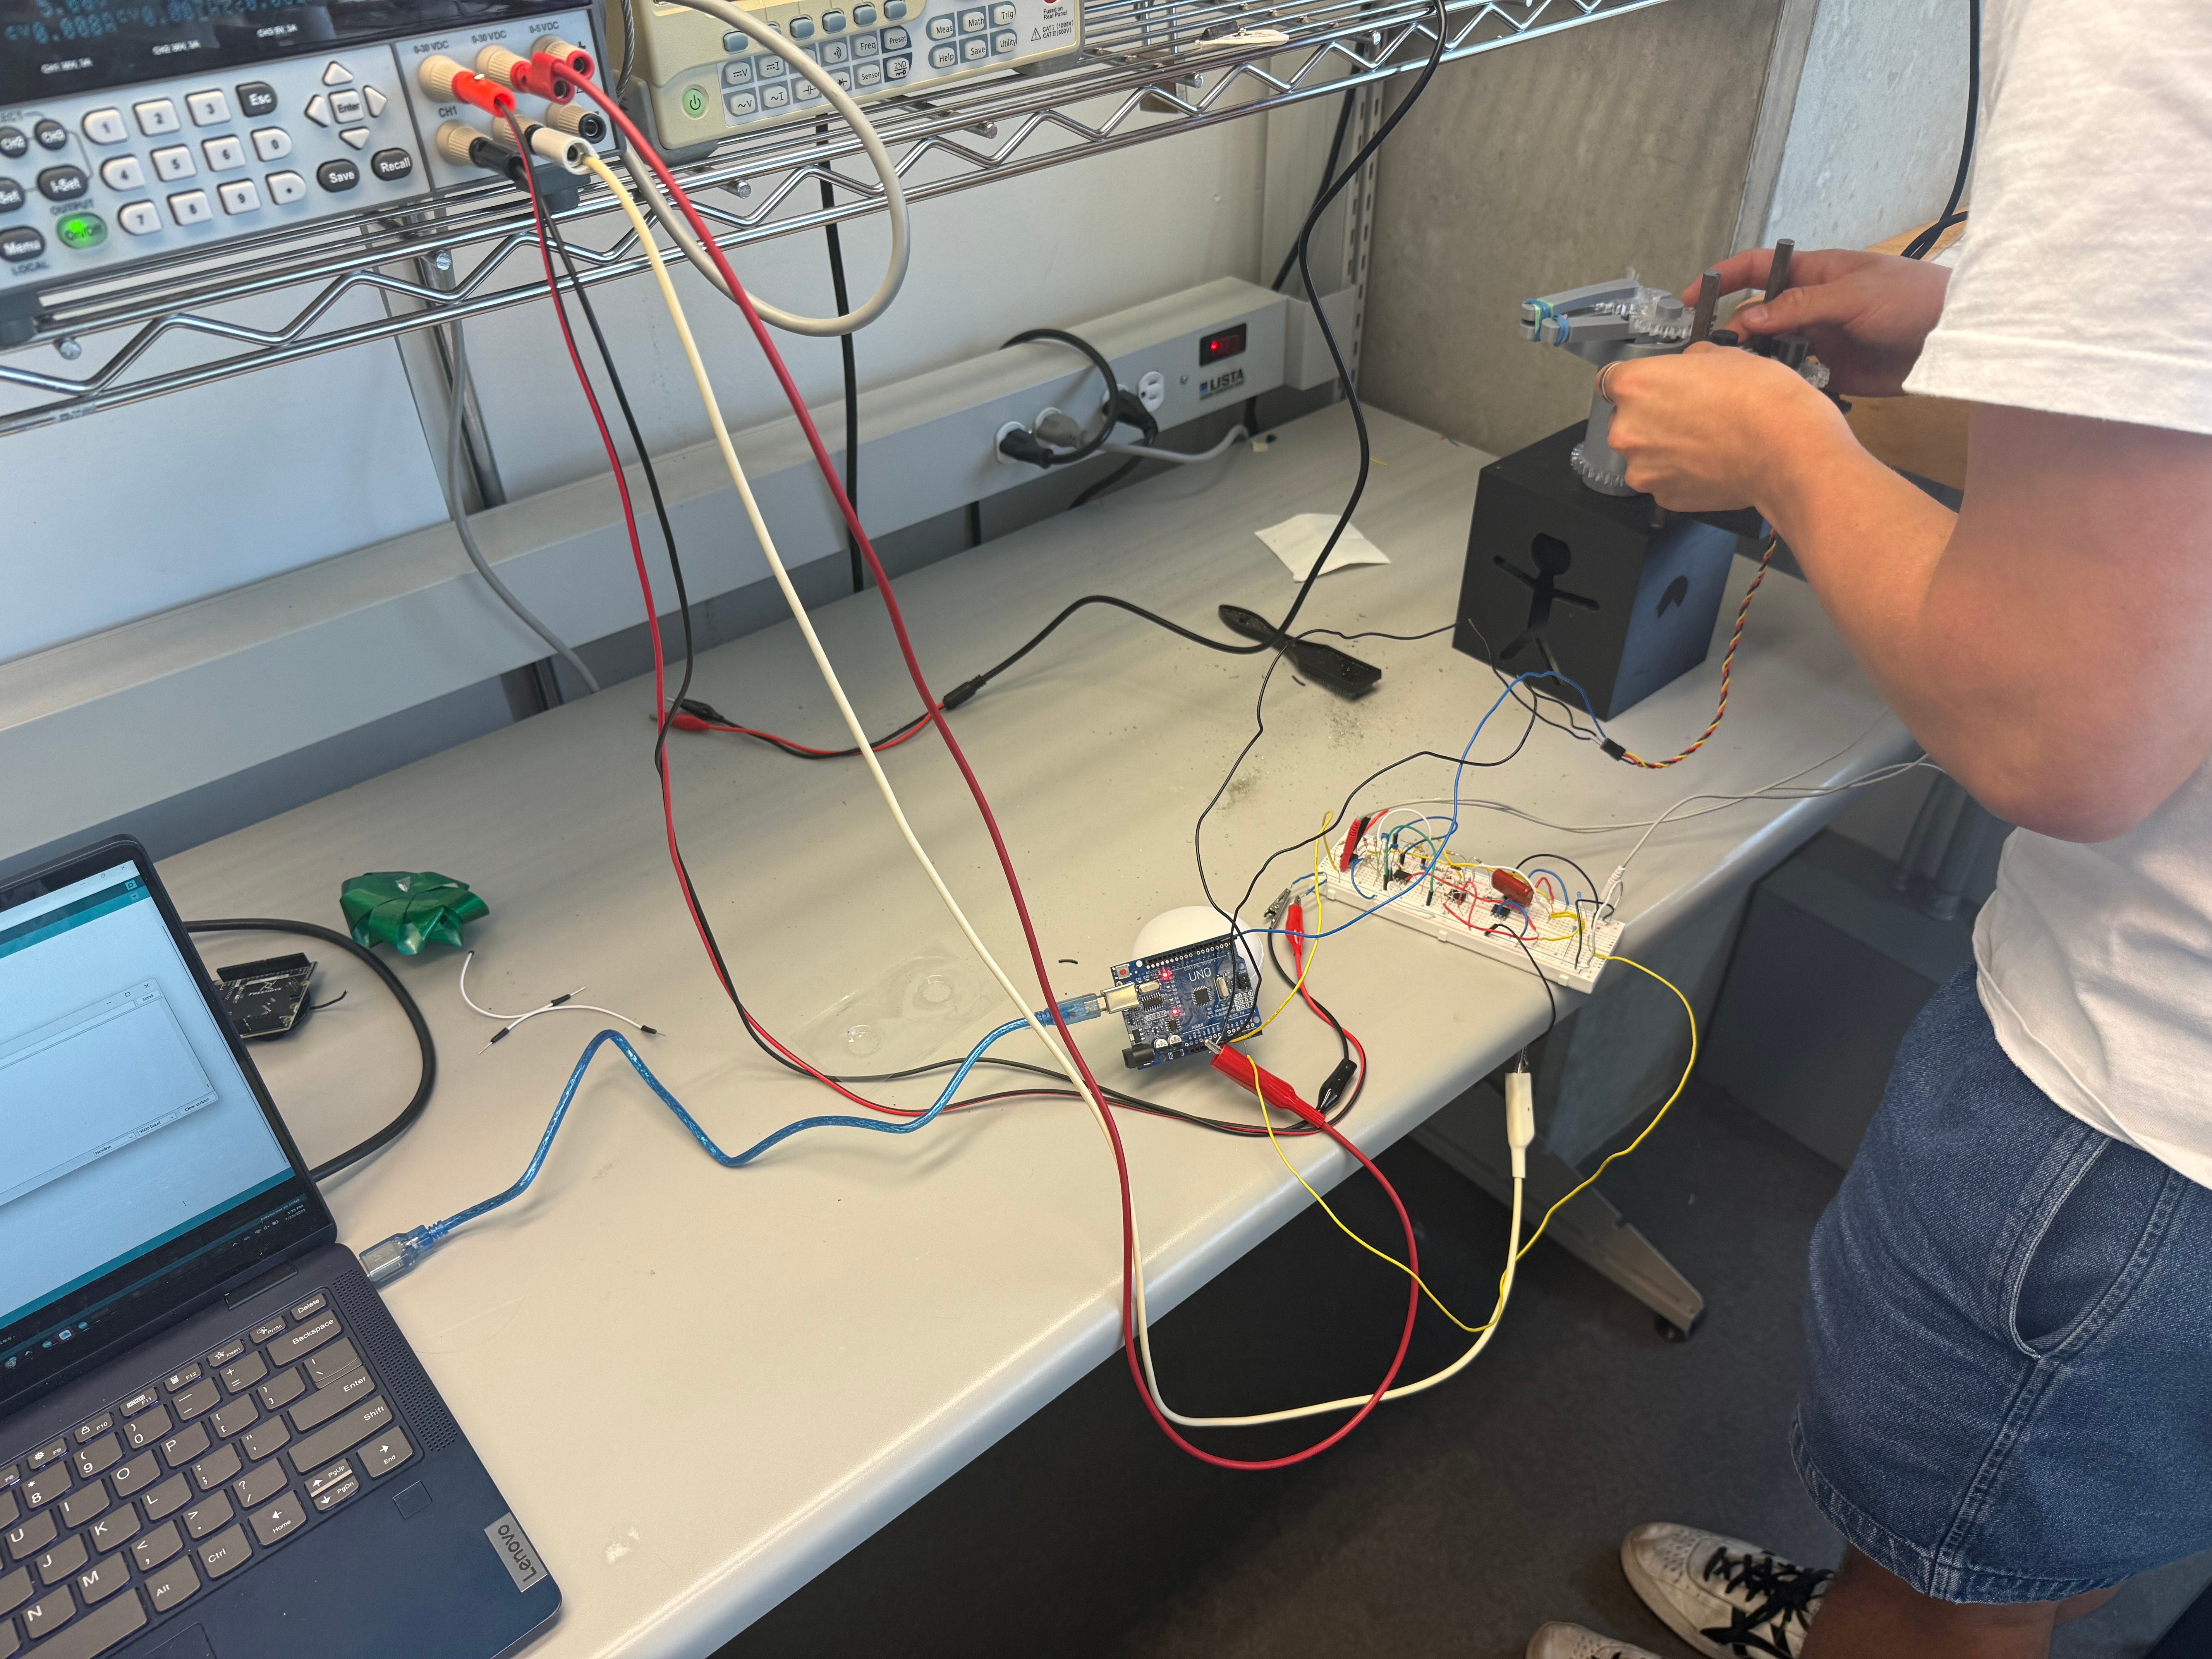
Our final design integrates three coordinated subsystems: mechanical, electrical, and firmware/signal processing. Mechanically, the prosthesis uses a slider mechanism that allows a single motor to be repositioned between two gear sets, enabling both finger grasp and wrist rotation. This reduces cost and complexity while still supporting task-specific functionality. The electrical subsystem acquires raw EMG signals from the user’s forearm, amplifies and filters them into a clean 0–5 V signal, and ensures reliable performance under real-world conditions. The firmware subsystem interprets these signals, mapping contraction intensities to motor actions in real time using experimentally determined thresholds. Together, these subsystems produce a low-cost, simple, and functional handheld prosthetic designed to assist with soldering.
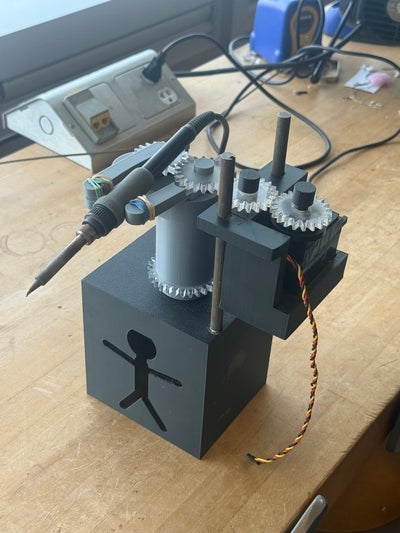
The motor can switch between gripping and rotating the soldering iron for precise control.
What knowledge and skills did you use to develop your solution?
- Mechanical design: CAD modeling, 3D printing, and machining skills developed through coursework (such as BME 101L) and prior projects were essential to creating and refining the assembly.
- Electrical design: Circuit knowledge from BME 294/294L was applied to design an amplification and filtering system that reliably transformed EMG signals into usable inputs.
- Signal processing & firmware: Prior coding experience allowed us to implement simple but robust Arduino firmware for real-time motor control, with clear thresholds for contraction strength.
The project combined technical skills from coursework with hands-on experience in prototyping and problem-solving.
Was there a roadblock you hit during the design process, and how did you overcome it?
One mechanical challenge was that friction-fit pins, which worked well in CAD, failed in practice by either slipping or locking. We resolved this by redesigning the joints with integrated ball bearings, providing both stability and smooth rotation.
Electrically, our biggest obstacle came from the motor drawing excessive current, which disrupted EMG signal readings by shifting the baseline voltage. We overcame this by powering the motor from a separate regulated supply while sharing a common ground, which stabilized the system. We also had to replace a faulty breadboard that introduced random difficulties—rewiring the circuit onto a new board restored proper functionality.
What did you learn from testing the design in realistic scenarios?
Testing highlighted the importance of small mechanical tolerances. Initially, a slight rotation in the base pin caused the wrist and finger gears to slip at higher torques, which we solved with a more secure redesign. For firmware, iterative testing allowed us to tune the motor’s step size to balance efficiency and fine motor control. Too large a step impaired precision, while too small a step required excessive contractions; 15° increments struck the right balance for soldering tasks. These insights emphasized the value of iterative testing in refining both usability and reliability.

The team designed a device to control a soldering iron.

The motor can switch between gripping and rotating the soldering iron for precise control.
How did the collaboration in the group shape the final design?
Collaboration was central to our success. While each team member focused on a subsystem aligned with their strengths, we made all major design decisions and troubleshooting efforts collectively. This ensured that the mechanical, electrical, and firmware systems integrated smoothly. Team meetings provided space to brainstorm, share updates, and quickly address challenges together. The combination of independent contributions and strong communication gave us the flexibility to work efficiently, while still maintaining a cohesive final design.
If you could take this project to the next stage, what improvements or new features would you add?
Mechanically, adding a second motor or improving the gear-switching mechanism would eliminate the need for manual sliding and increase precision. Electrically, moving from a breadboard to a custom PCB would improve compactness and reliability. On the firmware side, adaptive thresholds or proportional EMG control could make the system more responsive and intuitive, bringing it closer to the performance of higher-end prosthetics. Together, these changes would make the device more practical and user-friendly, while retaining its low-cost foundation.
The students completed this project with knowledge and skills gained in BME 261: Prototyping, Simulation and Design and BME 294L: Circuits, Instrumentation and Measurements Laboratory.