Interactions can help students engage with course content in ways that enhance their learning experience. There are multiple types of interactions available within the CMS (Content Management System) that can be utilized on content pages.
List of Available Interactions (Interactive folder location)
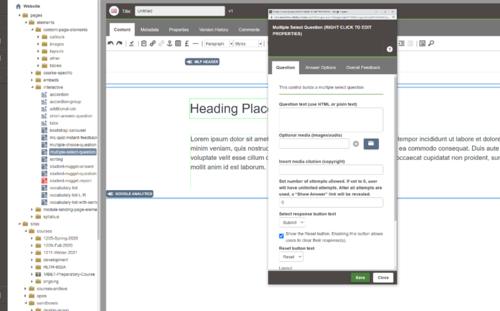
To view the list of interactions available, browse to pages > elements > interactive on the navigation tree to your left.

Steps to add an interaction
Step 1: Place your chosen interaction on the page
Drag your chosen interaction from the navigation tree and drop it on your content page in the location where you want the interaction to appear (NB. You must drag the icon,, not the name of the interaction, for the drag/drop to work).

Step 2: Add required information for your interaction
For some interactions when you drag and drop them onto a content page a dialogue box will appear.
- Complete the fields in the dialogue box where/as necessary.
- Click 'Save' to return to the editor.

Step 3: Preview your interaction
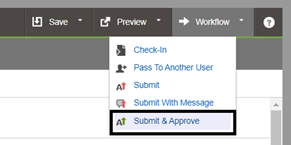
Once your interaction is saved you must first submit and approve your changes before you can preview/test your interaction.
- Click on 'Workflow'
- Select 'Submit & Approve' from the drop-down menu.

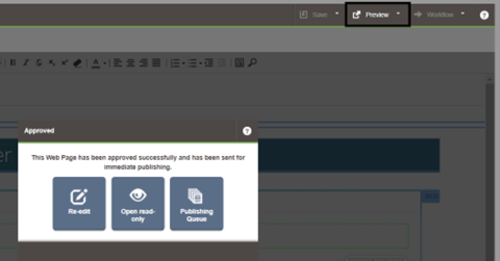
A dialog box will appear confirming your submission. Click on the preview button to preview your interaction on the preview page. Keep in mind that your interaction will appear differently in the editor window compared to your preview/live page.

Step 4: Preview your interaction
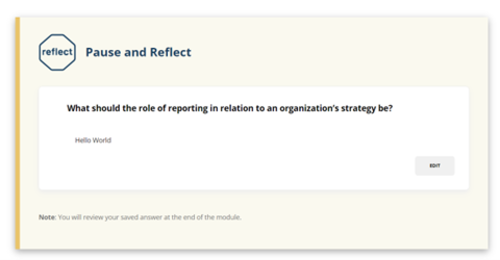
Make sure to test your interactions. All interactions can be tested on the preview and live page except for persistent note response interactions. This specific interaction will only completely appear (with question and text box) on the live version of the course page.
Persistent note response interaction on preview version:

Persistent note response interaction on live version:


