Contact us | 519-888-4567 x41744
Create an ATLAS workspace:
To create a workspace in ATLAS you will first need a LEARN course created for the term of offer the Workspace will be used. These two are connected using an LTI to transfer the roster from your LEARN course to the ATLAS workspace and to pass grades from the ATLAS workspace back to LEARN.
Note: Once you have created a workspace via the LTI, please do not delete the link in your LEARN course.
Note: First you must add the Pebble+ and ATLAS links to your term of offer LEARN course.
How to add the LTI link to your LEARN course:
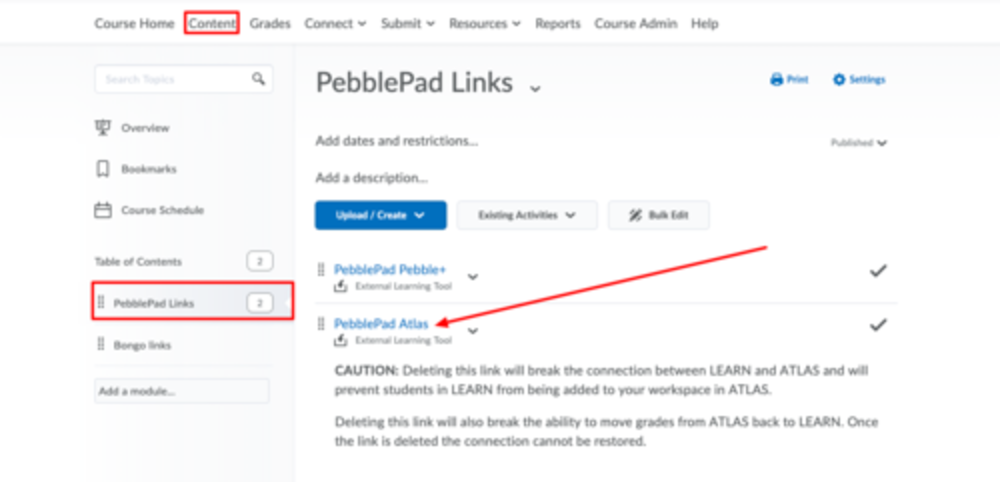
- Go to your course content page and either create a new module for PebblePad content or go into the module you would like the LTI links added to.
- Once in the module, click on the Existing Activities button and choose External Learning Tools from the dropdown menu.
- You should now see a list of LTI options including Pebble+ and ATLAS, choose PebblePad Pebble+ to insert the link. This link allows you and your students to access Pebble+ to create content.
- Click the Existing Activities button again and choose External Learning Tools from the dropdown menu.
- This time, choose PebblePad ATLAS to insert the link. This is the link that will allow you to create a workspace in ATLAS.
- To open Pebble+ and ATLAS in a new window, click the down arrow to the right of the each link in LEARN and choose Edit Properties In-place.
- Now click the box to open the link as an external resource.
How to create an ATLAS workspace:
- To create your ATLAS workspace, click on the ATLAS LTI link in your LEARN course.
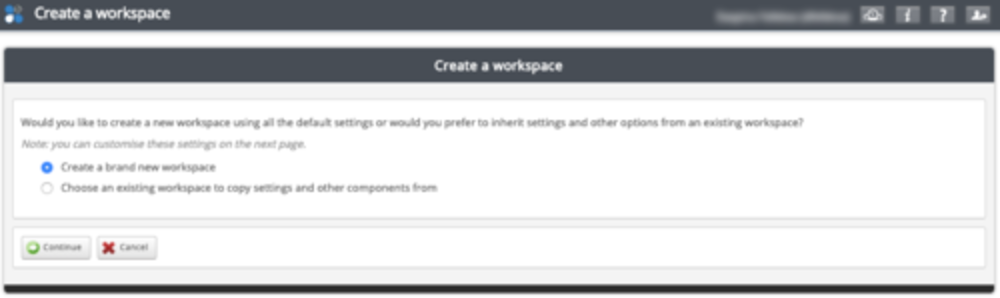
- Once you click the LTI link to ATLAS you should be taken to the Create a workspace page.
- On the Create a workspace page you will see two options. The first is to Create a brand new workspace and the second is to Choose an existing workspace to copy settings and other components from. Most likely, you will choose to Create a brand new workspace. This will take you to the Settings Page.
The Basic Settings page:
- After selecting which method you will use to create your workspace, click the continue button.
- The title should auto populate with your LEARN course name and Number (e.g. ENBUS 112 - Winter 2019). To ensure users are able to easily identify the workspace, please do not change the Workspace title.
- Next, populate the optional description field if desired.
- If you have access to more than one region (departments), choose the region that matches the department your course belongs to. Adding the workspace to an incorrect department will make finding the workspace harder to find for students and TAs. Email pebblepadhelp@uwaterloo.ca to request your workspace be moved to the correct department (Region). Please include the current location of the workspace and the desired location.
- Next, you can decide if you would like to activate your workspace or leave it in Set-up mode. Activating later is done by clicking the Active button in the workspace.
- Next, choose Continue to move to the workspace management area.
On the Advanced Settings Page:
Here you can choose what pages should be visible to students.
- About page is the description of the workspace
- Submissions is where instructors and TAs will view and grade submissions.
- Resources page is where instructors add PebblePad resources to a workspace for students to complete.
- Community page is similar to your LEARN classlist. Here you will be able to see which students, managers and externals have access to the workspace.
- Conversations are similar to LEARN discussions but the do NOT pass grades back to LEARN.
- Finally, you can choose which of the above pages listed as the landing page for your workspace. The about page is the default.
The Managers tab:
When accessing the Managers tab during the course creation process the page will list all managers being added to the space from LEARN. Users on this list will have the role of a TA 4 or higher. Other TA roles will also map here but to the Tutor role instead of the Lead Tutor role.
Note: Do NOT navigate away from this page while the roster is updating or the managers will not be properly imported.
The Members tab:
When accessing the Members tab during the course creation process the page will list either all members to be added (if there are few to add) or the number of users to be added if a large classlist will be loaded.
- Click continue to load the members
- Once loading completes, click the continue button
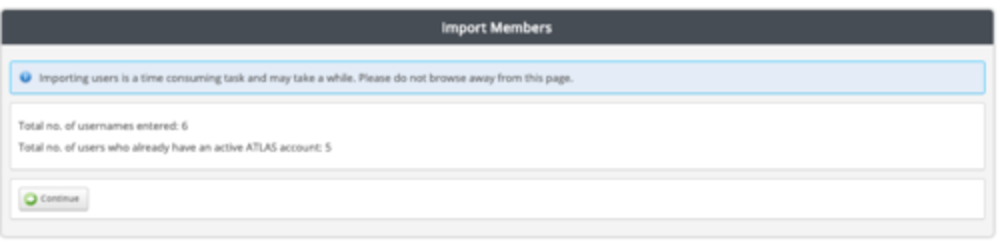
Note: Do NOT navigate away from this page while the roster is updating or the members will not be properly imported.
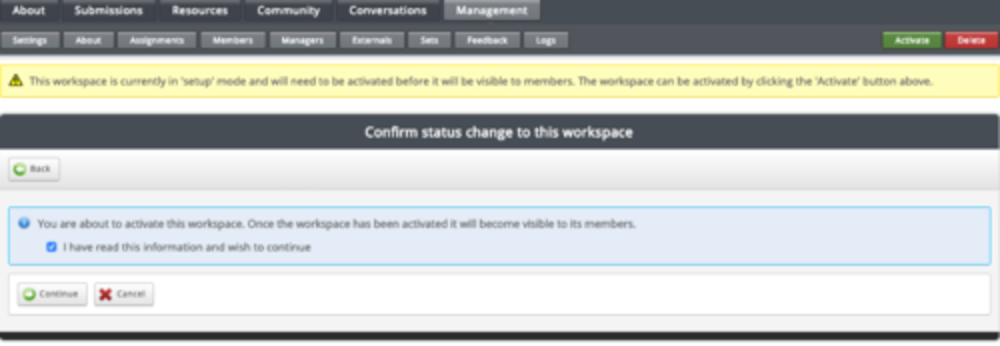
Activating your Workspace. If you did not activate your workspace during the creation process you will see a green Activate button along the top of your workspace pages. When you are ready to activate the Workspace, click the activate button and check the confirmation box before clicking Continue.