


Contact us | 519-888-4567 x41744
To create a Workbook:
- Log into Pebble+ via LEARN
- On any page, click the burger menu (three stacked lines) at the top left of the screen
- Click on Get Creative to expand the menu
- Click on Create a Workbook
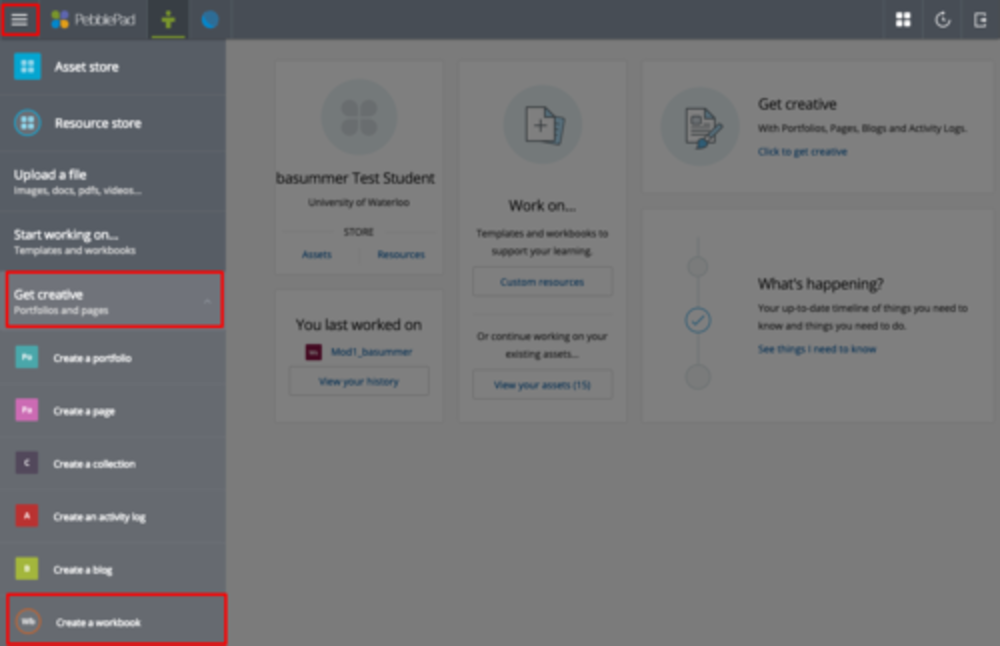
Note: Workbooks can only be created from the "Get creative" menu available from the burger menu. The "Get creative" menu on the landing page does not include workbooks.
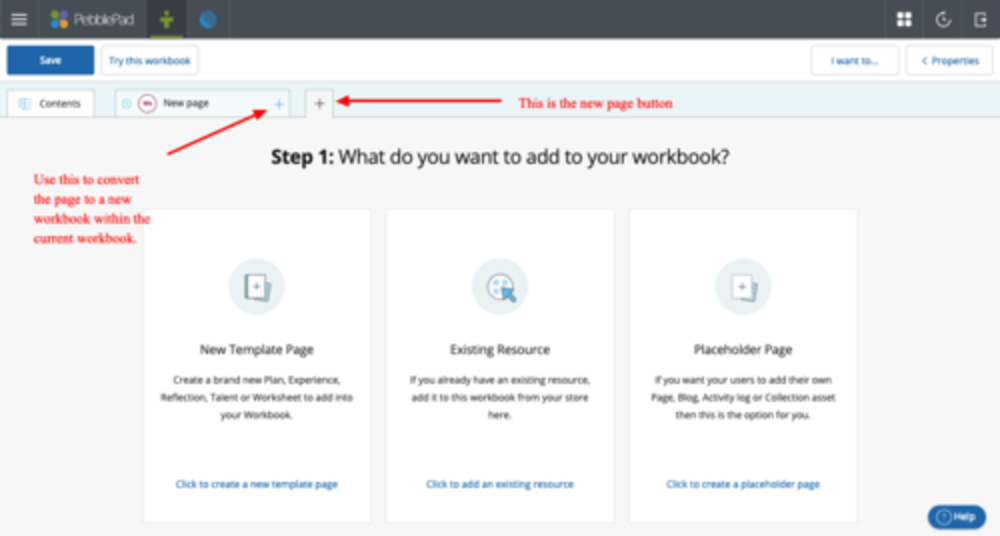
- A new Workbook will open and you will have the following options:
- Create a new Template Page: This allows you to create a brand new Template page directly in the Workbook.
- Existing Resource: This allows you to add any existing Resource from your Resource Store as a page in your Workbook.
Note: If you import an existing Resource and edit it in this Workbook, it will also edit the original Resource. If you do not want this to happen, create a copy before adding it to your Workbook.
- Placeholder Page: This creates a blank page that learners can replace with an existing Resource from their Resource Store. You can select whether this is a Page, Collection, Blog or Activity Log.

- After you add your first page to the Workbook, the view will change to the page just added. From here, to add additional pages, select the + sign to the right of the page you just added.
- Once you have added your pages you will need to add content to those pages. To add content to a page within a workbook, click the blue "+ Add Content" button to see the available options to add.
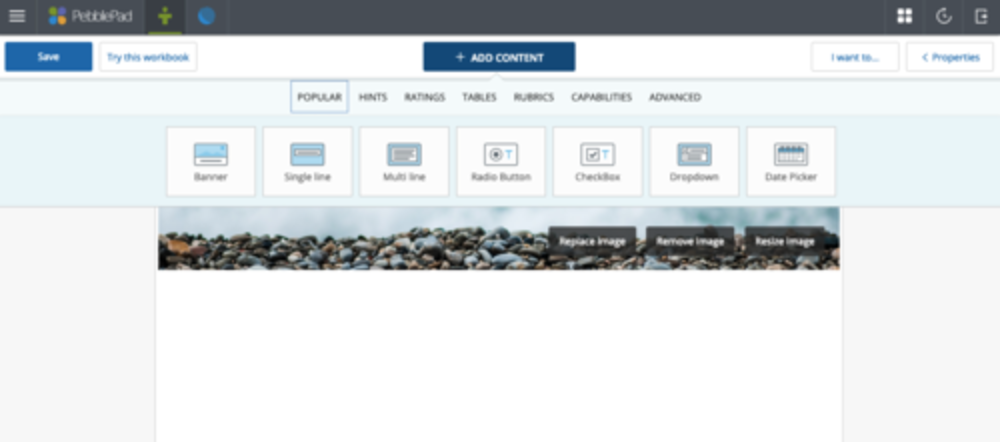
- Toggle between the various element options for adding content by clicking on the the elements along the top and select the content item to add from the options for each element.
- Popular: These include common form items, including single line text, multi-line text, radio and checkbox options, drop-down menus and date pickers.
- Hints: These are expository elements that users can't fill in, such as text, images, videos or audio. These should be used to guide your learners around your Template, or to add visual elements.
- Ratings: Elements for adding the opportunity to add rating scales.
- Tables: Allows tables to be inserted in various formats.
- Capabilities: Contains elements for adding capabilities and evidence.
- Advanced: contains an element for recording digital signatures, and a Media Picker to allow learners to add their own media elements (images, video, etc.) directly into the Template.
Note: Be sure to save your work frequently. There is no auto-save function in PebblePad, any unsaved work will be lost.