Data Storage
- Data protection information
- Engineering Computing Research (ECResearch)
- Network Attached Storage (NAS)
- One Drive
Data protection Information
|
Options |
Usage |
Cost |
Reliability |
Secure |
Remotely Accessible |
Supports File Collaboration | Synchronize Files |
|---|---|---|---|---|---|---|---|
| Local Drive | data storage |
none |
susceptible to failure | excellent | yes |
no |
manual |
|
Network "N Drive" |
data storage |
none |
very good |
excellent | yes | no | manual |
|
USB Device |
data storage |
determined by size | susceptible to failure | poor | no |
no |
manual |
|
Cloud Storage |
data storage |
free |
very good | excellent |
yes |
yes |
automatic |
|
EC Research Storage |
research storage | free | very good | excellent |
yes |
yes | automatic |
|
Hard Drive Mirroring |
drive redundancy | determined by size | very good | excellent | yes | yes | automatic |
| Options | Usage | Cost | Ease of Use | Automated | Restore Previous Versions | Customize Backup Settings |
|---|---|---|---|---|---|---|
|
MAC Time Machine |
backup data | free | very easy | yes | yes | yes |
|
Windows10, and 11 File History |
backup data | free | very easy | yes | yes | yes |
|
Windows 10 and 11 Backup and Restore |
backup data | free | very easy | yes | yes | yes |
|
Disk Imaging |
system backup | licensing fee | no | manual | only full system restore | no |
| Options | Usage | Cost | Reliable | Security Protection | Setting Recovery | Reduce I.T. Issues | Customizable |
|---|---|---|---|---|---|---|---|
|
Deep Freeze |
system protection | yes | very | very | yes | excellent | highly |
ECReseach
ECResearch is a network file server for Engineering faculty members, for storage of research data. Its use is primarily for backup purposes. Instructions for backing up various clients can be found Backing up various clients.
ECResearch (ecresearch.uwaterloo.ca) can be accessed a number of different ways, all requiring Nexus credentials for authentication:
- Via Microsoft's file sharing protocol, SMB/CIFS, from Windows, MacOS, Linux, Unix etc.
- Through Nextcloud, an open-source "dropbox"-like Web service, accessible through a browser or through an installed client application that synchronizes a selected folder. The synchronization client is available for Windows, MacOS, Linux, Android, etc. Nextcloud also allows easy file sharing among Nextcloud users.
- Via NFS (network file system protocol) on Unix/Linux, available from on-campus computers only.
File size, type of computing device you use, and need for auto-synchronization of data among devices, are the determining factors for which of the above is the best method to use to access your data.
SMB/CIFS and NFS can accommodate larger file sizes and are fast. These methods do not auto-synchronize data between your computing devices and the server (unless you take additional steps). Certain devices such as phones and tablets may not support these methods (easily).
Nextcloud synchronizes data between a folder on your computer or mobile device and its corresponding folder on the ECResearch server. File transfer via Nextcloud provides easy-to-use access from anywhere over the Web, but is slower and may use expensive telephone data plans, depending on your device and its connection to the Internet. Therefore, the Nextcloud web service is not recommended for large files.
We have set an initial storage quota of 10 GB through Nextcloud to prevent inadvertently filling up storage on small mobile devices, and inadvertent telephone data charges. This quota is consistent with other cloud storage services. We will, however, increase this quota on an individual request basis by sending an email.
All three types of access to ECResearch, can be used simultaneously, from multiple locations, with a few caveats. For example, file locking on the server may interfere with simultaneous accesses.
MME NAS (Network Attached Storage)
Mechanical and Mechatronics Engineering has a NAS Storage for some of the Academic Units to have a common place to store data that needs to be access by a particular team
Some of the Research units have decided to purchase their own NAS (Synology boxes) that will give them whatever capacity needed for their projects. If you want to have your own storage MME IT can help you price and give you advice about what is best solution for your data storage and help you acquire and configure it.
OneDrive
All faculty, staff and graduate students are provided an Office 365 account. You can access Office 365 at https://portal.office.com with userid@uwaterloo.ca and your WatIAM password. For more information, see Getting started with Office 365 for faculty and staff and Microsoft Office 365 frequently asked questions for faculty and staff.
All data is stored in Microsoft’s Canadian data centers. Faculty and staff will have access to their Office 365 accounts for the duration of their employment. Graduate students will keep their accounts for approximately 16 months after their last registered term.
Office 365 includes:
- Microsoft Office downloads for up to five personally owned computers/devices.
- Do not install on University-owned machines; these use a separate license agreement and include additional applications.
- Office Online apps via the online portal.
- 5TB of personal storage space on OneDrive.
- Do not save highly confidential information to OneDrive.
- File sharing is restricted to others at UWaterloo: faculty, staff, graduate and undergraduate students.
- There is a limited ability to recover deleted files. When files are deleted from OneDrive, they go into a recycle bin folder in OneDrive. Files can be retrieved from that folder for 30 days. Once the file is gone from the recycle bin it cannot be retrieved.
- Open OneDrive (it should be installed by default).
- Enter ‘userid’@uwaterloo.ca as your sign in address, replacing ‘userid’ with your WatIAM ID.
- Click 'Sign in'.

- You will be redirected to a University of Waterloo sign in page.
- Make sure your email address is entered as ‘userid’@uwaterloo.ca.
- Type your password.
- Click ‘Sign in’.

- You will be redirected back to the OneDrive application:
- Click ‘Change location’.

- Choose where you would like to keep the OneDrive folder. It is not recommended to save your OneDrive folder within a network drive (N:, R:, S:, etc.)
- Choose which files and/or folders you want to sync from your account and click ‘Next’. All selected files and folders will be copied locally from OneDrive. All new files placed in here will sync to your OneDrive account.
- You should see this screen once an account is successfully added. If you would like to open your OneDrive folder, click 'Open my OneDrive folder'. Otherwise, close the window.

Adding a second account to OneDrive for Windows 10
- Find the OneDrive app icon in the taskbar at the bottom right of your screen:

- Right click icon > select ‘Settings’.

Note: If you are unable find the OneDrive icon in your taskbar, open ‘File Explorer’ and right click on the OneDrive folder in the left pane. This will pull up a similar menu, with the ‘Settings’ option.

- Click the ‘Account’ tab > select ‘Add an Account’.

- Follow the ‘Adding OneDrive accounts to Windows 10’ instructions to add an account.
Adding OneDrive account to macOS
- Download OneDrive from the App Store and sign in.
- App Store > Search for OneDrive > Get > Install.
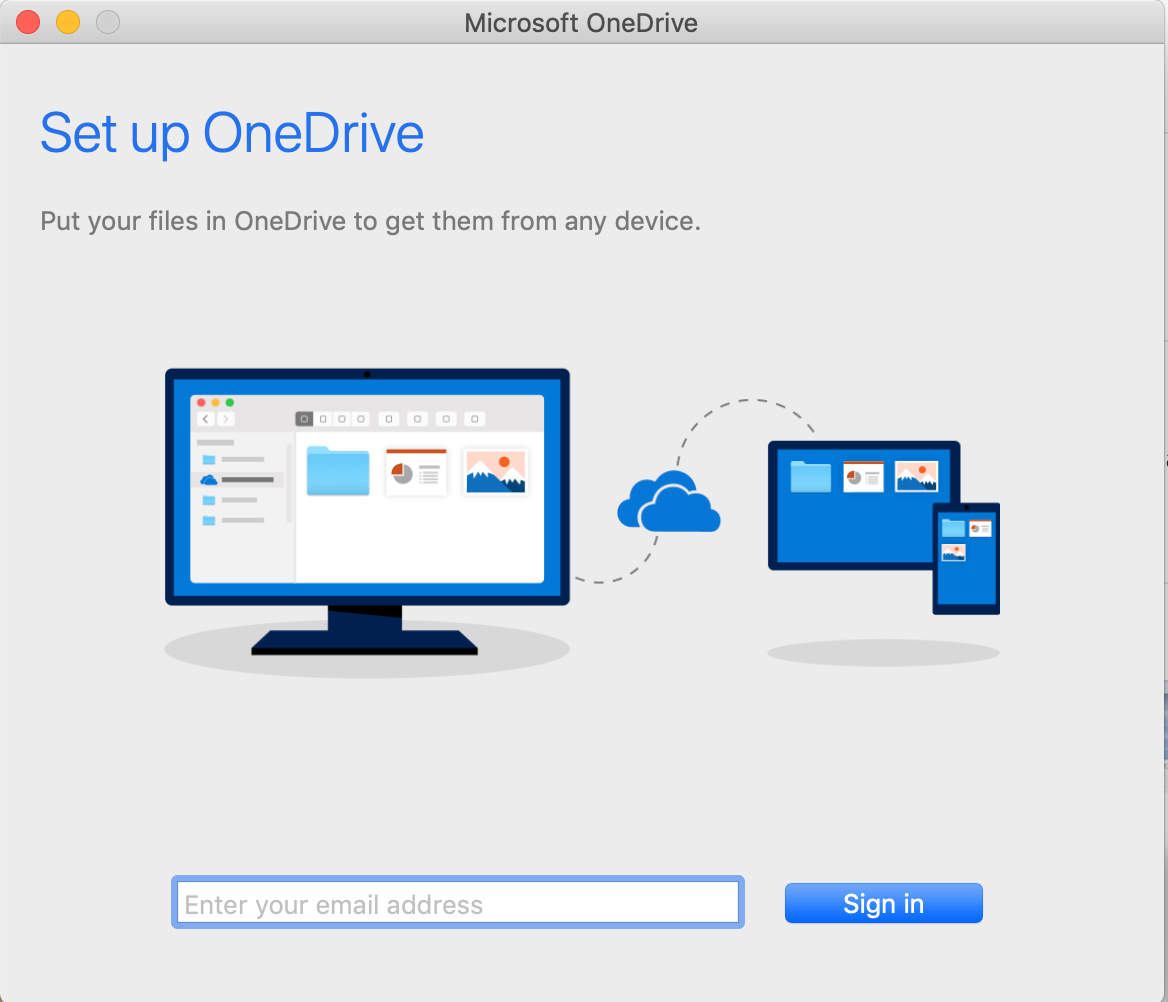
- Open OneDrive.
- Enter ‘userid’@uwaterloo.ca as your sign in address, replacing ‘userid’ with your WatIAM ID.
- Click 'Sign in'.
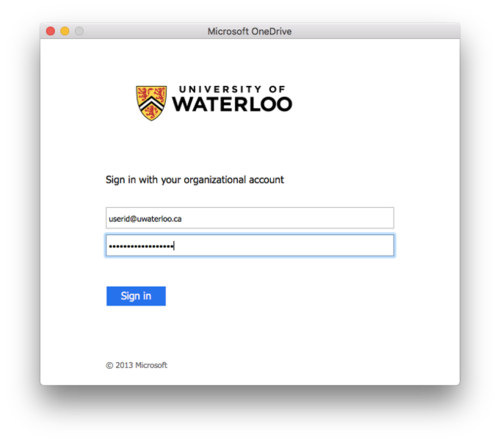
- You will be redirected to a University of Waterloo sign in page.
- Make sure your email address is entered as ‘userid’@uwaterloo.ca.
- Type your password.
- Click ‘Sign in’.
- You will be redirected back to the OneDrive application:
- Click ‘Choose OneDrive Folder Location’.
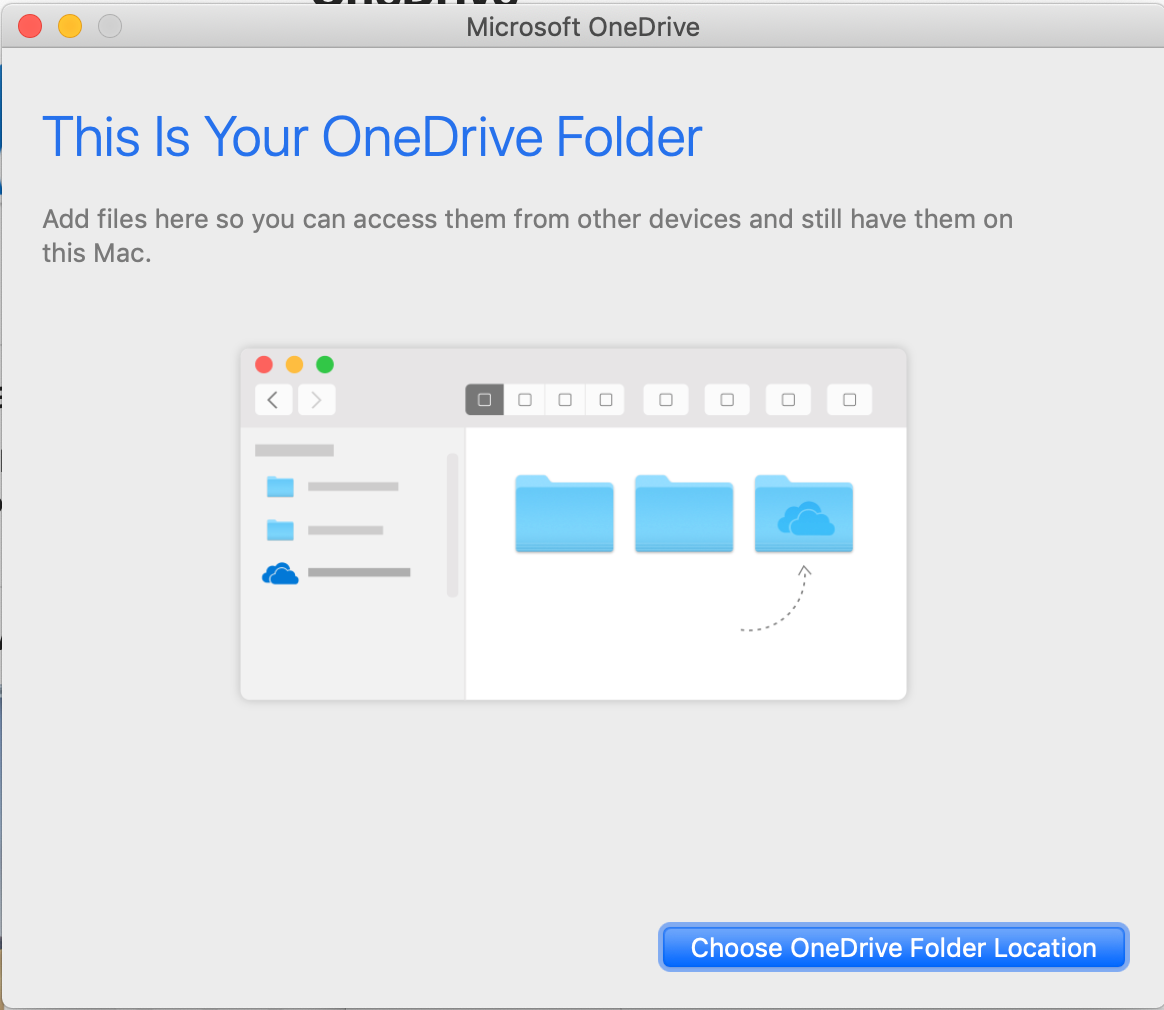
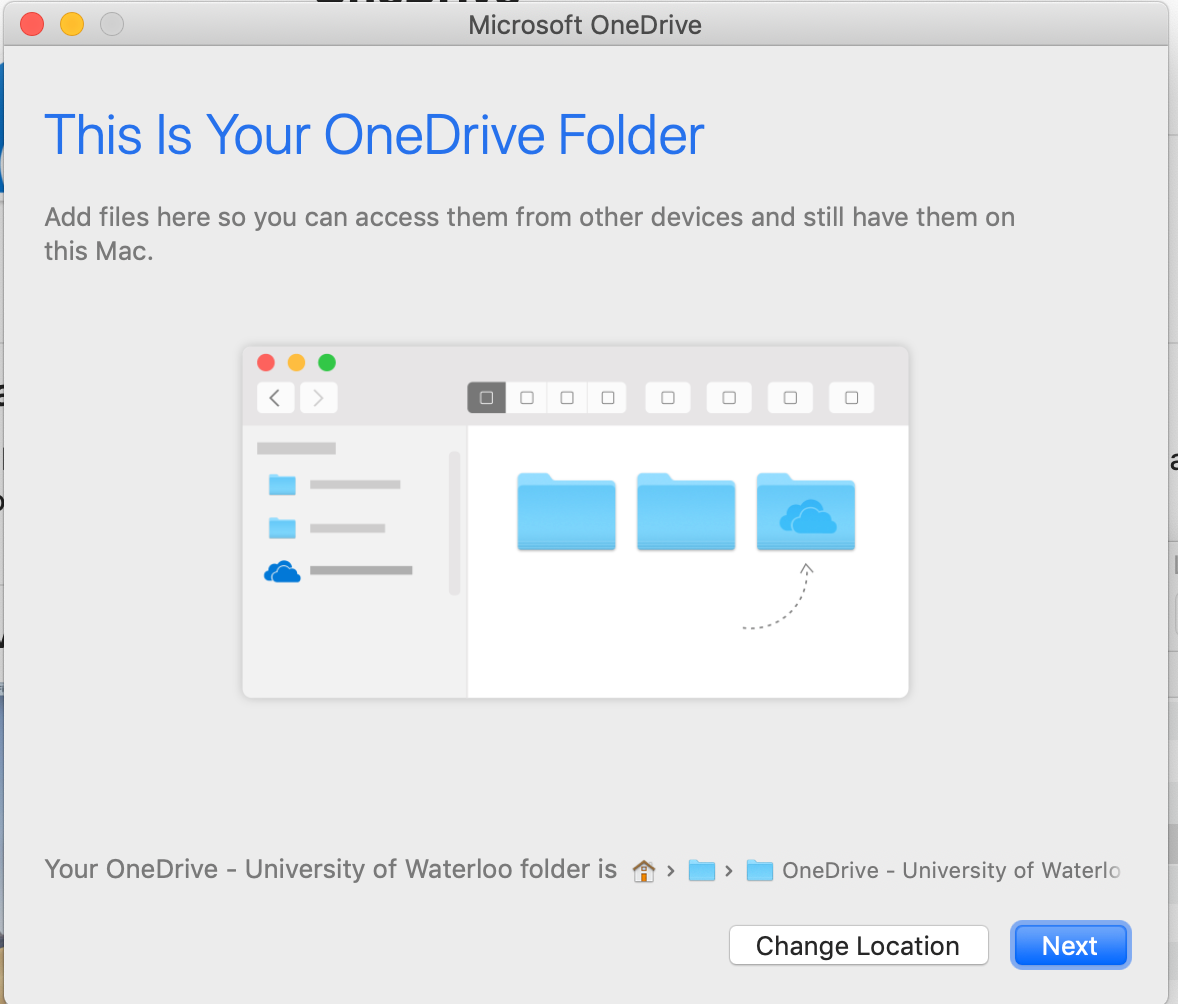
- After choosing your location for the OneDrive folder location, you will get a confirmation window of that location and option to Change Location, if necessary, as shown below:
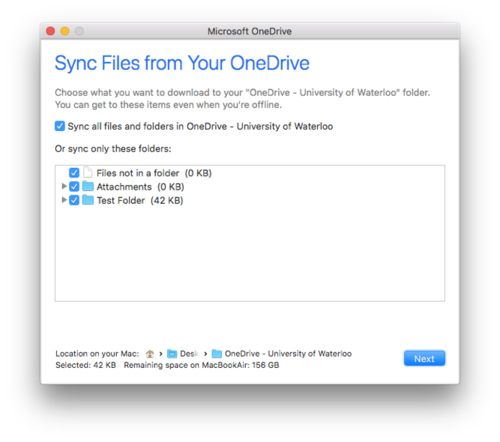
- Choose which files and/or folders you want to sync from your account and click ‘Next’.
Note: All files and folders selected will be copied locally from OneDrive for offline viewing. In addition, any new files placed in this folder will sync to your OneDrive account.
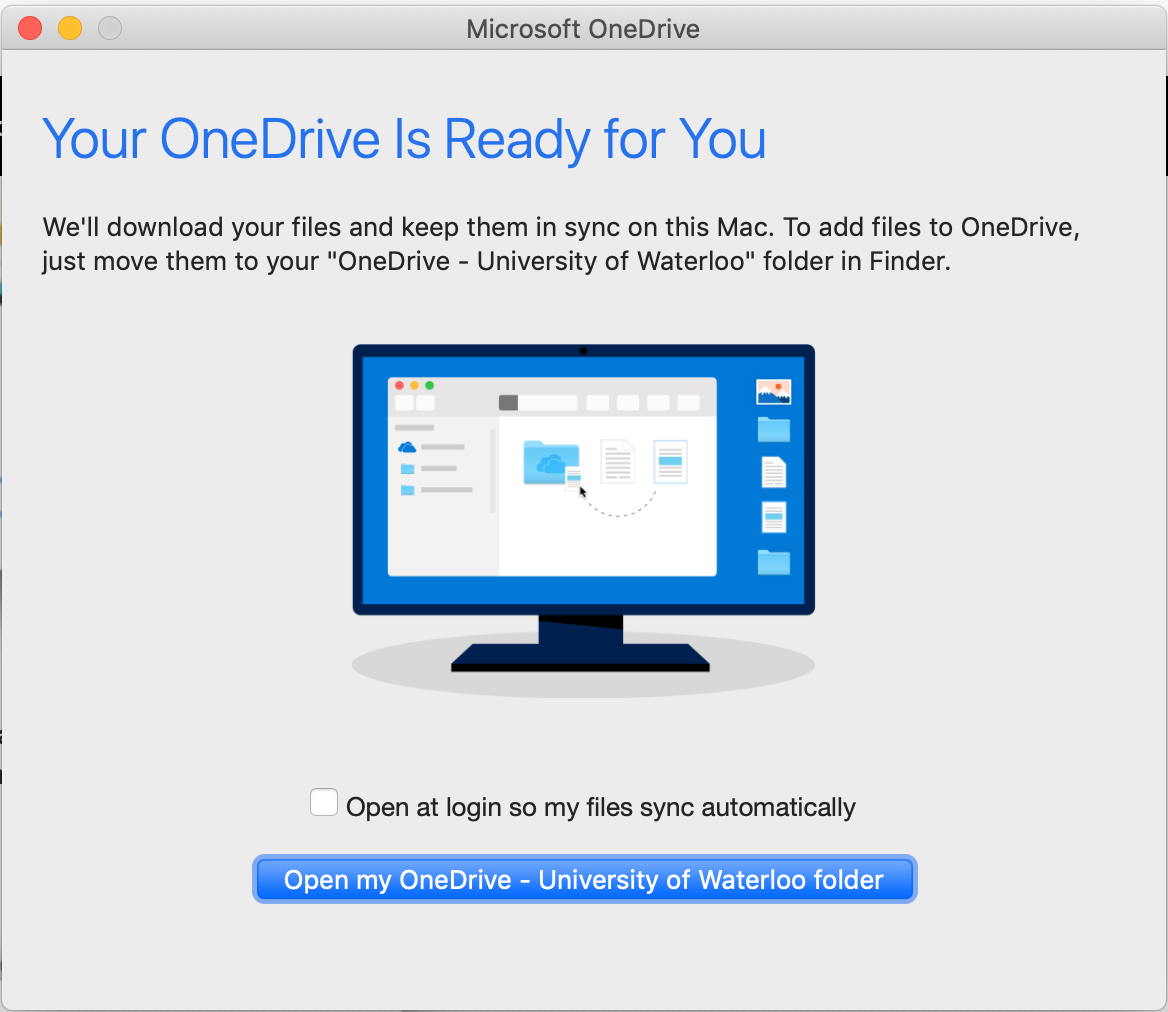
- You should see this screen once an account is successfully added. If you would like OneDrive to start automatically when you login to your computer, check the 'Open at login so my files sync automatically' box.
To view your local OneDrive folder, click the 'Open my OneDrive - University of Waterloo folder' button. Otherwise, close the window.
Adding a second account to OneDrive for macOS
-
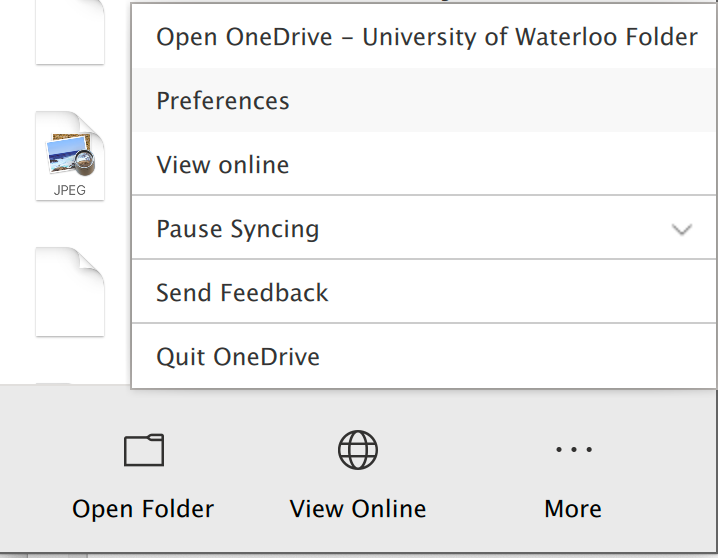
Find the OneDrive app icon in the task bar at the top of your screen:
-
Right-click (control-click) > select ‘Preferences’.
-
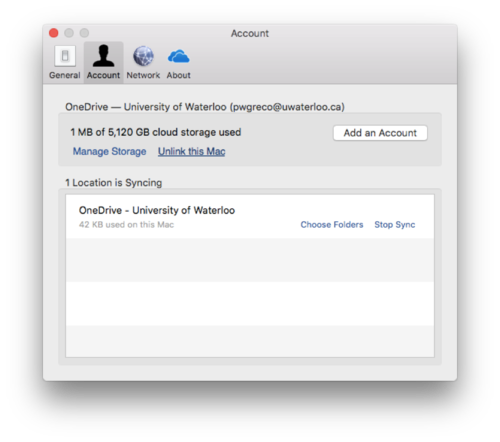
Click the ‘Account’ tab and select ‘Add an Account’.
-
Follow the ‘Adding OneDrive accounts to macOS’ instructions for adding an account.
Restoring Deleted files
OneDrive will retain deleted files and folders in the recycle bin, where you can easily restore them within 93 days.
Microsoft's support documentation provides a step-by-step guide on restoring deleted files.
Sharing files using OneDrive
- Log in to your account at portal.office.com using your full UWaterloo email address and password.
- Under ‘Apps’ click ‘OneDrive’ to launch the web app.
- A list of your files/ folders will display:
- Right-click the file/ folder you wish to share.
- OneDrive has a 15-gigabyte (GB) file size limit for each file uploaded. You will not be able to share files larger than this.
- Click ‘Share’ in the new dialog box.
- Specify which group the file/ folder will be shared with:
- Right-click the file/ folder you wish to share.
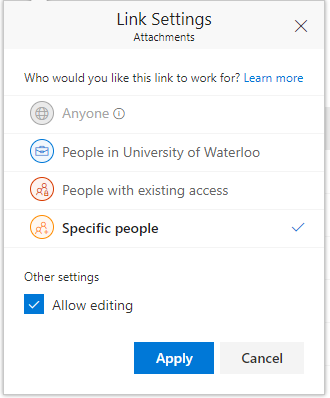
- Specific People - This option limits use of the link to specific people
- This is the recommended option for all sharing as you can manually choose recipients.
- People in University of Waterloo - This option limits access of files to members of the University community with active Office 365 accounts
- NOTE:This will allow all members of the University to access the file or folder as long as they have the link. You will not need to specify recipients.
- After you have selected an option, click ‘Apply’:
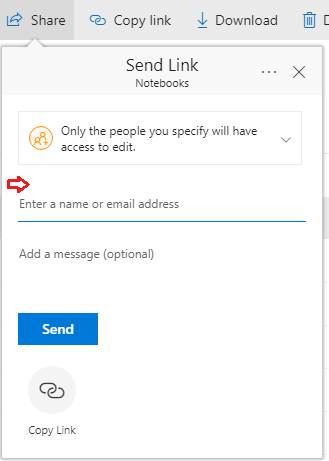
- Enter the email address of the recipient. Multiple addresses may be entered if you are sending to more than one person.
- Click ‘Send’ to email your recipient(s) the link to your file.
- Alternatively, you can click ‘Copy Link’ to copy it for use later.
How to unshared file in one drive.
This instructions are done in windows explorer
- Go to windows explorer and you one drive folder
- Select the folder you want to unshared and right click on it and go to share
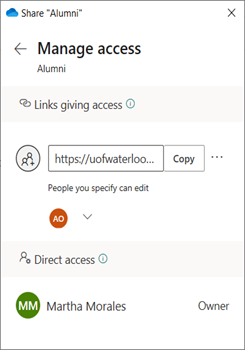
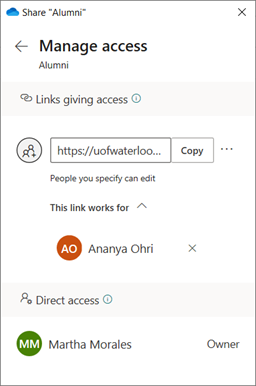
- On the share window go to the three ellipses at the top and click on Manage access
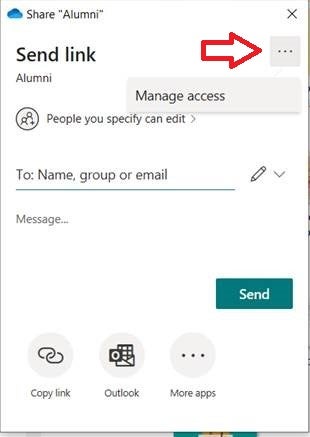
- On the Manage access windows remove the people you don’t want to have access anymore depending on how you share you will see as Direct access or giving a link to the shared folder. In this case because I gave a link you will need to expand by clicking on the “v” once expanded you can delete by clicking in the x beside the name
