How to setup a Connect account in Outlook
Configure Outlook (Windows)
Note: These instructions are for Microsoft Windows 10 and Office 2016
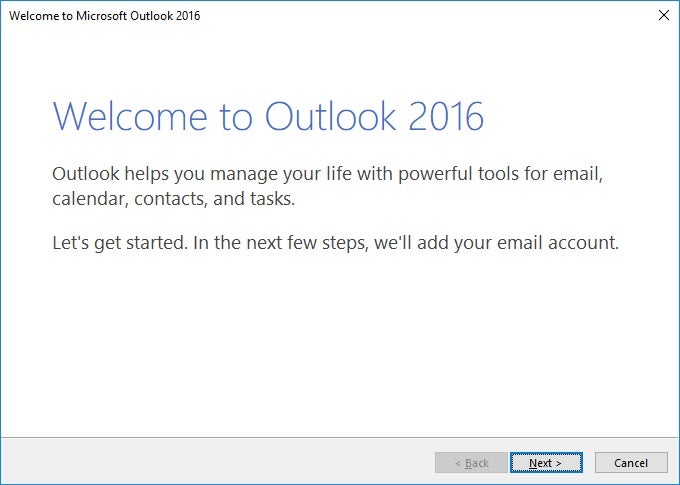
If this is the first time you open Outlook it will start a set up wizard and follow the instructions:
1. Open Outlook
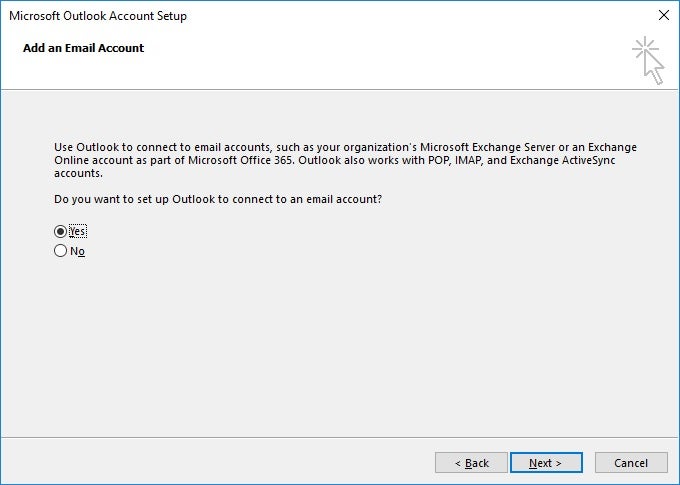
2. Select Yes to "Do you want to set up to connect to an email account?" question.
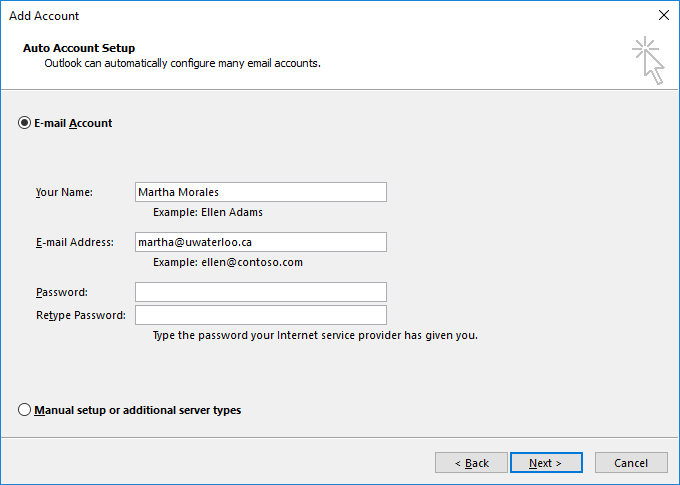
3. Type your name, email (userid@uwaterloo.ca) and your password twice
You may be asked Allow this website to configure ... server settings? If so, click Allow.
4.You will be prompted for credentials:
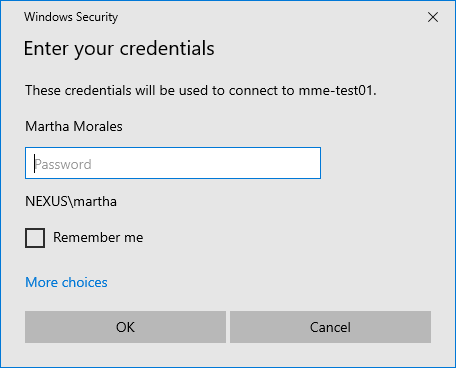
5. Click More choices and Use a different account
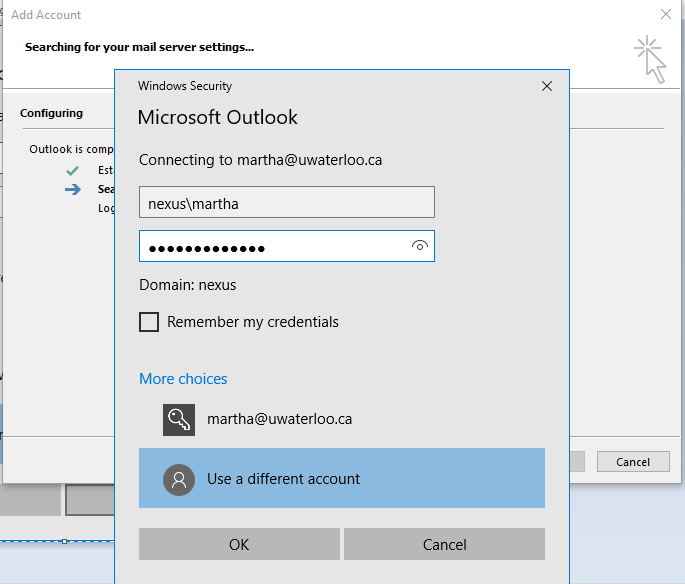
Enter User name in the form of nexus\userid OR username@nexus.uwaterloo.ca
Enter your password
Check the check box, Remember my credentials
Click OK.
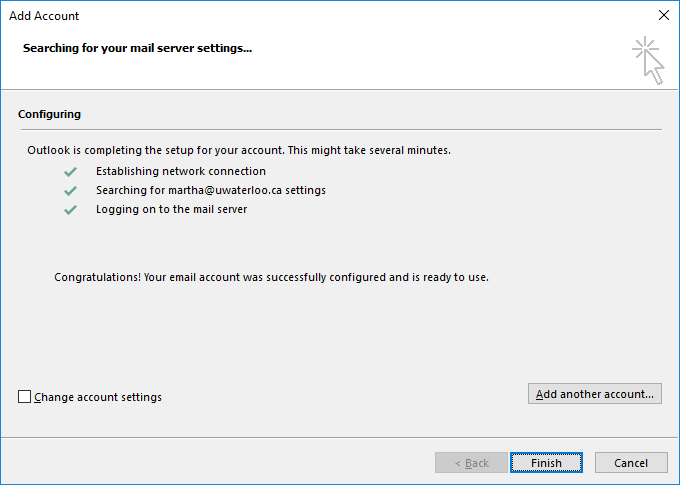
6. Finish
If you have already a profile
a. From the File tab, choose + Add Account
i. Leave the E-mail Account option selected
ii. Leave Your Name blank.
iii. Beside E-mail Address, enter your email address (in the form of userid@uwaterloo.ca)
iv. Enter your password twice (in the text boxes provided)
v. Click Next
You will be prompted for credentials:

vi. Click More choices and Use a different account

vii. Enter User name in the form of nexus\userid OR username@nexus.uwaterloo.ca
Enter your password
Check the check box, Remember my credentials
Click OK.
viii. Finish

x. Close and then re-open Outlook.
xi. It may take a few minutes for Outlook to complete the process and synchronize data with Exchange.
Configure Outlook Mac
Add a new connect account to an existing installation of Outlook 2016 for Mac.
- Open Outlook 2016.
- Click on the Tools menu and choose Accounts.
- Click on the Exchange or Office 365 icon on the Add an Account dialog.
- Enter the following details:
- Email address as: userid@connect.uwaterloo.ca.
- User Name as: "nexus\userid" (no quotations).
- Nexus password (WatIAM password used for HR and Quest).
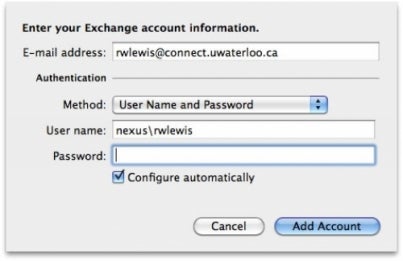
- Click Add Account.
- All settings should be discovered and completed automatically.
- Choose your new connect account, click on the settings icon and choose Default Account.
- (Optional) Select your old account and click on the minus sign to delete the old email profile.
Configure on Mobile Devices
Mobile devices such as Apple, Android, Blackberry and others change very quickly. Android devices can have different experiences depending on the particular implementation. As such we provide documentation on a best efforts basis and encourage you to read the vendor's documentation for the particulars of your specific device and software versions.
Apple devices
- From the "Settings" application, choose Passwords & Accounts
- On the "Add Account" screen, select Microsoft Exchange
- On the "Exchange setup" screen, enter the following and select "Next":
- Email: userid@uwaterloo.ca
- Description: Anything you wish
- When it asks "Sign in to your "uwaterloo.ca" Exchange account using Microsoft?" select Sign In
- Password: Your WatIAM password
- In the Server field: connect.uwaterloo.ca
- In the Domain field: nexus
- In the username field: WatIAM username
- Your device will now verify your Exchange account settings
- Tap the Save or Done
Android devices
- Settings
- General
- Accounts
- Add account
- Microsoft Exchange ActiveSync
You will need to enter following information to set up your email account:
- Email Address: userid@uwaterloo.ca
- Domain\Username: nexus\WatIAm username
- Password: your WatIAM password
- Server Address: connect.uwaterloo.ca
Follow the screen instructions. You will need to tap OK a couple of times and tap Activate at the end.
BlackBerry Android devices
Add an email account to the BlackBerry Hub:
- Tap the BlackBerry Hub
- Tap Add account
- Enter your email address, and then tap Manual Setup
- Tap your account type - Microsoft Exchange ActiveSync
- Email address: userid@uwaterloo.ca
- Username: nexus\WatIAM username
- Password: WatIAM password
- Server name: connect.uwaterloo.ca
- Tap Next
- Tap OK
- Tap Activate
Adding a Shared mailbox to Outlook for Windows
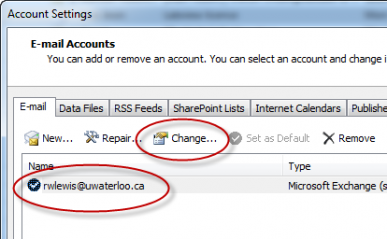
- From the main menu ribbon select: File, Account Settings, Account Settings
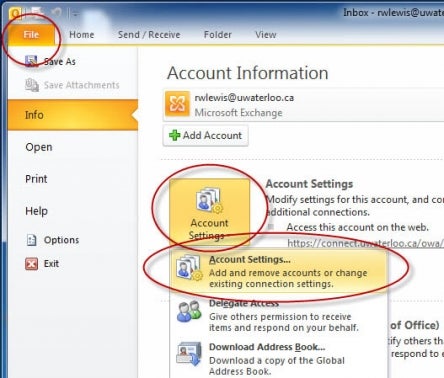
- Select your account and click Change
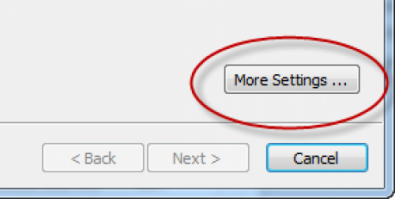
- Click on More Settings
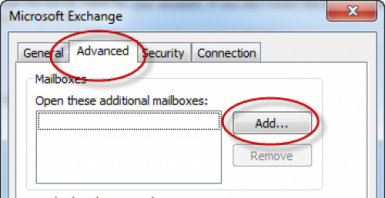
- Go to the Advanced tab, click Add
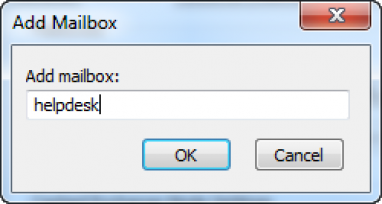
- Type the name of the generic account and click OK
- Close the remaining dialog boxes
- The mailbox will appear in your list of accounts in Outlook