Introduction
Now that you’ve gotten your LED to blink on and off, it’s time to up the stakes a little bit – by connecting eight LEDs at once. We’ll also give your Arduino a little test by creating various lighting sequences. This circuit is a great setup to start practicing writing your own programs and getting a feel for the way Arduino works.
Along with controlling the LEDs, you’ll learn about a couple programming tricks that keep your code neat and tidy:
- for() loops - used when you want to run a piece of code several
- arrays[ ] - used to make managing variables easier by grouping them together
Parts Needed
You will need the following parts:
- 1x Breadboard
- 1x Arduino Uno
- 8x LEDs
- 8x 330Ω Resistors
- 9x Jumper Wires
Hardware Hook-up
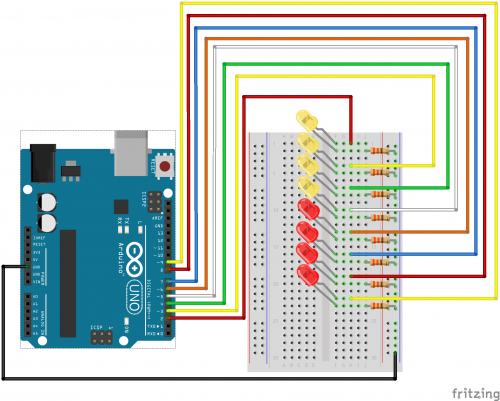
Ready to start hooking everything up? Check out the fritzing diagram below, to see how everything is connected. Open up 123D circuits io on your computer or laptop and make sure all the connections are completed.
Open the Sketch
Open up the online Arduino IDE on 123D circuits on your computer and laptop. Coding in the Arduino language will control your circuit. Copy and paste the following code into the 123D circuits code editor and follow along. Hit upload, and see what happens! Make sure to spend time adjusting the code here. Hack away; just don’t break anything.