Introduction
In Reading a Potentiometer, you got to use a potentiometer, which varies resistance based on the twisting of a knob. In this circuit, you’ll be using a photoresistor, which changes resistance based on how much light the sensor receives. Since Arduino Uno can’t directly interpret resistance (rather, it reads voltage), we need to use a voltage divider to use our photoresistor. This voltage divider will output a high voltage when it is getting a lot of light and a low voltage when little or no light is present.
Parts Needed
You will need the following parts:
- 1x Breadboard
- 1x Arduino Uno
- 1x LED
- 1x 330Ω Resistor
- 6x Jumper Wires
- 1x Photoresistor
- 1x 10k Resistor
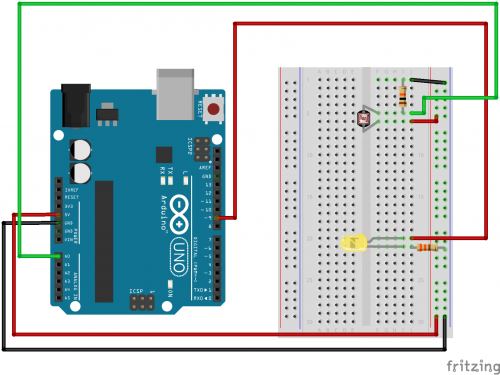
Hardware Hook-up
Ready to start hooking everything up? Check out the diagram below, to see how everything is connected.
Open the Sketch
Open up the online Arduino IDE on 123D circuits on your computer and laptop. Coding in the Arduino language will control your circuit. Copy and paste the following code into the 123D circuits code editor and follow along. Hit upload, and see what happens! Make sure to spend time adjusting the code here. This is another ‘hack away’ project and, as always, don’t break anything.
What You Should See
You should see the LED grow brighter or dimmer in accordance with how much light your photoresistor is reading. If it isn’t working, make sure you have assembled the circuit correctly and verified and uploaded the code to your board