Introduction
Servos are ideal for embedded electronics applications because they do one thing very well that motors cannot – they can move to a position accurately. By varying the pulse width of the output voltage to a servo, you can move a servo to a specific position. For example, a pulse of 1.5 milliseconds will move the servo 90 degrees. In this circuit, you’ll learn how to use PWM (pulse width modulation) to control and rotate a servo.
Parts Needed
You will need the following parts:
- 1x Breadboard
- 1x Arduino Uno
- 1x Servo
- 8x Jumper Wires
Suggested Reading
Before continuing on with this experiment, we recommend you be familiar with the concepts in the following tutorial: Pulse-width Modulation
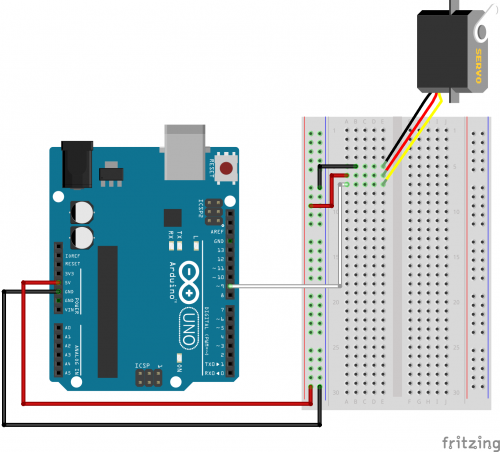
Hardware Hook-up
Ready to start hooking everything up? Check out the diagram below, to see how everything is connected.
Open the Sketch
Open up the online Arduino IDE on 123D circuits on your computer and laptop. Coding in the Arduino language will control your circuit. Copy and paste the following code into the 123D circuits code editor and follow along. Hit upload, and see what happens! Make sure to spend time adjusting the code here.