- Adding a Xerox copier/WorkCentre to a machine
- Printing a secure print job
- Releasing a secure print job
- Scanning documents to email
- Setting up an email address list on the Xerox
- Faxing
- Arts Printers and how to connect to them
Adding a Xerox copier/WorkCentre to a machine
In order to print to your department’s Xerox machine, you have to add it to your machine. For most faculty and staff, your department's Xerox machine is set up by default on machines managed by the Arts Computing Office (ACO). The following instructions assume the user is connected to the internet with a wired campus connection or through eduroam.
For Windows machines:
1. Click Start (usually in the bottom left corner).
2. Type \\artsprint.nexus.uwaterloo.ca , and then click OK.

3. If you are prompted for credentials use nexus\USERID
4. When selecting the Xerox, double click on your faculty copier. For example, if you are part of the Anthropology department, double click on p_anthrocopier.
For Managed Mac machines:
Managed Mac’s can use the "Managed Software Center” to add departmental printers simply by clicking Install under the desired printer.

For Unmanaged Mac machines:
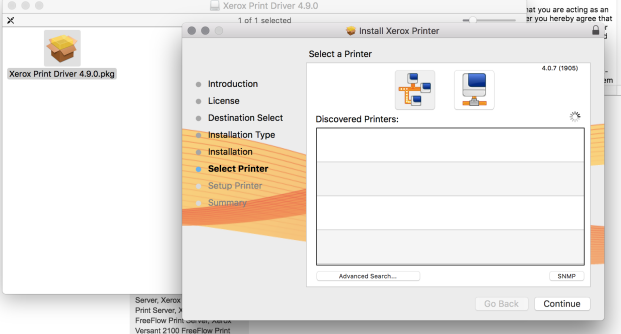
1. First download and install the driver for the Xerox device from the Xerox website. The device name of your printer should be indicated on the device itself. Most department printers are the Xerox VersaLink B7035. If unable to identify the Xerox device, please contact the ACO Help Desk and we will provide the device information. Then visit the Xerox website to locate the driver of your Xerox device.
2. Make sure to select the correct macOS. Run the installer, you'll be prompted for an admin account.

3. When it's looking for a printer just hit continue and don't try to add it.
4. Then go to Apple menu () > System Preferences, then click Printers & Scanners.
5. Click the + button to add. If the Advanced icon is not there then add it by right clicking in the menu bar and then dragging it to the toolbar.
6. Then Add theappropriate driver for the printer you are setting up, by choosing the correct queue name. Ensure to choose Type "Windows printer via spools". Also ensure to set the Name of the printer to something nicer than artsprint. If you are having difficulties identifying the correct queue name, please contact the ACO Help Desk and we will provide the correct information.

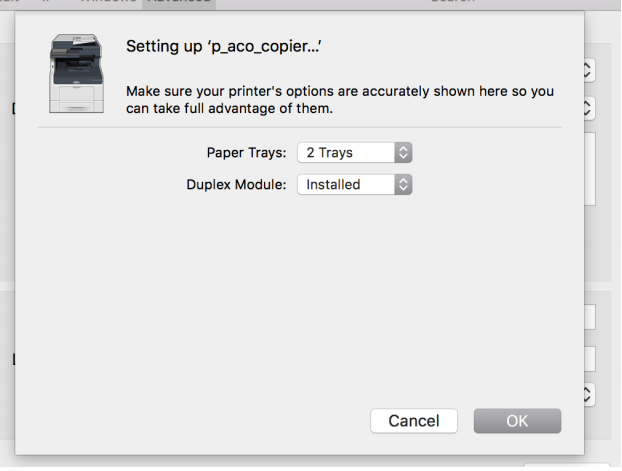
7. Click Add and then configure the features of the device, number of trays / duplex etc. ('p_aco_copier...') is used as an example:
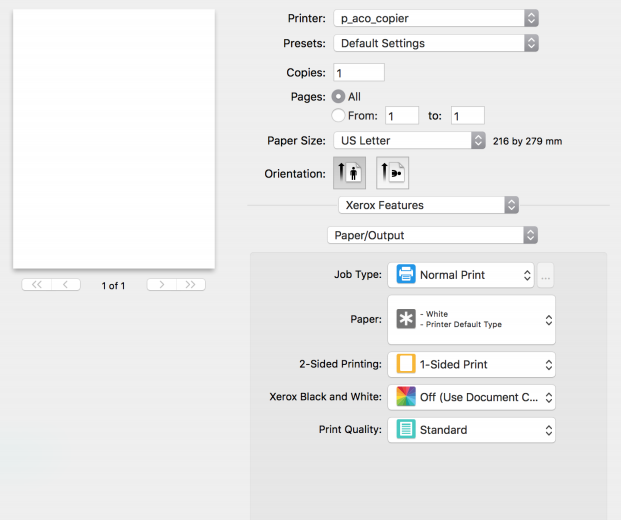
8. Hit OK, then try printing something. Select Xerox Features to change things like color or duplexing, or secure printing:
9. When you hit print you’ll have to authenticate with your nexus account. You do not need to prefix with nexus\ though it won’t matter if you do.

Printing a secure print job
A secure print job does not automatically print. Secure print jobs are held at the printer and can only be released at the printer with the set passcode.
- When printing, select the Xerox copier and then click on Printer Properties, or other similar options that will open the Xerox Printing Preferences window.
- Under Job Type, select Secure Print.
- In the Secure Print window, enter a passcode ( anumeric password required to release the document) twice.
- Click OK twice.
- Choose any other settings needed and Print.
- Proceed to Releasing a secure print job.
Releasing a secure print job
- On the printer, go to Job Status.
- Select your WatIAM userid.
- Click the print job, and then select Release.
- Type in the passcode, and then press Enter.
Scanning documents to email
- Place your paper document on the copier as if you were making a photocopy.
- On the printer, select All Services, and then select Email.
- Select New Recipient.
- In the To: field, enter the email address to which you want to send documents, and then press Enter.
- Configure how the document is emailed through the options available. By default, documents are sent as PDFs.
- Press Start to scan the pages.
When the scan is complete, the document will be sent to the specified email as an attachment. The screen will display confirmation of the scan when it has finished.
Setting up an email address list on the Xerox
To make the process of scanning to email easier, you can set up an email address list on your Xerox so that you can just choose an email address from the list, rather than having to type it in.
- Create a small file in Excel that lists the names and email addresses of the people you would like in the address list on the Xerox:
- Email that file to (to be determined) in the Arts Computing Office, and ask them to add the list to the email address list on your Xerox. If you have more than one Xerox, in your area, you may need to specify which one; otherwise, just let them know what department/group you are in.
Sending a fax
- Place your paper document on the copier as if you were making a photocopy.
- On the printer, select All Services and then select Email.
- Select New Recipient.
- In the To: field, enter the fax number as an email address according to the following format: 6[fax-number]@fax.uwaterloo.ca.
Replace [fax-number] with the fax number to which you are sending the document with no separators. For example, to send a fax to 123-456-7890, the email address would be 61234567890@fax.uwaterloo.ca - Press the Start button to send the fax.
When the fax is complete, the document will be faxed to the specified number. The screen will display confirmation of the scan when it has finished.