


Contact us | 519-888-4567 x41744
A user list is a collection of users who can access the PEAR project. Adding users allows them to submit their own work and review their peers' submissions. Users can be added as Instructors, TA's, or Students.
Adding users to a project in PEAR does not replicate it in any other project, even if the projects are for the same course. You will need to manually add users for every project.
All processes in PEAR rely on groups, so users must be added to a group in order for the review process to take place. See Creating groups in PEAR for detailed information.
Note: It is recommended to add users after the add/drop period has ended. If users are added before the add/drop period is over there may be issues with the user list (i.e. missing students).
Adding Users Individually Instructors/TA's
Adding Students
Adding a class list or bulk-adding users to a PEAR project is a two-step process that involves creating an Excel spreadsheet and uploading the spreadsheet's content to PEAR.
Creating the Excel Spreadsheet
- Login to LEARN and navigate to the appropriate course.
- Go to the Grades tab in the course navbar.
- Click Enter Grades.
- Click Export.
- Under Key Field select Username.
- Under User Details select Last Name, First Name, Email, and Group Membership.
- Deselect any grade items.
- Select Export to CSV.
- Open the Excel Spreadsheet.
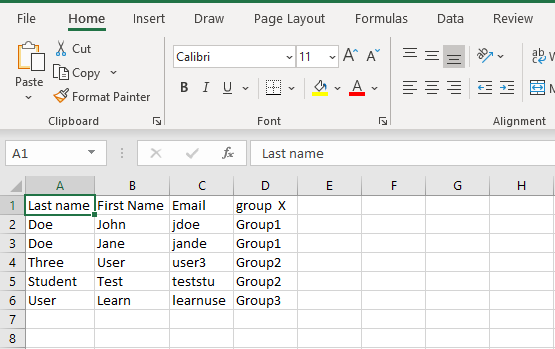
- The important columns are Last Name, First Name, Email, and Group. There may be multiple Grade columns, keep the desired group (i.e. journal, project etc.). All other columns can be deleted.
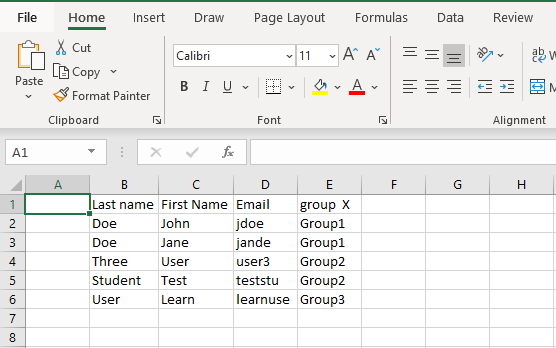
- Right-click on column A and select Insert.
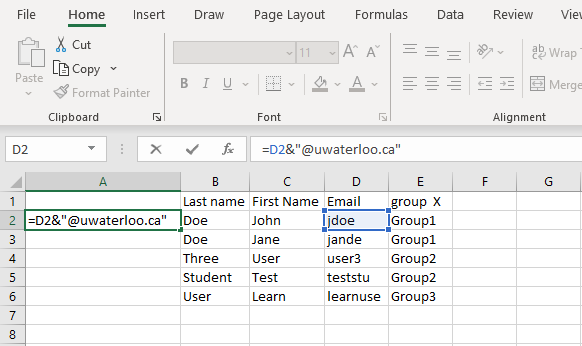
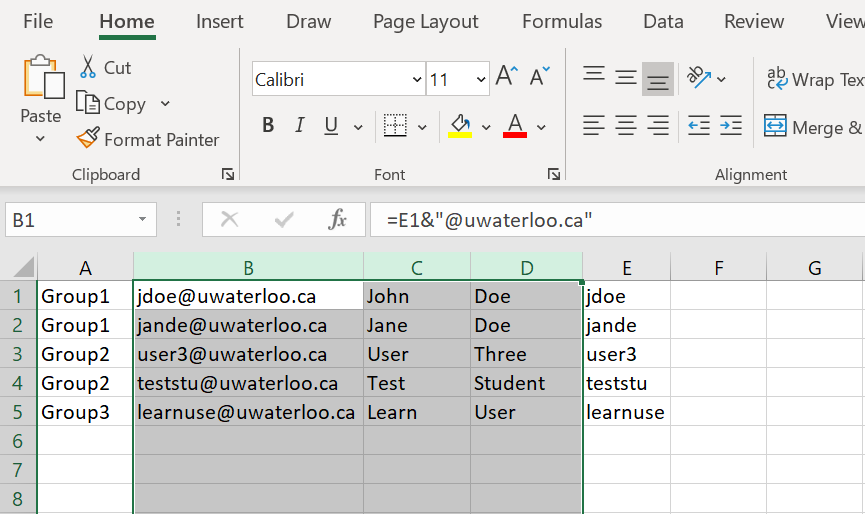
- Concatenate the user's email with @uwaterloo.ca so that username@uwaterloo.ca is displayed in the cell. The formula should look like =cell&"@uwaterloo.ca" (e.g. A2&"@uwaterloo.ca").
Note: As PEAR was developed by the University of Guelph and is hosted on the Guelph server, we need to include the username with @uwaterloo.ca to make a distinction between University of Waterloo and University of Guelph users.
- Select cell A2 and enter "=".
- Select the cell containing the user's Email.
- Input the following: &"@uwaterloo.ca" (including the quotation marks).
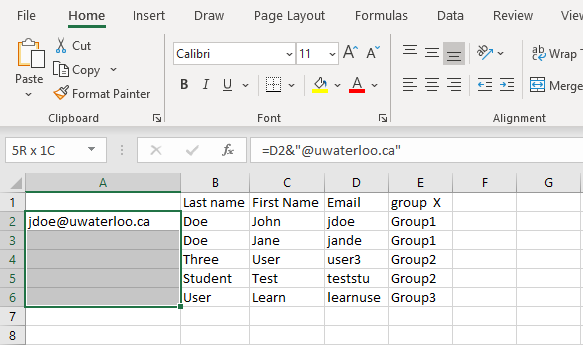
- To auto-populate/autofill the remaining cells, select the cell with username@uwaterloo.ca and drag the fill handle down the remaining rows OR select all the cells you wish to fill and click Ctrl + D.
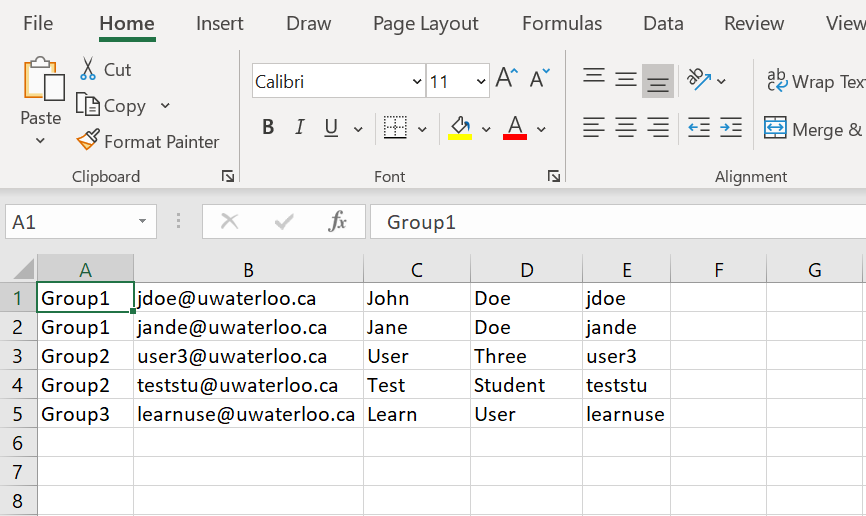
- Cut and paste Group column into column A. Cut and past First Name column into column C. Cut and past Last Name column into column D.
- The columns should be the following:
- A - group
- B - Email with @uwaterloo.ca
- C - First Name
- D - Last Name
- E - Email without @uwaterloo.ca
- Remove any column headings.
Bulk adding students to PEAR
-
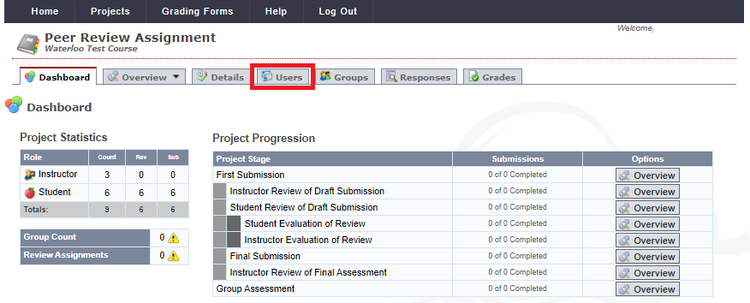
Login to PEAR and navigate to the desired project.
-
Click on the Users tab.
-
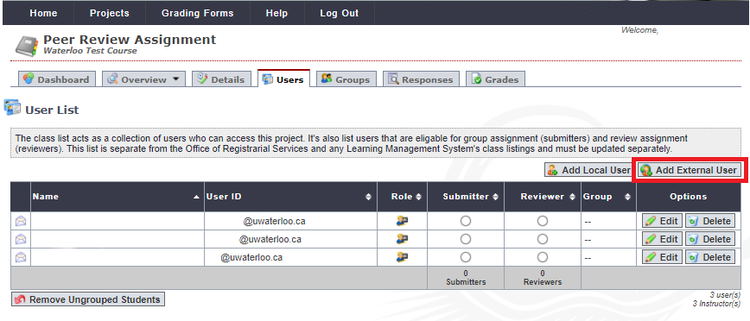
Click on the Add External User button.
-
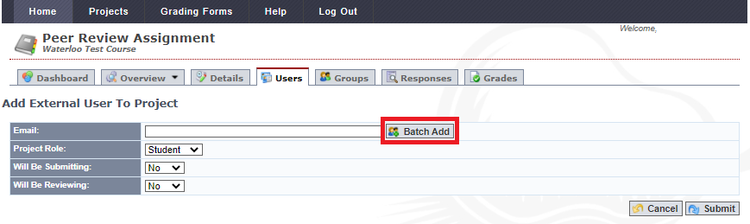
Click on the Batch Add.
-
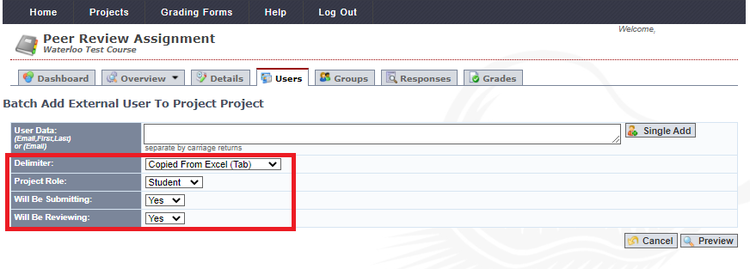
For Delimiter select Copied From Excel (Tab), for Project Role select Student, for Will Be Submitting select Yes or No, and for Will be Reviewing select Yes or No.
-
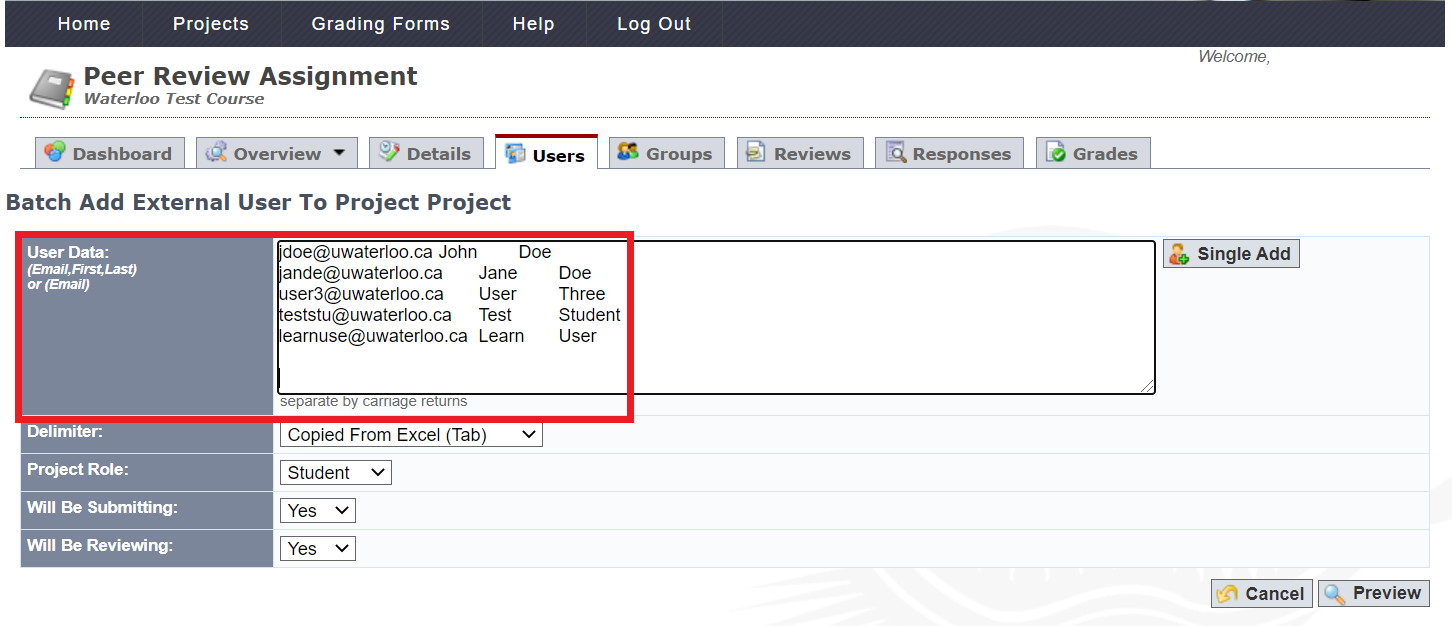
From the Excel spreadsheet copy columns B-D (email, first name, last name).
-
Return to PEAR and paste into User Data field.
-
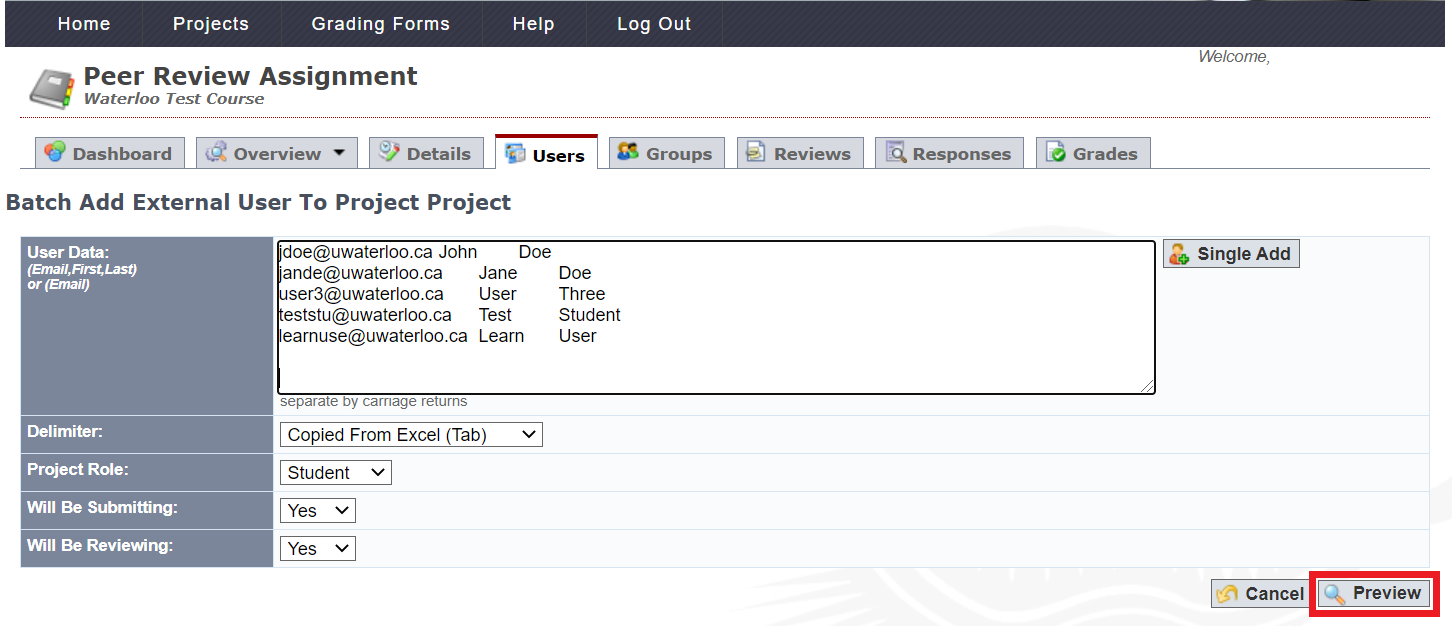
Click on the Preview button to ensure that the information has been input correctly.
-
Click Submit.
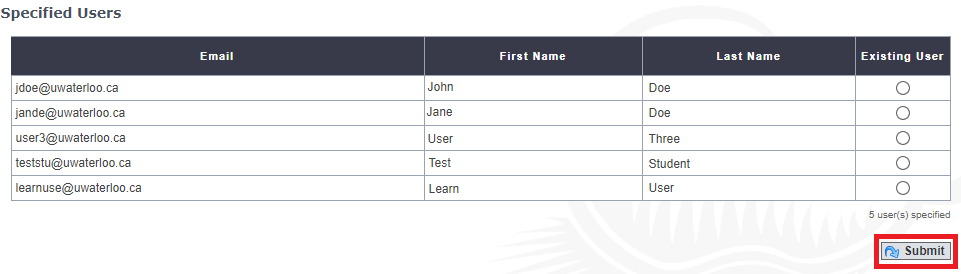
Note: If you see a green circle with a checkmark under the Existing User column it means that the particular user already exists in PEAR.
-
Students should now be added to the User List.
Adding Users Individually
-
Login to PEAR and navigate to the desired project.
-
Click on the Users tab.
-
Click on the Add External User button.
-
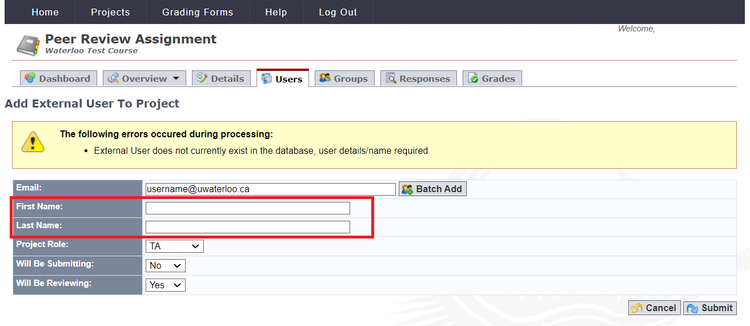
Enter the user's email in the Email field following the format of username@uwaterloo.ca, select the user's role from the Project Role drop-down list (Student, Instructor, or TA) and, select Yes or No for Will Be Submitting and Will Be Reviewing.

-
Click on the Submit button.
-
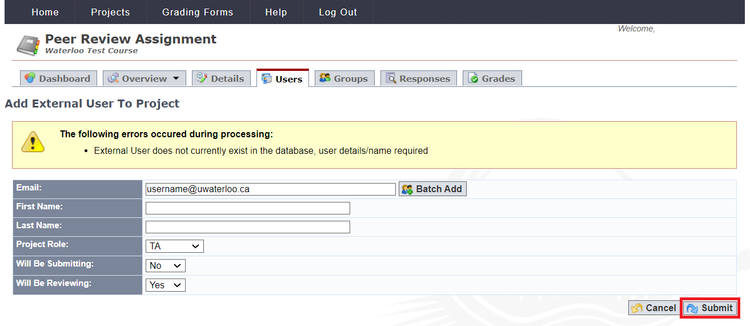
If the user has not used PEAR before/are not in the PEAR database then you will be prompted to enter their First Name and Last Name.
-
Click on the Submit button to add the user.
Deleting Users
-
Login to PEAR and navigate to the desired project.
-
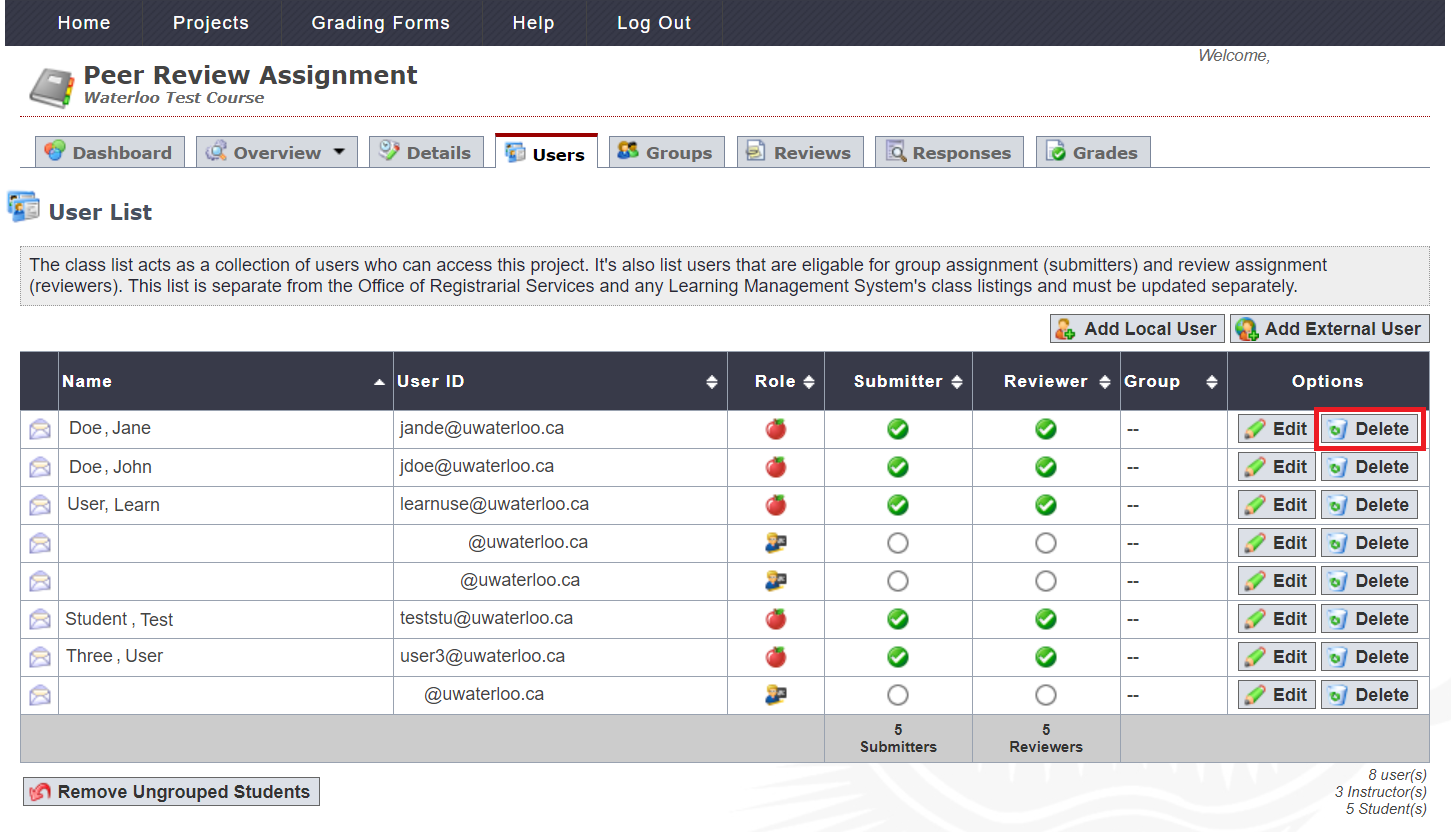
Click on the Users tab.
-
Click on the Delete button under the Options column for the user you would like to delete.
-
Click OK to confirm the deletion.