


Contact us | 519-888-4567 x41744
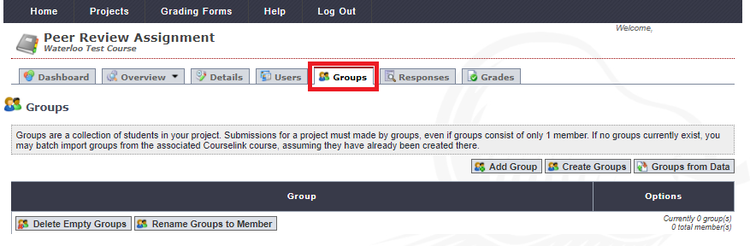
Groups are a collection of students in the project. Creating groups allows students to make project submissions as a group and allows users to complete assessments of their group members.
All processes in PEAR rely on groups. Groups must be created in order for the review process to take place. Groups can consist of any number of users whether it be 1, 10, or 50. If students are doing work independently, they still need to be added to a group in PEAR.
Note: Users must be added before groups can be made. You will also need access to the Excel spreadsheet you created when adding users to PEAR. See Adding users in PEAR for detailed instructions.
Creating PEAR Groups using Waterloo LEARN Groups
Creating PEAR Groups using Waterloo LEARN Groups
- Log into PEAR and navigate to the desired project.
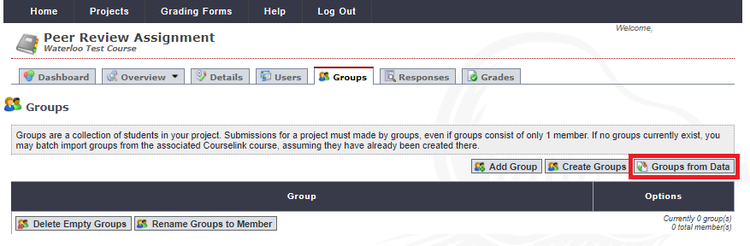
- Click on the Groups tab.
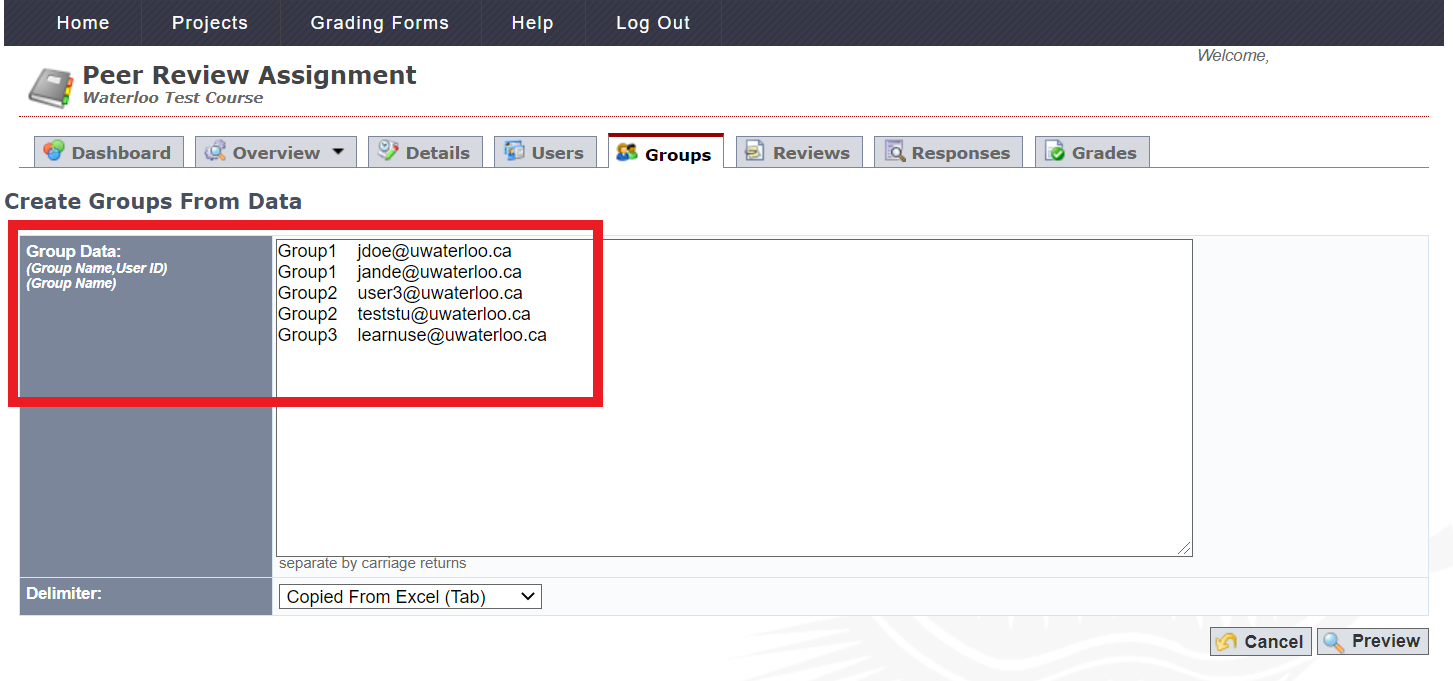
- Click the Groups from Data button.
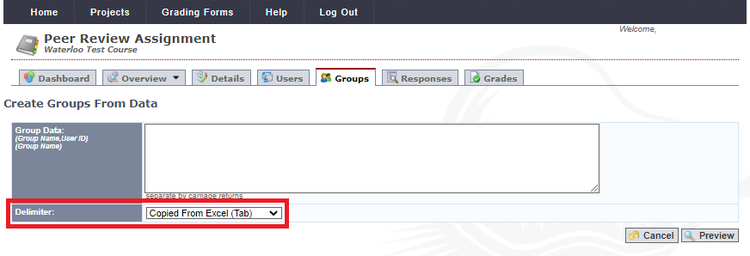
- For Delimiter select Copied From Excel (Tab).
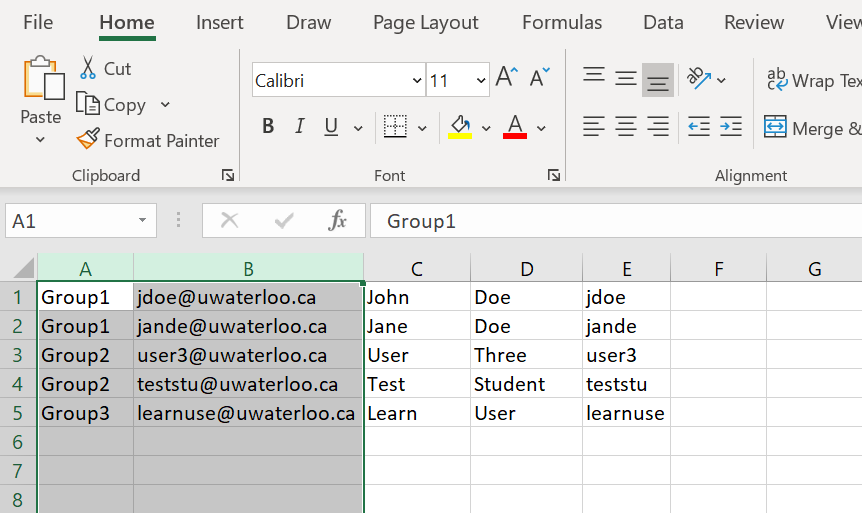
- From the Excel spreadsheet created while adding users in PEAR, copy columns A and B (Group and Email).
- Return to PEAR and paste into the Group Data field.
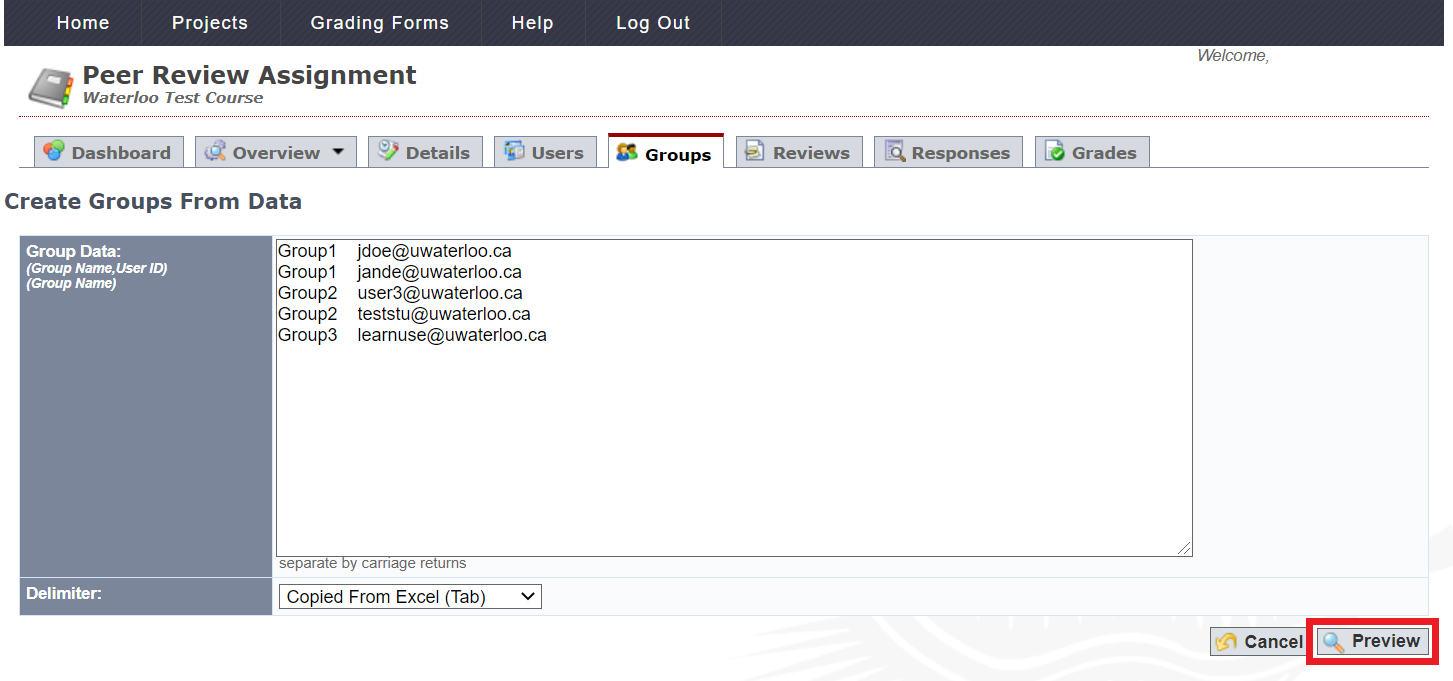
- Click on the Preview button to ensure that the information has been input correctly.
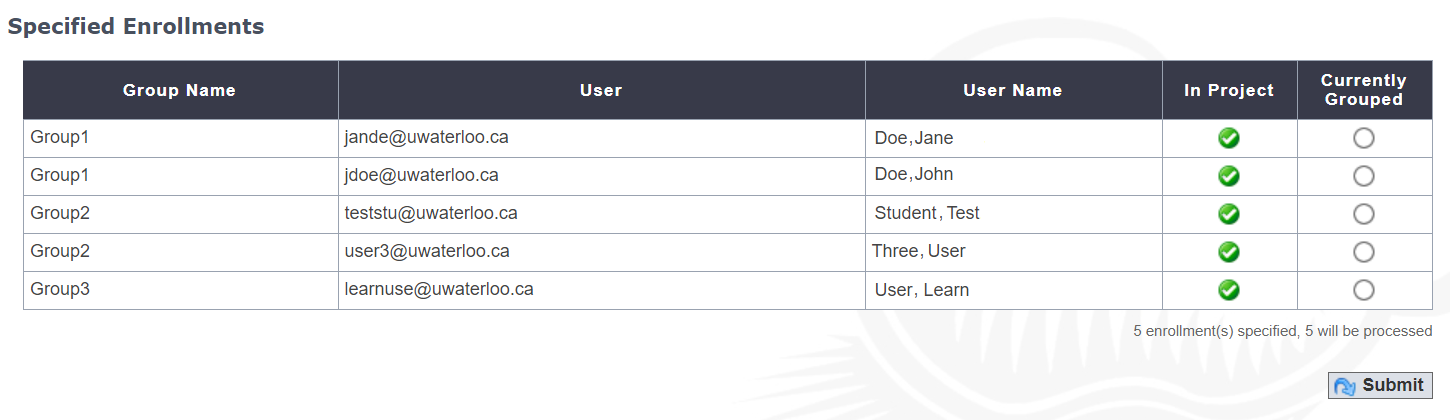
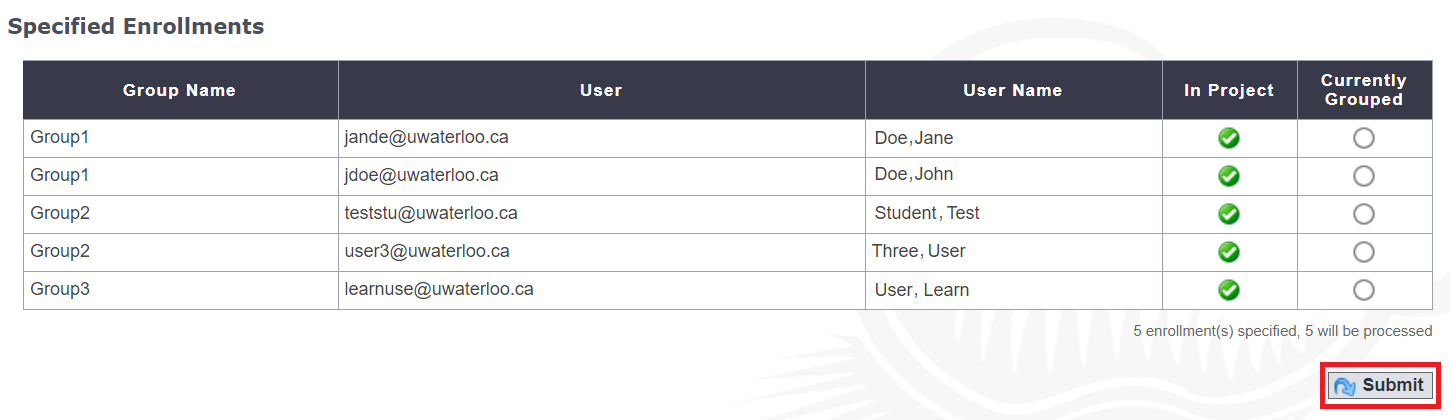
Note: It is helpful to check the In Project column to ensure that all the users in the groups have been successfully added to the project. A green circle with a checkmark indicates that they have been added to the project. If a user does not have the green circle with a checkmark, they will need to be added to the project. - Click the Submit button.
- The groups should now be created.
After groups have been created they can be modified. Users can be added to or removed from groups. New groups can be created and existing groups can be deleted. Groups can also be renamed.
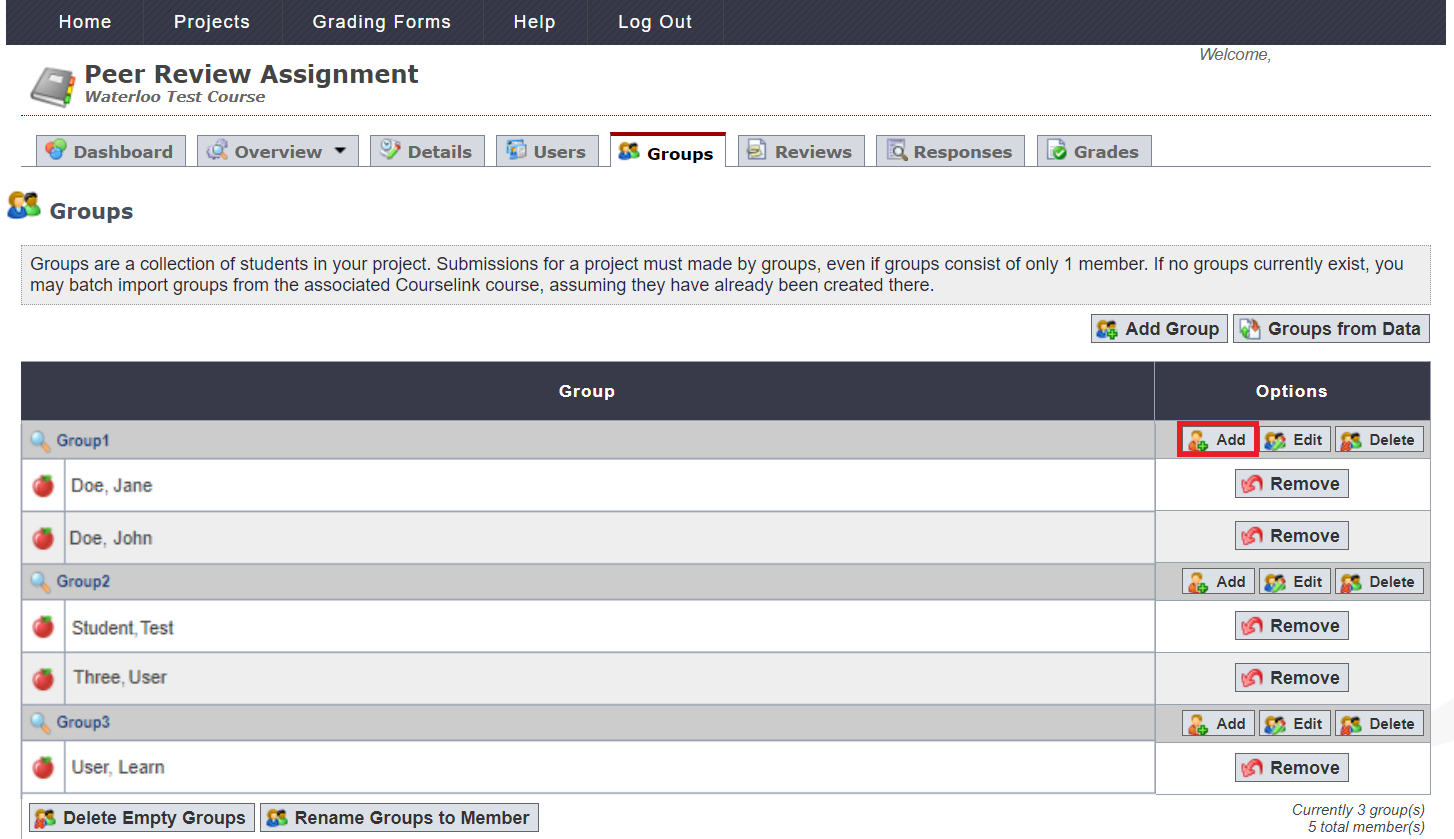
Adding Users to Groups
- Click the Groups tab.
- Click on the Add button for the group you would like to add users to.
Note: Both Students and Instructors/TA's can be added to groups. - Select the user(s) you would like to add to the group.
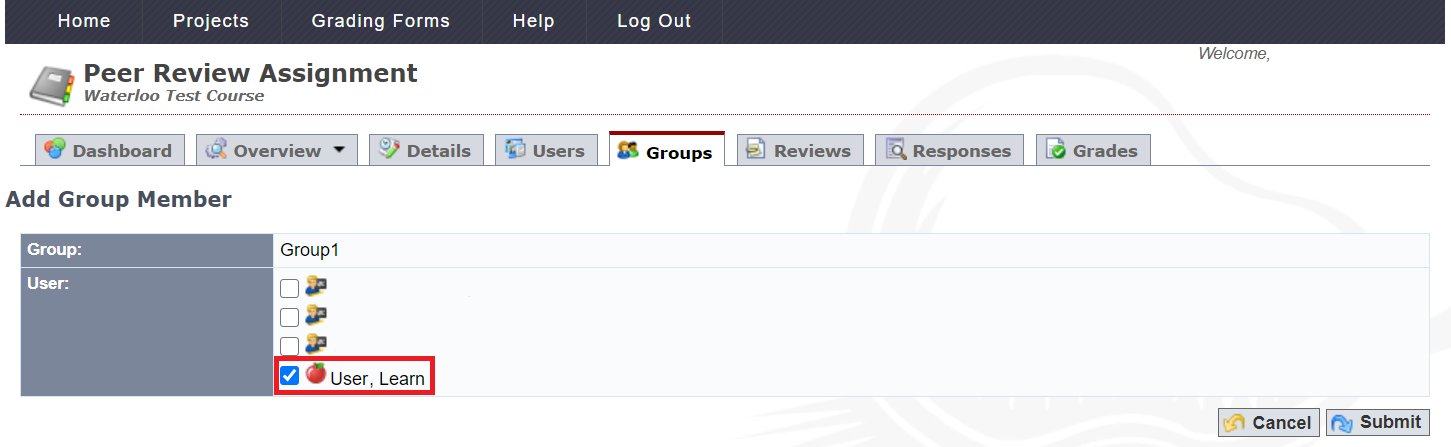
- Click on the Submit button to save your changes.

Removing Users from Groups
- Click the Groups tab.
- Click on the Remove button for the user you would like to remove from the group.
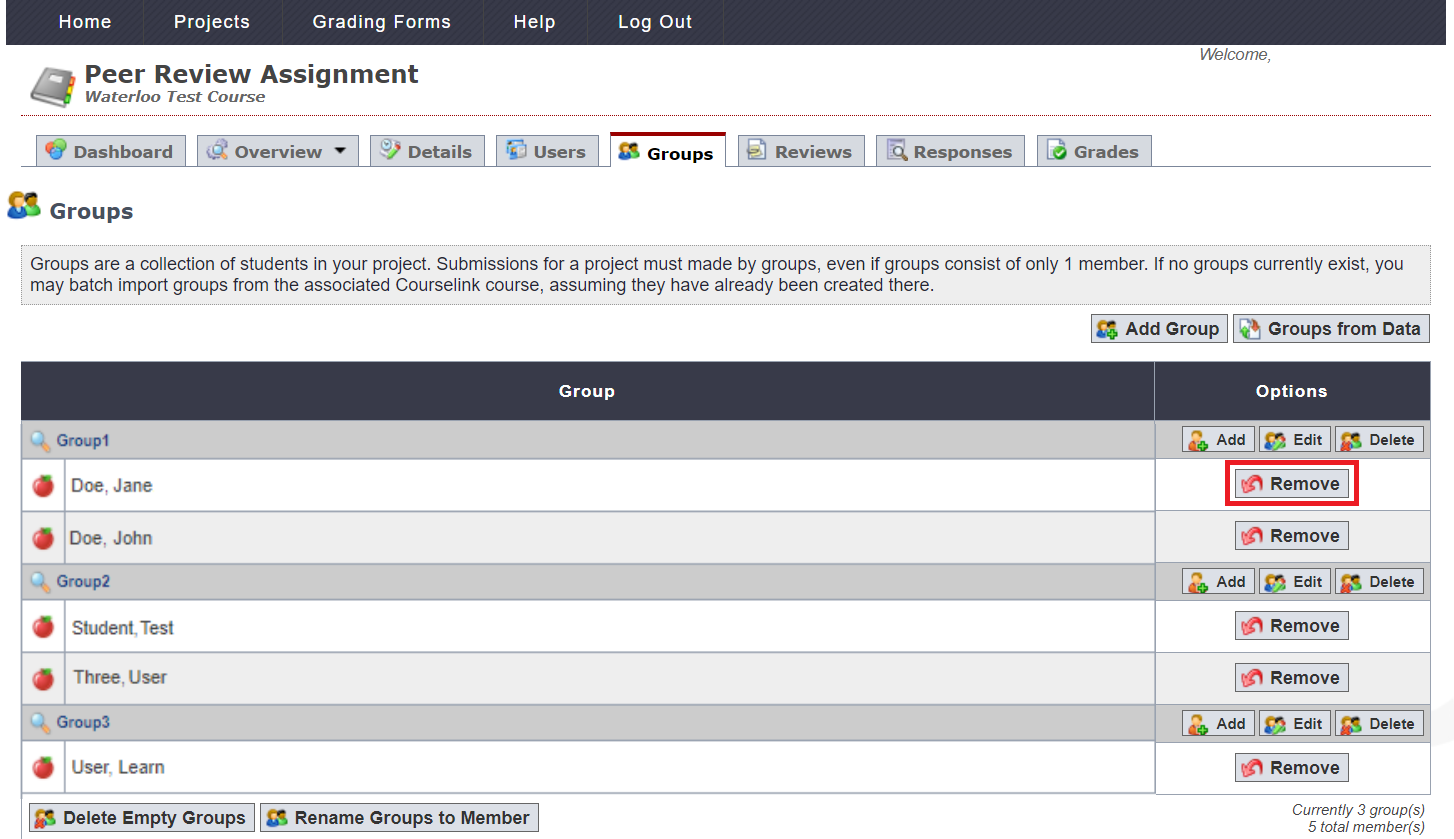
- Click OK to remove the user.
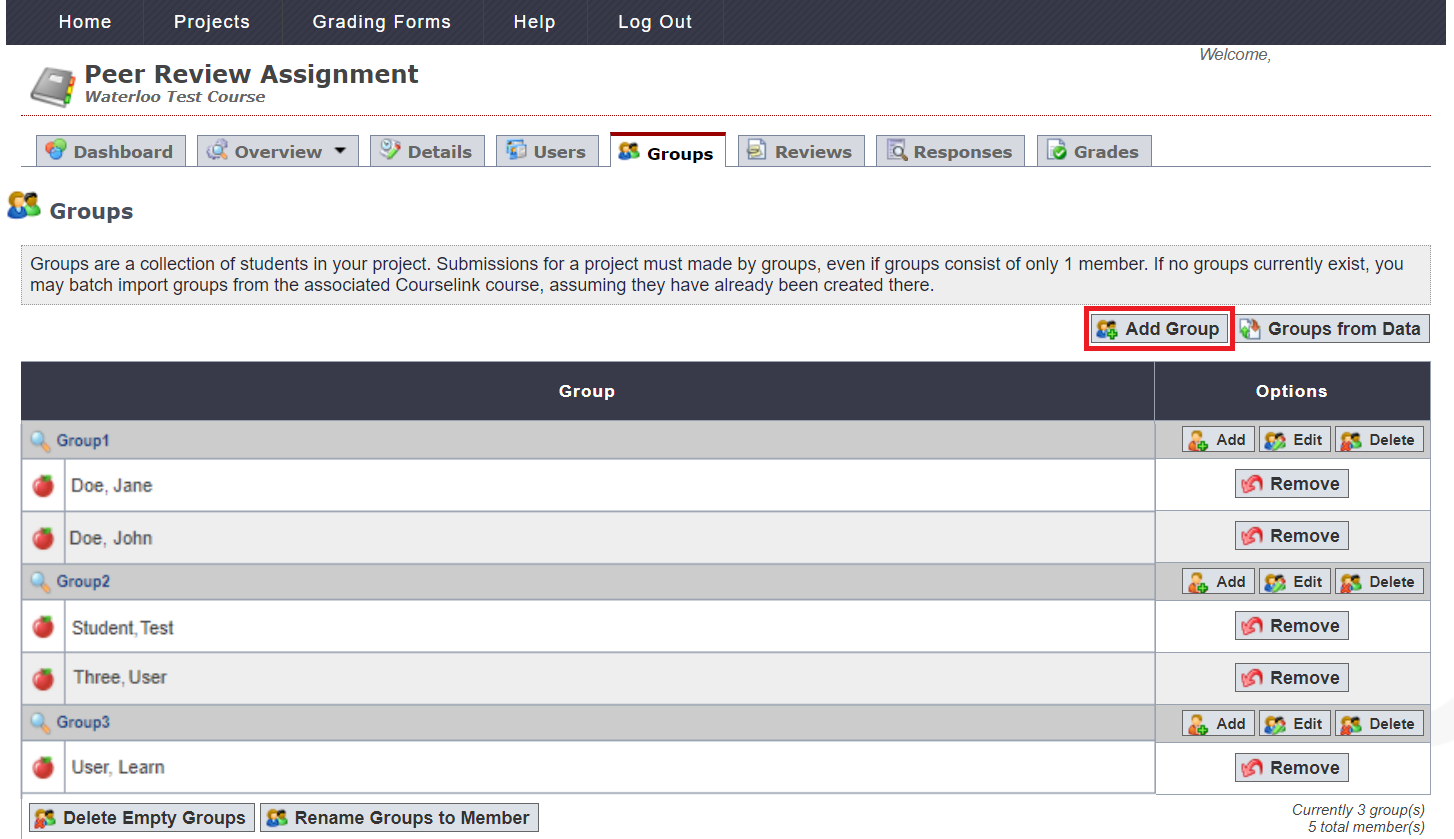
Adding a Group
- Click the Groups tab.
- Click on the Add Group button.
- Enter your desired name in the Group Name field.
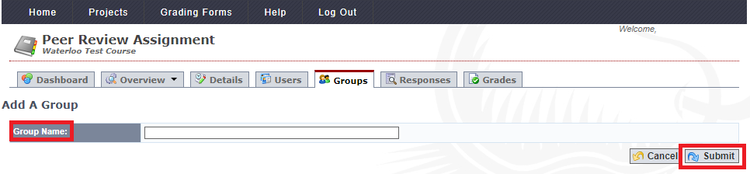
- Click on the Submit button to save your changes.
Deleting a Group
- Click the Groups tab.
- Click on the Delete button for the group you would like to delete.
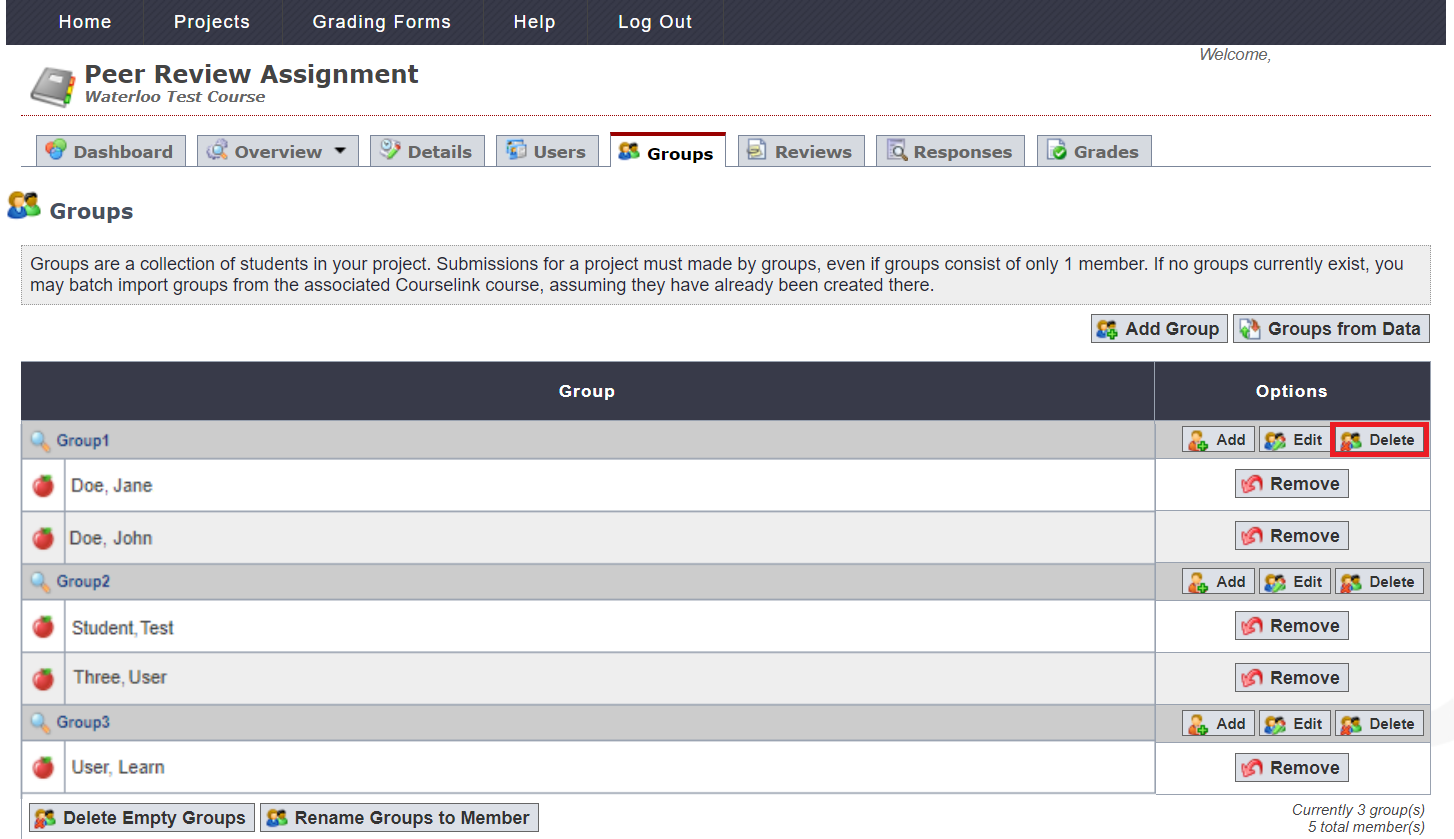
- Click OK to delete the group.
Renaming a Group
- Click on the Groups tab.
- Click the Edit button for the group you would like to rename.

- Enter your desired name in the Group Name field.
- Click on the Submit button to save your changes.