Note: The following information:
- Pertains to faculty, staff and grad students only.
- Is valid for Outlook 2013 and Outlook 2016.
- Close Outlook before proceeding.
- Click on the Start menu in the bottom left corner -> Click Control Panel.
- Double click the Mail icon. Click Show Profiles button.
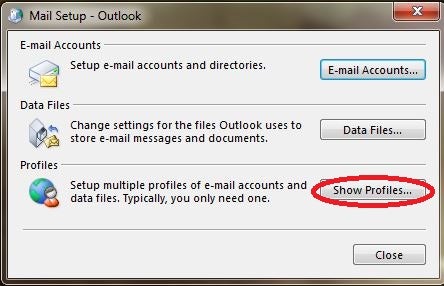
- Select your main profile. If there is only one profile, it will already be selected for you.
- Click Properties button.
- Click E-mail Accounts button.
- Click the New button.

- Leave the E-mail Account option selected.
- Click Next.
- Change the selection from E-mail Account to Manual setup or additional server types.
- Click Next.
- Choose the service which works best with your new E-mail Account:
- For @connect email accounts, choose Microsoft Exchange Server...
- Click Next.
- Set the server to connect.uwaterloo.ca.
- The user name is your userid, select Next.
- To authenticate, in the next window that appears your userid is nexus\userid and your password is your WatIAM password.
- To prevent having to type this information in every time you log on, check the Remember my credentials box before logging in.
- For @mailservices email accounts, choose POP or IMAP
- Follow the instructions in the Mailservices account section of Using Microsoft Outlook 2013/2016.
- For @connect email accounts, choose Microsoft Exchange Server...
- Close the remaining dialog boxes (Finish, Close, Close).
- Click OK.
- Open Outlook.
- The new mailbox will appear in your list of accounts in Outlook.