Monday, December 7, 2020 9:00 AM EST
It’s holiday time up in the Library, and all the geese are shouting, “It’s Holi-yay! Rock out with your beak out.” This year we’ve created a comprehensive list of DIY activities to enjoy as you take a break and relieve some stress. We have so many activities, and you might need an assignment planner to help plan and time your DIYs. Okay, maybe it’s not that serious, but your assignments are! Check out the Library assignment planner and see how it could help you better break down your assignments into manageable steps.
Ready for DIY?


Whenever cooking a new recipe, it’s important to research multiple recipes, read the reviews, and pick the most credible one... sound familiar? When completing your assignments, contact your librarian by subject for consultations on finding and accessing relevant research resources and creating successful search strategies.
Let's get baking!
A sweet, sweet taste of home.
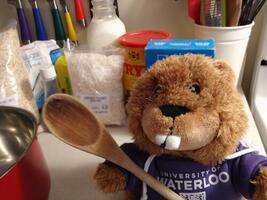
What you need
Ingredients
- 2 cups granulated sugar
- ½ cup butter
- ½ cup milk
- Pinch of salt (if using unsalted butter)
- ½ cup unsweetened cocoa powder
- ½ teaspoon vanilla extract
- 3 cups quick-cook oats
- 1 cup unsweetened shredded coconut
Equipment
- Medium or large saucepan (3L or larger)
- Large spoon and/or spatula
- Reusable baking mat or parchment paper
- Two cookie sheets or cutting boards
- A tablespoon or cookie scoop
- Small teaspoon (not a measuring spoon)
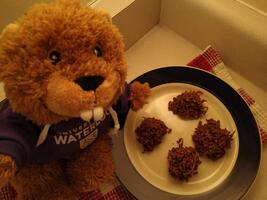
Step 1
Line the cookie sheets or cutting boards with the waxed paper, parchment paper, or reusable baking mat. You have to work FAST at the end of the recipe, so don’t skip this step!
Step 2
Mix sugar, milk, and butter into the saucepan over medium heat. Stir the butter into the milk and sugar, breaking it up as the mixture heats. Once all the butter has melted, occasionally stir until the mixture starts to boil.

Step 3
Add the cocoa powder and vanilla to the bubbling mixture, and stir until all of the cocoa is well mixed. Turn down the heat a little bit, but make sure it’s still bubbling. Let it boil for 4 minutes, occasionally stirring to make sure it doesn’t stick.

Step 4
Turn off the heat, but leave the saucepan on the hot element. Add the oats and coconut to the mixture, and stir them in fast and thoroughly.
Step 5
Leave the saucepan on the turned off yet still hot element. Using your tablespoon, scoop up some of the mixture and use the smaller teaspoon to scoop it out onto your prepared tray. Don’t use your fingers; that boiling sugar is HOT. Work as fast as you can to scoop out your cookies – the sugar will start to crystallize as it cools, and it will become powdery as you try to work with it (that’s why you leave the saucepan on the stove) – you have about 5-8 minutes to scoop out your beaver lodges!

There’s no taste like home for the holidays!
Book ornament
Whenever sharing or publishing pictures that are not your own, it’s essential to understand the rules behind copyright and licensing. Today we can share book covers because it falls under educational use under Fair Dealing. In other cases, we would use Open License and Open Access resources to gather images. Open Access (OA) is an international movement that advocates for the free and unrestricted access to peer-reviewed scholarly research on the web with full and accurate acknowledgment for the authors. For more, check out the Library’s copyright and licensing page.
Ready to start building your book ornament?
What you need
- Book cover printed on cardstock
Pick a book cover from the images below. For more images, download the following book cover PDF.
To download: right click image and save image as.


- Cardstock cut to size, roughly 20 to 40 pieces depending on size desired (other thick paper could work instead)
- Colourful string, twine, fishing wire, paper clip, or anything for hanging your ornament
- Glue stick
- Glue gun and extra glue gun sticks
Step 1
Begin by gluing your cut cardstock pieces together. Glue one side and press down another piece on top. Continue this with all of your pieces in two or three groups, depending on the desired thickness. Place these under something heavy while the glue dries. I had my friend Henrietta help.
Step 2
While your cardstock is drying, take the book cover you have printed and score the spine: take a knife or pair of scissors and run it along either side of the book’s spine. This will help with the overall effect once your pages are attached.
Step 3
Plug in your glue gun and once it’s ready, glue the two groups of cardstock you have already made. This will help reinforce these pages so they can stay together. Press down on these pieces for around 30 seconds.
Step 4
Take your string and cut to the desired length. Holding the two ends against the top of the spine on what will be the inside of the book, use your glue gun to attach the string.
Step 5
To attach the pages to the spine, take your glue gun and add a line of glue against the book's spine and one of the long sides of the cardstock pages. Press together for 30-60 seconds. You can keep your pages as is, or you can glue the back and/or front cover to the cardstock pages using your glue gun.
Step 6
Let your ornament sit for 10-15 minutes to ensure all of the glue is dry. Then find a nice spot on your tree to hang it! Don’t have a tree? Hang it on a door handle or piece of furniture.
Tips:
- I ended up using a rather thick string, so I needed more hot glue to the cardstock's side after it had been attached to the spine.
- If you’re not sure how much cardstock you’ll need, check the thickness against the book's spine before you glue everything together.
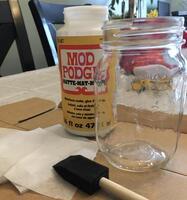
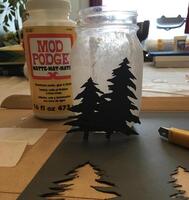
Candleholder
Isn’t it lit to have Open Access? Open Access is the free, immediate online availability to research articles. The Library has compiled journals and books with Open Access content here on the library website. Always look to get access through your UWaterloo credentials or an Open Access resource.
Ready to light it up?
What you need
- Mason jar
- Tissue paper
- Mod podge
- Black paper
- Candle
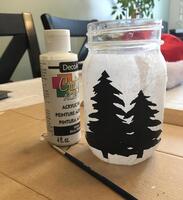
- White paints (optional)
- Paintbrush (optional)
- String (optional)
Step 1
Clean and dry your mason jar. Next, cut out tissue paper strips the length of your mason jar. The thinner the strips, the easier it will be to apply.
Step 2
Apply mod podge to your mason jar and add your tissue strips. Add another coat of mod podge on top of the tissue paper you apply.
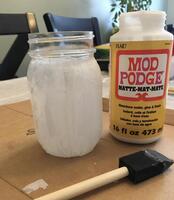
Step 3
Once you have entirely covered your mason jar, let the glue dry. In the meantime, sketch and cut out a tree silhouette. I decided to cut out two, but feel free to get creative with your shapes! You can cut out snowflakes or a snowman instead.
Step 4
Apply a mod podge to the section of the mason jar where you will add your silhouette. Depending on the thickness of your paper, add more glue. The paper I used is sturdy, so I needed more glue than expected. Next, add glue and pressure to the silhouettes, ensuring the trees are sticking to the jar.
Step 5
Let the tree and glue dry. In the meantime, get your paintbrush and paint ready.
Step 6
With white paint, add a little bit of snow to your trees! It will help them blend better on the mason jar.
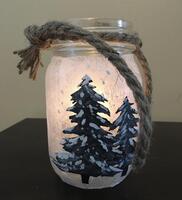
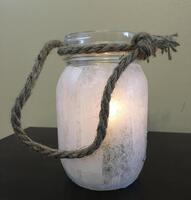
Step 7
Add a string! It's just for aesthetics. Finally, add your candle and enjoy.
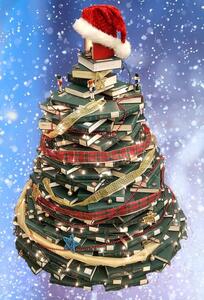
Holiday tree
Stack up your books to make a holiday tree! There are various ways to create a unique holiday tree, but the Library has a tradition of making one out of books!
Did you know you can now receive Library books by mail? Books by mail is a new feature that started on November 6th. Requested items will be mailed out to any address within Canada or campus office location if working on campus has been approved. Also, prepaid return shipping labels will be provided for off-campus addresses.
Let's build our tree!
What you need
- Books (ideally green books)
- More books
- Maybe more books!
- Garlands
- Any other decorations you may have around the house!
Step 1
stack up two closed books on top of each other.
Step 2
Open the other books and stack the open books on top of each other.
Step 3
Decorate your tree with garlands or twinkle lights! Check out our DIY snowflakes below to add to your tree!
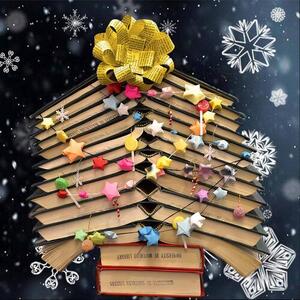
Have more books to spare?
Snowflakes
You know what they say, no two citation styles are the same…oh, I meant snowflakes… but you get the gist. Like making a snowflake, citing properly also takes time and various steps. Check out the Library’s online reference shelf to guide you to the style you need for your assignment.
As no two snowflakes are the same, we have a variety of DIY snowflakes:
Paper snowflake
What you need
- 8.5 x 11-inch Paper
- Scissors
Step 1
Fold the piece of paper so that the short edge is aligned with the long edge. Use scissors to cut the remaining rectangle to create a triangle.
Step 2
Fold the triangle along the longest edge to form a smaller triangle. Fold the triangle in thirds.


Step 3
Cut the shape at an angle to produce another triangle, even smaller in size.

Step 4
Add cuts and designs to your triangle!

Step 5
Unfold the remaining shape to reveal your snowflake!

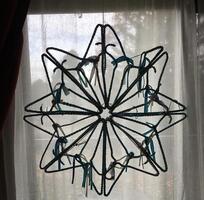
Coat hanger snowflake
What you need
- 16 hangers
- 16 zip-ties
Step 1
Building this snowflake will be much easier done on the ground. Take 2 coat hangers and lay them on the floor with the long side touching each other and the hanger pointing outwards. Place 3 more pairs of hangers the same way, ensuring the hanger's point are also touching each other.
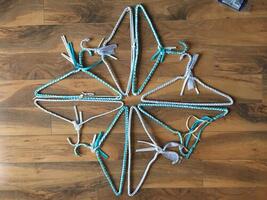
Step 2
Lay the coat hangers in the same manner on top of the first layer of coat hangers. However, lay the long side of the second hangers on top of the hanger points of the first layer of hangers.
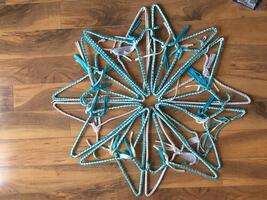
Step 3
Add 8 zip-ties loosely around all four coat hangers touch, where the 2 long parts of the hangers and the 2 hanger points touch. Add another 8 zip-ties around 4 hangers at the inner part of the snowflakes.
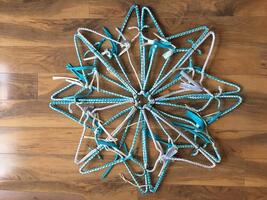
Step 4
Tighten all of the zip-ties once you like your snowflake shape and hang it with string!
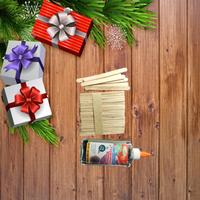
Craft stick snowflake
What you need
- Craft sticks
- Glue
Step 1
Break two sticks in half and glue the halves together to form a square.

Step 2
At each vertex and center of each edge, glue a stick to create the following shape.
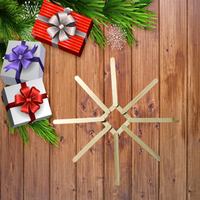
Step 4
Break eight sticks in half and glue each half together at a 90˚angle
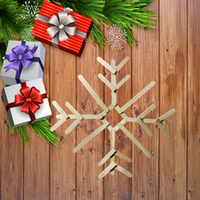
Step 5
On each stick positioned at the vertex of the center square, glue two of the pieces from the previous step with the point facing the center of the shape.
Egg carton snowflake
What you need
- Scissors
- Egg carton
- Blue paint
- Paintbrush
- Sparkles (optional)
Step 1
Cut out the egg holder from the egg carton. Cut out as many snowflakes as you'd like. Next, cut 4 slits in the egg holder to create a snowflake shape.
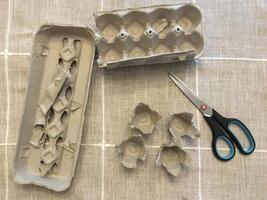
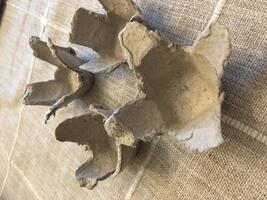
Step 2
Paint your snowflake and add some sparkles.
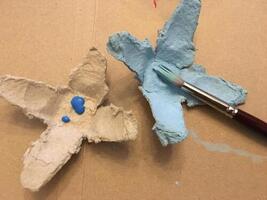
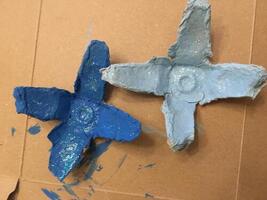
Step 4
Decorate your space with cute small snowflakes!
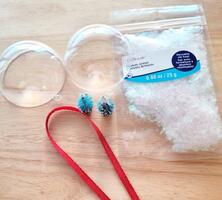
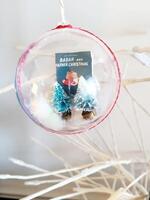
Snow globe ornament
The Library's Research guides are like small gift-wrapped packages of databases and resources, like how snow globes are wrapped holiday feels! One per academic subject, the Research guides provide targeted information on a particular topic to support your research. All of your resources in one place is always useful! Like building a snow globe, pick only a few items and build off from there.
We decided to pick out some miniature books for the Library’s snow globe!
What will you put in your snow globe?
What you need
- Cardstock paper
- Fake snowflakes
- Glue stick
- Hot glue
- Hot glue gun
- Ribbon
- String
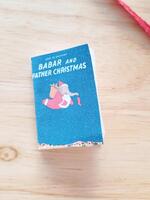
- Printed book cover
For book images, download the following book cover PDF.
Step 1
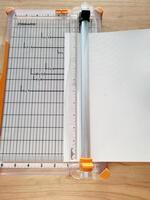
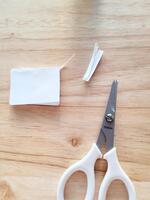
Cut cardstock sheets into strips of paper smaller than the width of the printed book cover.
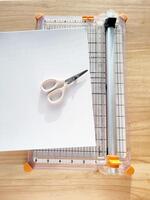
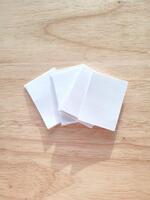
Step 2
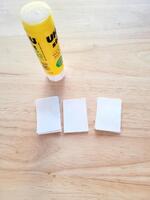
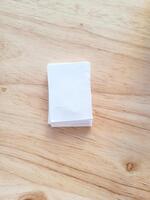
Glue the pieces of paper you've cut with a glue stick into little groups of 5 o 6 pieces. If you want the inside of your book to be colourful, the little packets of paper help to create a fun pattern. For this DIY I used white paper, but you could easily make it more festive with another colour mixed in.
Step 3
Glue little packets of paper together.
Step 4
Trim your paper as needed so that it fits nicely into the book cover you printed off.
Step 5
Warm-up your hot glue gun. Then put a generous amount of hot glue on one side of the paper you just glue together. Press into the book cover and you've got a little book!

Step 6
Glue in the book to one half of the plastic ornament using the hot glue gun. Glue in any other embellishments you want to put in your snow globe ornament.
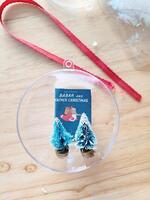
Step 7
Add in fake snow to the half with the book and other embellishments. Close the ornament. I put hot glue on the inside of the ornament when I closed it which was not a good decision. The ornament wouldn't close properly. Instead, close the ornament and put hot glue around the outside and lay the ribbon over it.
Step 8
Hang up!
We hope these DIY holiday decorations have lifted your holiday spirit!
Proud of your DIY? Tag the Library @uwlibrary and, we will showcase it on our story!


