What is it?
The Ubiquiti Camera is a compact, weatherproof network-connected camera used to record and monitor activities through a staff-managed web service.
- These cameras only work in locations with an Ethernet port available.
- To help ensure everything is ready before you need the camera, please submit your request at least 3 days in advance so IT staff can check network availability and perform the setup.
- The camera operates in temperatures from -20°C to 40°C, making it suitable for both cold winters and hot summers. It is weather-resistant and can handle indirect moisture, but it is not waterproof. For outdoor use, install the camera in a sheltered location protected from direct rain, snow, and prolonged exposure to intense sunlight.
.
- To borrow these cameras, please create a ticket by using our helpdesk portal. Afterwards, IT staff will coordinate camera pickup and setup with you.
.
What's it used for: The cameras are commonly used by staff/students in lab settings to stream/record experiments over time, allowing users to document progress and review changes throughout a project.
What's it not used for: The cameras are not used for video surveillance or security purposes. Recording others requires their consent.
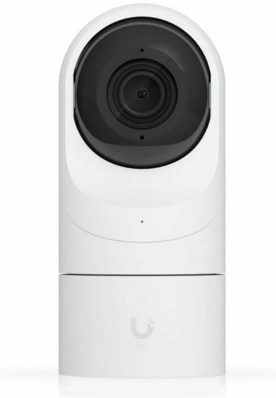
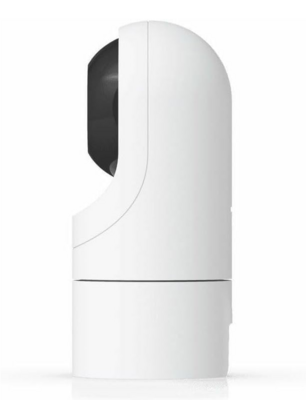
Camera Setup
An IT staff member will assist with the setup and network configuration of the camera.
The IT team will:
- Provide the camera and the required network cable.
- Connect and configure the camera for the designated room.
- Provide access to the camera feed based on the length of your request.
Optional Services
In addition to live viewing, the system can also provide recorded footage and motion detection exports upon request.
- Recording: Recordings can be made available upon request. For up to 24-hour recordings, the total exported file size is typically 8 GB or larger. Longer exports are automatically split into 1-hour segments, which are provided as multiple downloadable .mp4 files.
- Motion Detection: The IT team can also help set up motion-detection recording if required. This option records only when movement is detected, helping reduce storage use and making it easier to review relevant footage. Motion detection can be configured upon request.
Accessing Your Camera Feed
There are two methods of accessing a camera feed, depending on how long access is required.
Option 1: Access for Less Than 24 Hours
If you require access for less than 24 hours, the IT Office will provide you with a temporary livestream link.
Important:
- The link can only be viewed by one person at a time.
- Access is intended for short-term monitoring needs.
Simply open the link provided by IT in your web browser to view the camera feed.
Option 2: Access for More Than 24 Hours
If you require access for longer than 24 hours, the IT Office will provide a secure camera stream along with setup instructions.
Windows Setup Instructions:
- Download and extract ffplay.exe from the following link: ffplay download
- Navigate to: ffmpeg 4.4.1 binaries > windows-64 > ffplay
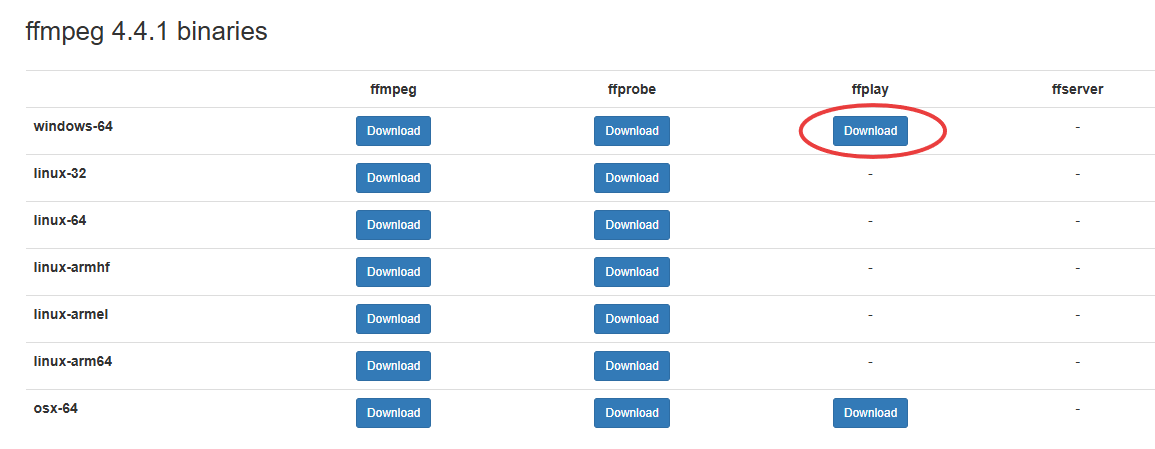
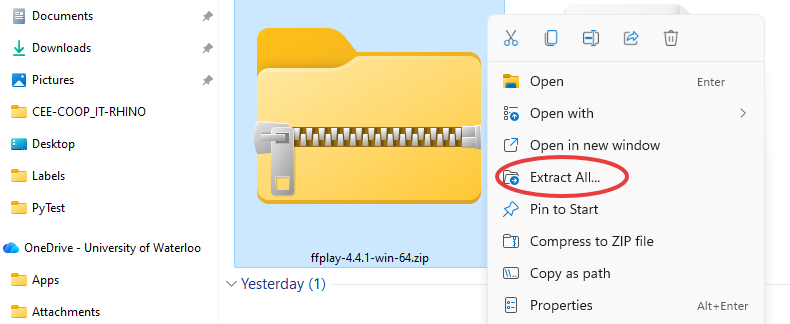
- Navigate to: ffmpeg 4.4.1 binaries > windows-64 > ffplay
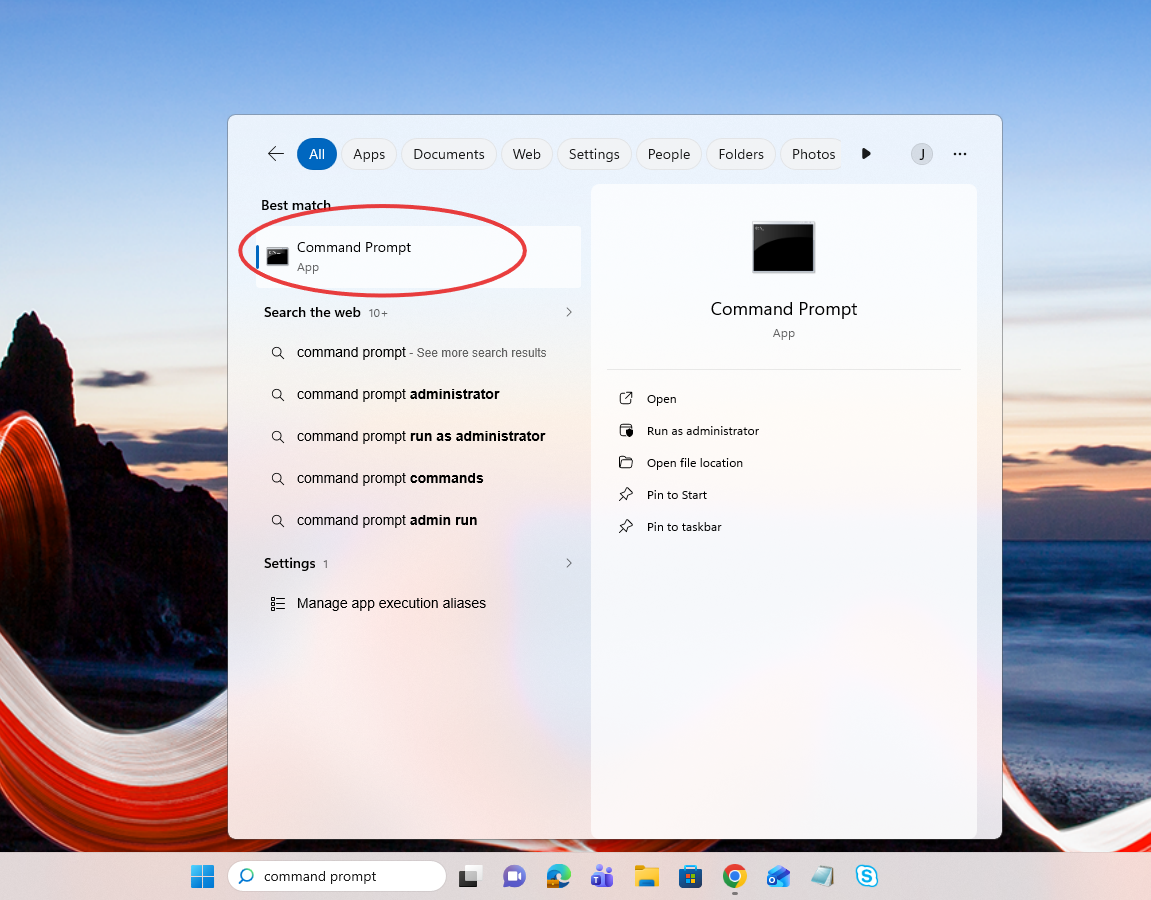
- Open Command Prompt on your computer.
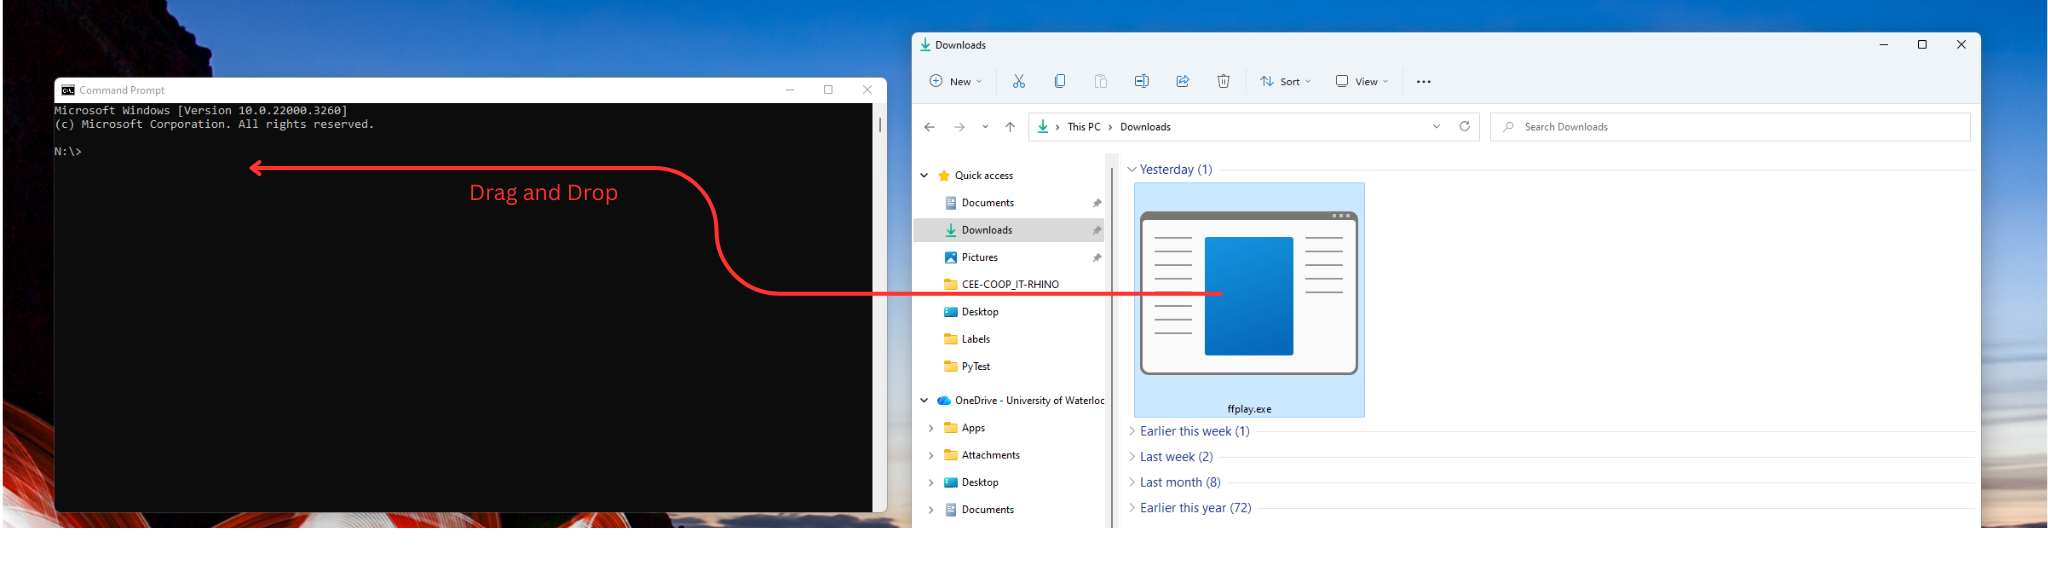
- Drag and drop the ffplay.exe file into the Command Prompt window.
- Press the Spacebar once.
- Paste the secure stream link provided by the IT Office.
An example of what your command prompt could look like is shown below.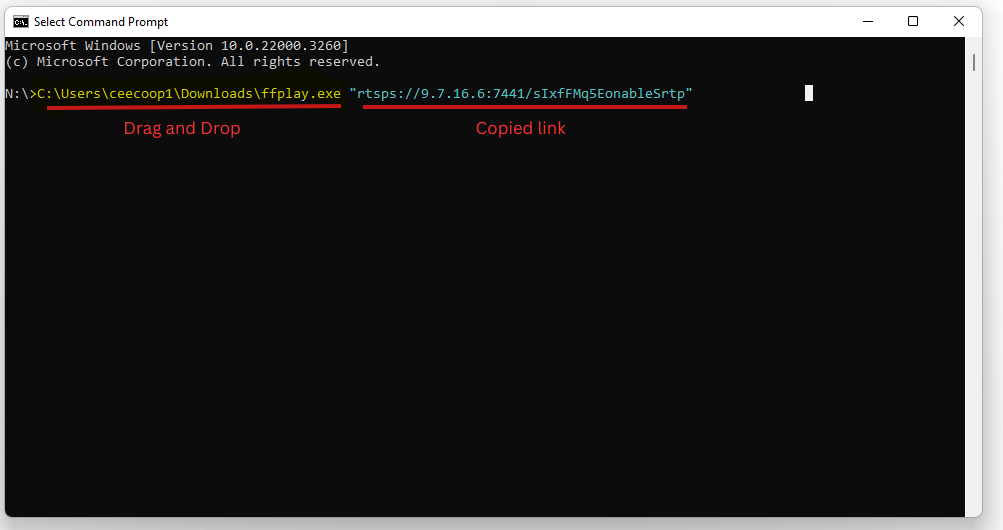
- Press Enter.
- The camera feed should open in a new window.