Remote desktop connection allows you to connect and use your office computer or server from anywhere. This facilitates students and faculty staff when having to use licensed software. Remoting into your workstation is also possible while off-campus and instructions on how to do so can be found below.
Windows users can use the in-built remote desktop client and MAC users can use the in-built one or use the third party clients like CoRD.
Connecting while on-campus
In order to connect using a remote desktop, you need to find out the computer's hostname and domain.
Finding the hostname and domain of your computer
If your computer is in the Nexus or Civil domain, follow the managed computer instructions.
If not, follow the unmanaged computer steps.
Note: If you are connecting to a server, the name of the computer and domain can be found through your professor or IT staff.
Managed computer:
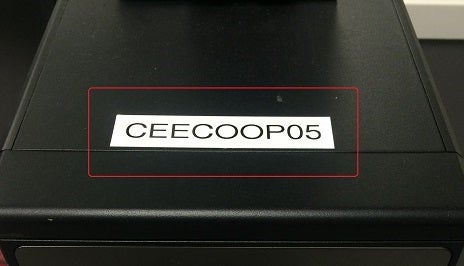
The computer may contain a sticker on it with its hostname (i.e CEENEX24, BRIDGE08, etc.).
Otherwise, follow the steps below:
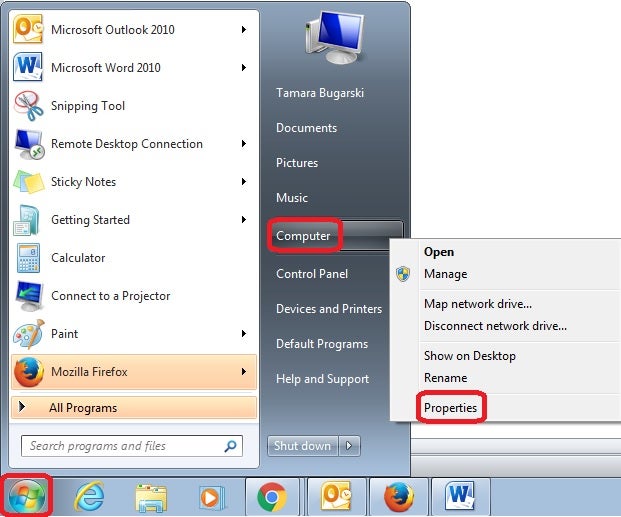
- Click Start, followed by right-clicking Computer and selecting Properties
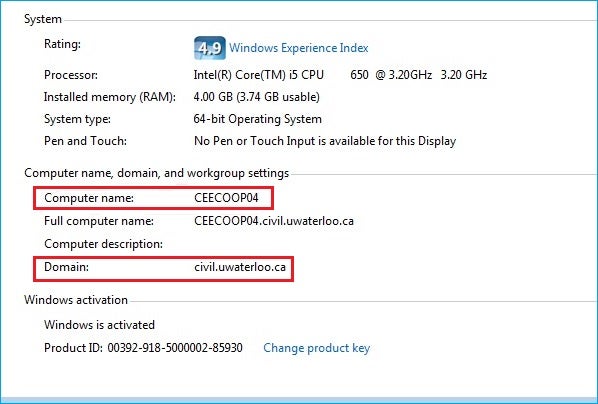
- Find computer name and domain under Computer name, domain, and workgroup settings
Starting a Remote Desktop:
- Click Start, followed by typing Remote Desktop Connection in the search box. Select the Remote Desktop Connection in the list of results
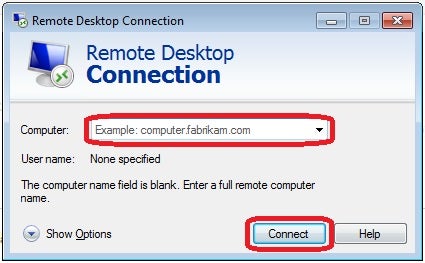
- In the Computer field, type the hostname of the computer that you want to connect to, followed by clicking Connect
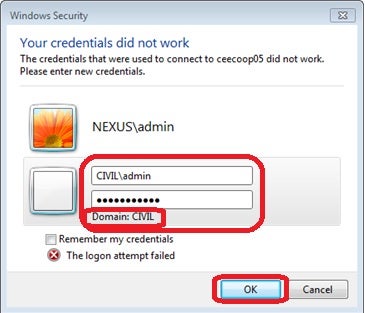
- Type in your domain credentials into Username and Password, followed by selecting OK. Note that the domain can be changed by typing in the domain name followed by a backslash, then typing in your username into the Username field (i.e CIVIL\username)
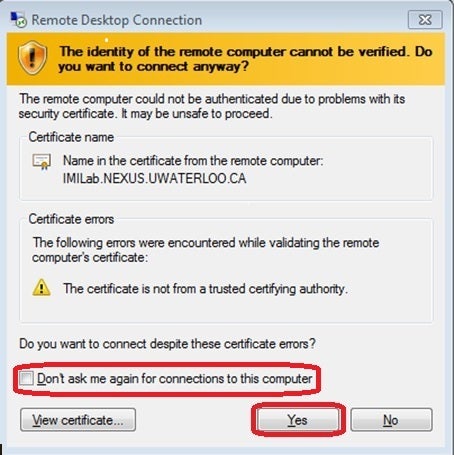
- If the remote computer is not verified, a screen similar to the one below will appear. Simply click Yes to connect. To prevent this message from reoccurring, select the box in front of Don't ask me again for connections to this computer
- You should now see the remote screen of the computer. If you receive any errors, please report to civrt@uwaterloo.ca via screen shot or include the error message that you see in your correspondence
For additional information, go to Microsoft's website.
Unmanaged computer:
If you have an unmanaged computer, the Remote Desktop Connection is not easily usable. You can use a program such as TeamViewer or Chrome Remote Desktop which provides a similar function.